
Introduction: Crafting the Perfect Space for Candle-Making at Home
Candle-making at home combines artistry, science, and a touch of magic—a rewarding hobby and a potential business opportunity. But before you can pour your first soy wax tealight or experiment with layered scents, you need the right setup. Outfitting a home candle-making workshop isn’t about filling your space with unnecessary gadgets. It’s about selecting practical, durable tools and equipment that streamline your process, keep you safe, and help you produce candles with consistent quality. Whether you’re an enthusiastic beginner or looking to upgrade your workspace, this comprehensive guide will walk you through the essential gear you need, why each tool matters, and tips for choosing the best options based on your goals and space. From foundational items like wax melters and thermometers to smart storage solutions and safety gear, we’ll cover it all—empowering you to create candles with confidence and efficiency.
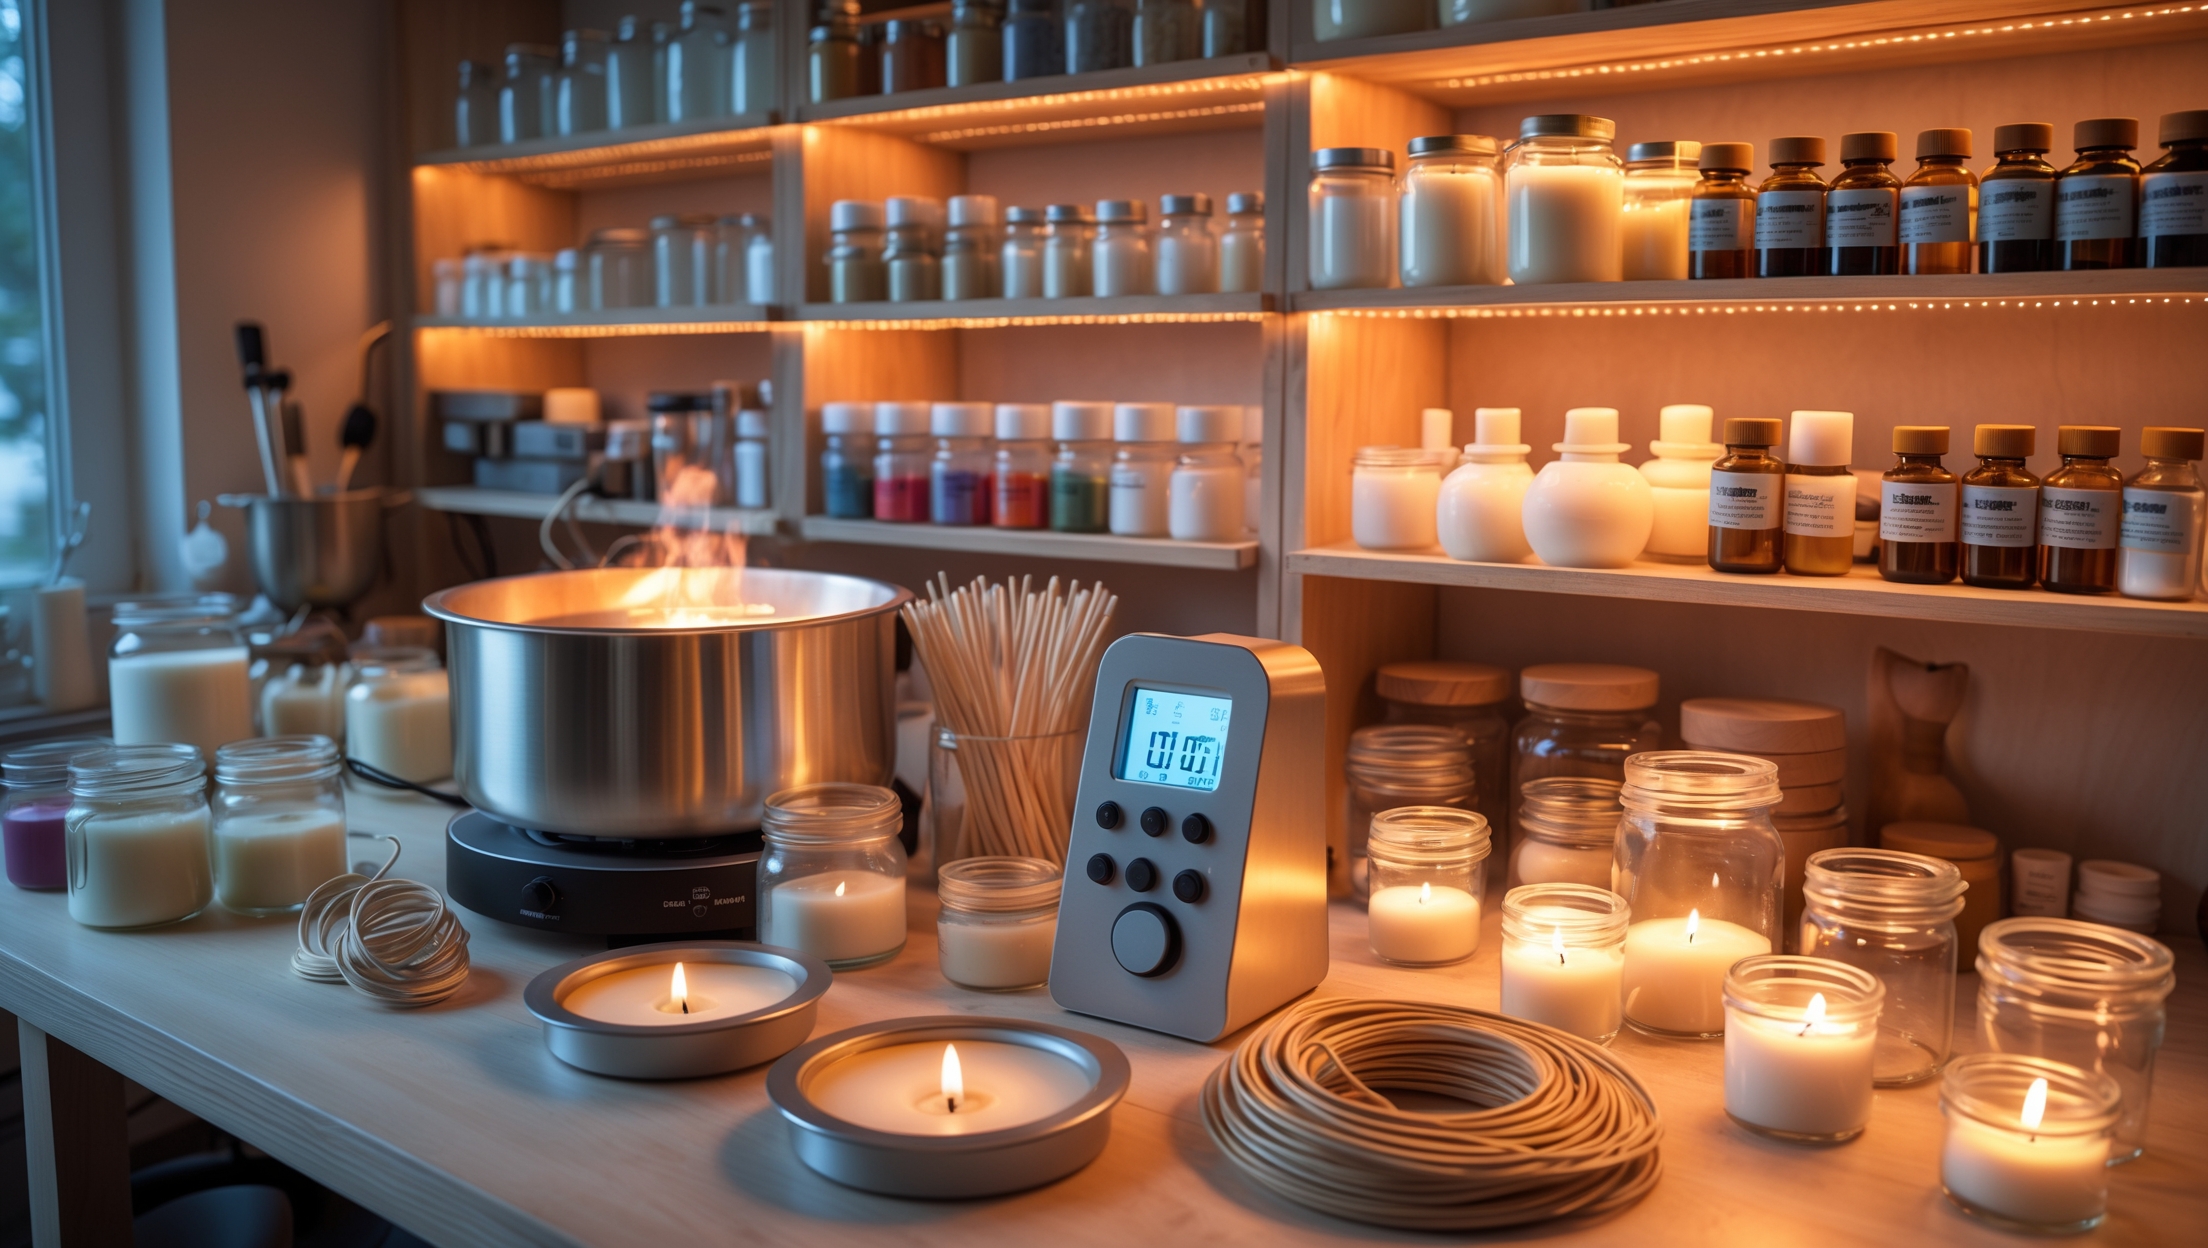
Ready to transform your kitchen, garage, or craft room into a candle-making haven? Let’s break down the must-haves and expert tips for every stage of your creative journey.
Planning Your Candle-Making Workspace
Choosing the Right Location
Before buying supplies, identify a suitable spot in your home. Candle-making can be messy, and it involves hot wax and potentially flammable materials. Look for a well-ventilated area with a sturdy, flat work surface. Ideally, your workspace should be:
- Near a sink for easy cleanup
- Away from children and pets
- Equipped with power outlets for melting equipment
- Free from clutter and drafts (which can affect pouring and scent distribution)
Work Surface and Organization
A heat-resistant table or counter is ideal. Cover surfaces with silicone mats or heavy-duty parchment paper to catch drips and protect finishes. Use shelving or stackable bins to organize supplies such as wax, dyes, and fragrances, keeping your workspace tidy and efficient.
Core Candle-Making Equipment: The Essentials
1. Wax Melting Equipment
- Double Boiler: The classic method—placing a heatproof pitcher or bowl over simmering water—gives precise control and prevents scorching. Stainless steel is preferred for durability and easy cleaning.
- Electric Wax Melter: For those making larger batches, a thermostatically controlled electric melter saves time and effort, offering even melting and temperature regulation.
2. Pouring Pitchers
Heatproof, spouted pitchers are indispensable for transferring melted wax into molds or containers. Stainless steel and heat-resistant glass options are common. Having several pitchers allows for working with multiple colors or scents in one session.
3. Thermometer
Accurate temperature control is vital for safe handling and optimal candle quality. Choose a reliable digital or analog thermometer with a long probe that can withstand at least 220°F (104°C). Laser thermometers are convenient but should be cross-checked for accuracy.
4. Scales
Precision matters. A digital scale (measuring to at least 0.1 oz or 1 gram) ensures you get the right wax-to-fragrance ratio, preventing issues like poor scent throw or uneven burning.
5. Stirring Utensils
Use dedicated, heatproof spatulas or stainless steel spoons for mixing wax, dyes, and fragrances. Avoid wood, which can absorb scent and harbor bacteria.
6. Candle Molds and Containers
- Reusable Molds: Metal, silicone, and polycarbonate molds are ideal for pillar or shaped candles. Look for options with easy-release features.
- Glass Jars/Tins: For container candles, use heat-resistant, seamless jars or tins. Repurposed containers are fine if they can withstand heat and have smooth interiors.
7. Wick Holders and Centering Devices
Keep wicks upright and centered while the wax sets. Options include reusable metal wick bars, wooden sticks, or even clothespins. These small tools prevent off-center burning and tunneling.
8. Heat Gun
A heat gun smooths the tops of cooled candles, fixes surface imperfections, and helps with unmolding. While optional, it’s a favorite among enthusiasts who value a professional finish.
Supporting Tools & Supplies
1. Measuring Cups and Spoons
For precise measurement of fragrance oils, dyes, and additives, use dedicated glass or stainless steel measuring tools. Avoid plastic, which can absorb scents and colors.
2. Pipettes and Droppers
These are handy for adding small amounts of fragrance or dye to test batches or to correct color intensity.
3. Labels and Markers
Organize and identify test batches, scents, and burn dates using waterproof labels and fine-tip permanent markers. Good recordkeeping is invaluable for refining your recipes.
4. Storage Solutions
- Airtight Containers: Store wax, dyes, and fragrance oils in airtight bins to preserve quality.
- Shelves and Drawers: Use adjustable shelving or drawer units to separate wicks, molds, and finished candles, reducing clutter and contamination.
5. Cleaning Supplies
Have paper towels, cotton rags, and rubbing alcohol on hand for quick cleanup. Silicone spatulas make it easier to scrape out cooled wax from pitchers and molds.
Safety Essentials for Your Workshop
1. Fire Extinguisher
A small, easily accessible Class B fire extinguisher is non-negotiable. Never leave melting wax unattended, and know how to use the extinguisher in case of emergency.
2. Protective Gear
- Heat-Resistant Gloves: Protects hands from hot surfaces and accidental spills.
- Safety Glasses: Shields eyes from splashes of hot wax or fragrance oil.
- Apron: A heavy-duty apron protects clothing and skin from wax and dye stains.
3. Ventilation
Ensure your workspace has adequate airflow. Some fragrance oils and dyes can release fumes; use a small fan or open window to keep the air fresh, especially with paraffin or when testing new scent blends.
Specialty Equipment for Advanced Candle-Making
1. Candle Wick Trimmer
Maintaining wick length is key for safe burning and quality control. A specialty trimmer makes it easy to keep wicks at the ideal length (typically 1/4 inch).
2. Wax Dye Blocks and Liquid Dyes
Experimenting with color? Invest in a selection of professional-grade dye blocks or liquids. Store them in labeled, airtight containers to prevent contamination.
3. Fragrance Oil Warmers
Test and blend fragrances before incorporating them into candles. Dedicated warmers allow for precise scent evaluation and recipe refinement.
4. Mold Release Spray
If you’re making shaped candles, a non-toxic mold release spray can make unmolding easier and reduce breakage.
5. Digital Timer
Track cooling, mixing, and pouring times with a simple digital timer. This helps ensure repeatable results for every batch.
Tips for Choosing and Maintaining Your Tools
Invest in Quality
Sturdy, well-made equipment pays off over time—cheaper tools may warp, rust, or break, leading to frustration and wasted materials. Read reviews, ask experienced makers for recommendations, and prioritize stainless steel and heat-resistant glass.
Keep Tools Candle-Dedicated
Don’t mix candle-making tools with kitchen utensils. Scent and dye residues can linger, and cross-contamination may affect the quality of your candles.
Regular Cleaning and Inspection
After each session, clean all tools with hot water and mild soap, wiping down surfaces to remove wax and fragrance. Inspect electrical equipment for frayed cords or loose connections, and replace worn-out items promptly.
Optional Upgrades for Efficiency and Creativity
- Electric Mixer: For large batches, a dedicated hand mixer can ensure thorough blending of wax and additives.
- Infrared Thermometer: Offers quick, non-contact temperature readings—handy for multitasking.
- Custom Molds: 3D-printed or specialty molds let you explore unique shapes and textures.
- Label Printer: For professional-looking, water-resistant candle labels.
- Storage Cart: A rolling cart organizes tools and keeps your workspace flexible, especially if you share the area with other hobbies.
Budgeting for Your Candle-Making Workshop
Starter Setup (Hobby Level)
- Basic double boiler: $15–$25
- Pouring pitcher: $10–$15
- Thermometer: $8–$20
- Digital scale: $15–$30
- Starter mold set: $10–$25
- Wick centering tools: $5–$10
- Safety gear: $20–$40
Total: $80–$165 (not including consumables like wax, wicks, and fragrances)
Advanced or Semi-Professional Setup
- Electric wax melter: $60–$200
- Multiple pouring pitchers: $30–$50
- Professional molds: $30–$80
- Heat gun: $20–$35
- Storage solutions: $30–$100
- Label printer: $50–$150
Total: $220–$615 (plus consumables)
Starting small and upgrading as you learn is a smart approach. Many makers repurpose kitchen items at first, then invest in specialized tools as their skills and output increase.
Conclusion: Setting Yourself Up for Candle-Making Success
Outfitting a home candle-making workshop is more than a shopping list—it’s about creating a productive, safe environment that nurtures your creativity and encourages continual improvement. The right tools not only make the process smoother and safer, but they also open up new avenues for experimentation, from double-pour techniques to intricate scent layering. Investing in quality equipment pays off in reliable results, less waste, and a more enjoyable experience overall.
Remember, your workshop should evolve with your skills and interests. Start with the basics: a heat-resistant workspace, a reliable melting setup, accurate measuring tools, and essential safety gear. As you develop your technique, consider upgrading to electric wax melters, specialty molds, or custom labeling solutions. Keep your tools clean, your supplies organized, and always prioritize safety—especially when working with heat and flammable materials.
Whether you’re crafting gifts, making candles for relaxation, or launching a small business, a thoughtfully equipped candle-making workshop is the foundation for beautiful, high-quality results. With the guidance in this article, you’re set to create a space that inspires—and the candles you make will shine even brighter for it.
For those interested in eventually turning their candle-making hobby into a small business, what extra organizational or safety measures should be considered beyond the basics listed here?
If you’re planning to grow your candle-making hobby into a business, consider organizing dedicated storage for raw materials and finished products, labeling all supplies clearly, and keeping thorough inventory records. For safety, install proper ventilation, maintain fire extinguishers, and develop clear cleanup procedures for spills. Also, ensure compliance with local business and fire codes.
When starting out, is it possible to get by without buying a dedicated wax melter and just use a double boiler on my stove, or will that compromise the quality and safety of my candles?
You can absolutely start with a double boiler on your stove to melt wax. It’s a common and safe method for beginners, as long as you monitor the temperature closely and never leave it unattended. Just make sure your equipment is clean and dedicated to candle-making to avoid contamination. As you grow, you might consider a dedicated wax melter for larger batches and convenience, but it isn’t necessary at the outset.
How do you handle ventilation if your workspace doesn’t have windows? I’m setting up in a garage, and I’m worried about fumes when using certain fragrances or dyes.
In a windowless garage, a good solution is to use a portable exhaust fan or fume extractor to pull air out of the workspace. Position the fan so it vents outdoors, like through a partially open door or a duct. You can also wear a mask rated for organic vapors when working with strong fragrances or dyes to further reduce exposure.
If I’m just starting with the basics, what are the minimum pieces of equipment I need before making my first batch, and is there anything that can safely double as a candle-making tool from what I might already have at home?
To get started, you’ll need a heat-safe container or old saucepan for melting wax, a thermometer, a stirring utensil like a wooden spoon, a pouring jug or mug, candle wicks, and molds or jars. You can often use an old pot for a double boiler, glass measuring cups for pouring, and chopsticks or pencils to hold wicks in place. Just be sure anything you use can handle heat and won’t be used for food afterward.
The article mentioned that drafts can affect pouring and scent distribution. Could you explain a bit more about how this happens and what simple steps I can take to minimize draft issues in my workspace?
Drafts can cool your candles unevenly as they set, causing surface imperfections or even cracks. They also disperse fragrance oils faster, reducing scent strength in the finished candle. To minimize drafts, keep windows and doors closed while pouring, avoid working near fans or air vents, and consider using a room divider or curtain around your workspace to block unexpected breezes.
I’m trying to set up my first candle-making space in my kitchen, but I’m worried about ventilation and cleanup. Do you have any tips for managing wax spills and keeping fumes under control when working in a smaller area?
For better ventilation in your kitchen, open windows and use an exhaust fan if possible. Work near the stove’s range hood to help clear fumes. To manage wax spills, cover surfaces with parchment paper or silicone mats and keep paper towels handy. Clean up spills right away using heat (like a hair dryer) to soften wax for easy removal.
I noticed you mentioned power outlets for melting equipment—do you have tips on choosing between an electric wax melter versus using a double boiler on the stove, especially for someone on a tight budget?
If you’re on a tight budget, a double boiler on your stove is usually the most cost-effective option, since it uses equipment you may already own. Electric wax melters are convenient and offer better temperature control, but they are an extra upfront expense. For beginners, starting with a double boiler is perfectly fine, and you can upgrade to an electric melter as your candle-making grows.
Regarding safety gear, do you have tips for sourcing reliable, affordable equipment, or specific types of gloves, aprons, or ventilation solutions you find particularly effective in a home workshop setting?
When sourcing safety gear, look for chemical-resistant gloves made from nitrile or neoprene, which are durable and affordable. A heavy-duty cotton or canvas apron works well for protection. For ventilation, a portable fume extractor or placing a worktable near an open window with a fan helps keep air fresh and safe during candle making.
For small businesses working out of a garage with limited outlets, do you have tips on prioritizing which electric tools are must-haves versus which ones can be manual or multitaskers?
For a garage setup with limited outlets, prioritize electric tools like a reliable wax melter and a heat gun, as they streamline key processes. Manual options work well for stirring, pouring, and measuring. Look for multitaskers, such as a digital scale that also measures temperature, to save both space and plug capacity.
When you talk about heat-resistant surfaces and silicone mats, are there any affordable DIY alternatives if I’m trying to keep my setup low-budget, or should I invest in specific products right from the start?
You don’t have to buy specialized products right away. For budget-friendly options, you can use an old baking tray or a large ceramic tile as a heat-resistant surface. Parchment paper or an inexpensive silicone baking mat also works well for protecting your workspace during candle-making.
You mentioned the importance of a well-ventilated area for candle-making. I’m wondering what specific ventilation options you recommend for someone setting up in a small apartment kitchen with minimal windows.
For a small apartment kitchen, consider using a portable kitchen exhaust fan or a range hood with an external vent if possible. If windows are limited, a box fan placed near a partially open window can help direct fumes outside. Air purifiers with activated carbon filters can also assist, but they aren’t a substitute for proper ventilation. Always avoid working in completely enclosed spaces.
You mention that candle-making can get messy and should be done near a sink. If my kitchen is too small, would a garage with a portable sink be a safe alternative, or are there extra precautions I should take in that case?
A garage with a portable sink can work well for candle-making, as long as the area is well-ventilated and away from flammable items. Be sure to protect surfaces from spills and keep a fire extinguisher nearby. Also, make sure the portable sink has adequate drainage and access to clean water for rinsing equipment.
If I’m considering switching from making candles on my kitchen counter to setting up a dedicated workspace in my basement, are there essential adjustments I should make in terms of ventilation or surface protection that you’d recommend?
Moving to a basement workspace is a great idea for dedicated candle-making. For ventilation, make sure you have a fan or window to help disperse fumes and heat. Surface protection is important too—use heat-resistant mats or stainless steel tables to prevent wax spills from damaging surfaces. Proper lighting and fire safety equipment are also worth considering.
Can you suggest any storage tips for keeping wax, fragrances, and dyes organized if I’m just working out of a small corner in my garage? Space is tight, and I want to avoid clutter.
For tight spaces, clear stackable bins work great for keeping wax, fragrances, and dyes separated and easy to see. Use small containers or jars for fragrances and dyes, and label everything clearly. A rolling cart or hanging shelves can maximize vertical space. Keep wax in a cool, dry spot to prevent melting. This setup should help keep your supplies organized and within reach.
I see you recommend a well-ventilated area for making candles at home. Do you have any tips for improving ventilation in a craft room that doesn’t have windows, especially when dealing with fragrance oils or dyes?
If your craft room lacks windows, consider using a portable exhaust fan or an air purifier with a HEPA filter to help remove fumes and odors. Work near an open door if possible, and avoid overcrowding the space with supplies. Taking breaks to let fresh air circulate from other parts of your home can also minimize exposure to fragrance oils or dyes.
For someone working with a small apartment kitchen as their main workspace, are there any space-saving versions of essential equipment like wax melters or thermometers that you would suggest without compromising safety or quality?
Absolutely, there are compact options suitable for small spaces. You can use a small electric wax melter or even a double boiler insert that sits on a regular pot, which saves space and is easy to store. For thermometers, digital clip-on candy thermometers are slim, accurate, and don’t take up much room. Just be sure to keep your workspace clear and organized for safety.
Could you explain a bit more about what makes a table heat-resistant enough for candle-making? Are there specific materials or budget-friendly options you recommend for covering surfaces if I don’t have a dedicated craft table yet?
A heat-resistant table for candle-making should be able to withstand hot wax spills and the heat from tools like melting pots. Stainless steel, stone, or ceramic surfaces work well, but if you’re using a regular table, you can cover it with a silicone mat, metal tray, or thick tempered glass as a budget-friendly option. Even several layers of heavy-duty aluminum foil or a large ceramic tile can help protect your surface effectively.
When it comes to choosing between a kitchen, garage, or craft room for setting up a candle-making workshop, do you find that one is typically safer or more efficient than the others, especially concerning access to power outlets and ventilation?
A craft room or garage is often safer and more efficient than a kitchen for candle-making. Both usually provide better ventilation options, more dedicated space, and less risk of food contamination. Garages often have more power outlets and easier cleanup, but make sure there’s adequate airflow. Always avoid enclosed or poorly ventilated areas to minimize risks from fumes or heat.
I noticed you mentioned using heat-resistant tables and silicone mats to protect surfaces. Are there any affordable alternatives for someone setting up a small workspace on a tight budget?
For a budget-friendly setup, you can use an old baking sheet or a large piece of cardboard covered with aluminum foil as a heat-resistant surface. For drip protection, parchment paper or inexpensive plastic placemats work well and are easy to replace if damaged.
What is the minimum amount of equipment I need to get started as a beginner on a budget, and which items can I safely skip until I’m more experienced or making larger batches?
To start candle-making on a budget, you’ll need a heat-safe container or pitcher for melting wax, a thermometer, a stirring utensil, basic molds or jars, wicks, and a scale. You can skip advanced tools like wax melters, large batch pouring pots, or specialized molds until you decide to scale up or experiment with more complex techniques.
You recommend using shelving and bins for organizing wax, dyes, and fragrances. Do you have any tips for people with really limited space, like small apartments, to keep things organized without taking up too much room?
For small apartments, consider stackable bins that fit under beds or inside closets to keep supplies out of sight. Over-the-door organizers or hanging shoe racks can also hold smaller items like dyes and fragrances. Using labeled containers and vertical storage helps maximize tight spaces without cluttering your living area.
When setting up a candle-making area in my kitchen, how do I make sure the space is ventilated enough for safety without letting drafts mess up the candles while they’re setting?
To balance safety and candle quality, use a kitchen exhaust fan or open a nearby window slightly during melting and pouring, but close it once candles are cooling and setting. This ensures fresh air circulation while preventing drafts that can cause imperfections in your candles.
Do you have any tips for setting up a safe workspace in a small apartment where ventilation and counter space are limited? I’m worried about managing hot wax spills in a compact area.
In a small apartment, try working near an open window or use a fan to help ventilate fumes. Use a large, heat-resistant tray or baking sheet to catch hot wax spills and protect surfaces. Keep supplies organized in bins or on shelves to free up counter space, and always have paper towels and a fire extinguisher nearby for safety.
I noticed you mentioned organizing supplies with shelving and bins. For someone starting with a small apartment, do you have any recommendations on how to maximize storage without taking up much space?
For a small apartment, stackable clear bins that fit under your bed or inside closets can keep supplies organized yet out of sight. Consider using over-the-door organizers for smaller tools and vertical wall shelves above work areas to save floor space.
When organizing supplies like wax, dyes, and fragrances, what’s the best way to store them if my workspace is pretty small and I don’t have shelves or stackable bins yet?
If space is tight and you don’t have shelves or bins, try using sturdy boxes or clean tote bags to group similar items together. Store wax in its original packaging to prevent contamination, and seal dyes and fragrances in airtight containers to preserve their quality. Tuck these under tables, in closets, or even inside cabinets to keep your workspace tidy and safe.