
Introduction: The Allure of Home Kombucha Brewing
If you’re a fan of fizzy, tangy kombucha, you’ve probably considered making your own at home. Beyond the creative satisfaction, homebrewing offers fresher flavors, endless customization, and cost savings over store-bought bottles. However, setting up a home kombucha brewery isn’t as simple as tossing tea and sugar into a jar. The right tools and equipment are crucial—not just for flavor, but for safety, consistency, and efficiency. Whether you’re a total beginner or looking to upgrade your setup, this guide will walk you through every essential piece of gear, explain the rationale behind each item, and offer expert tips for a flawless home kombucha experience. From fermentation vessels to bottling gadgets, we’ll break down what you really need, what’s optional, and how to avoid common pitfalls. Let’s demystify the process and help you build a home kombucha brewery that’s clean, productive, and ready for experimentation.
Core Equipment: The Foundation of Safe and Efficient Brewing
Fermentation Vessels: Glass vs. Plastic vs. Ceramic
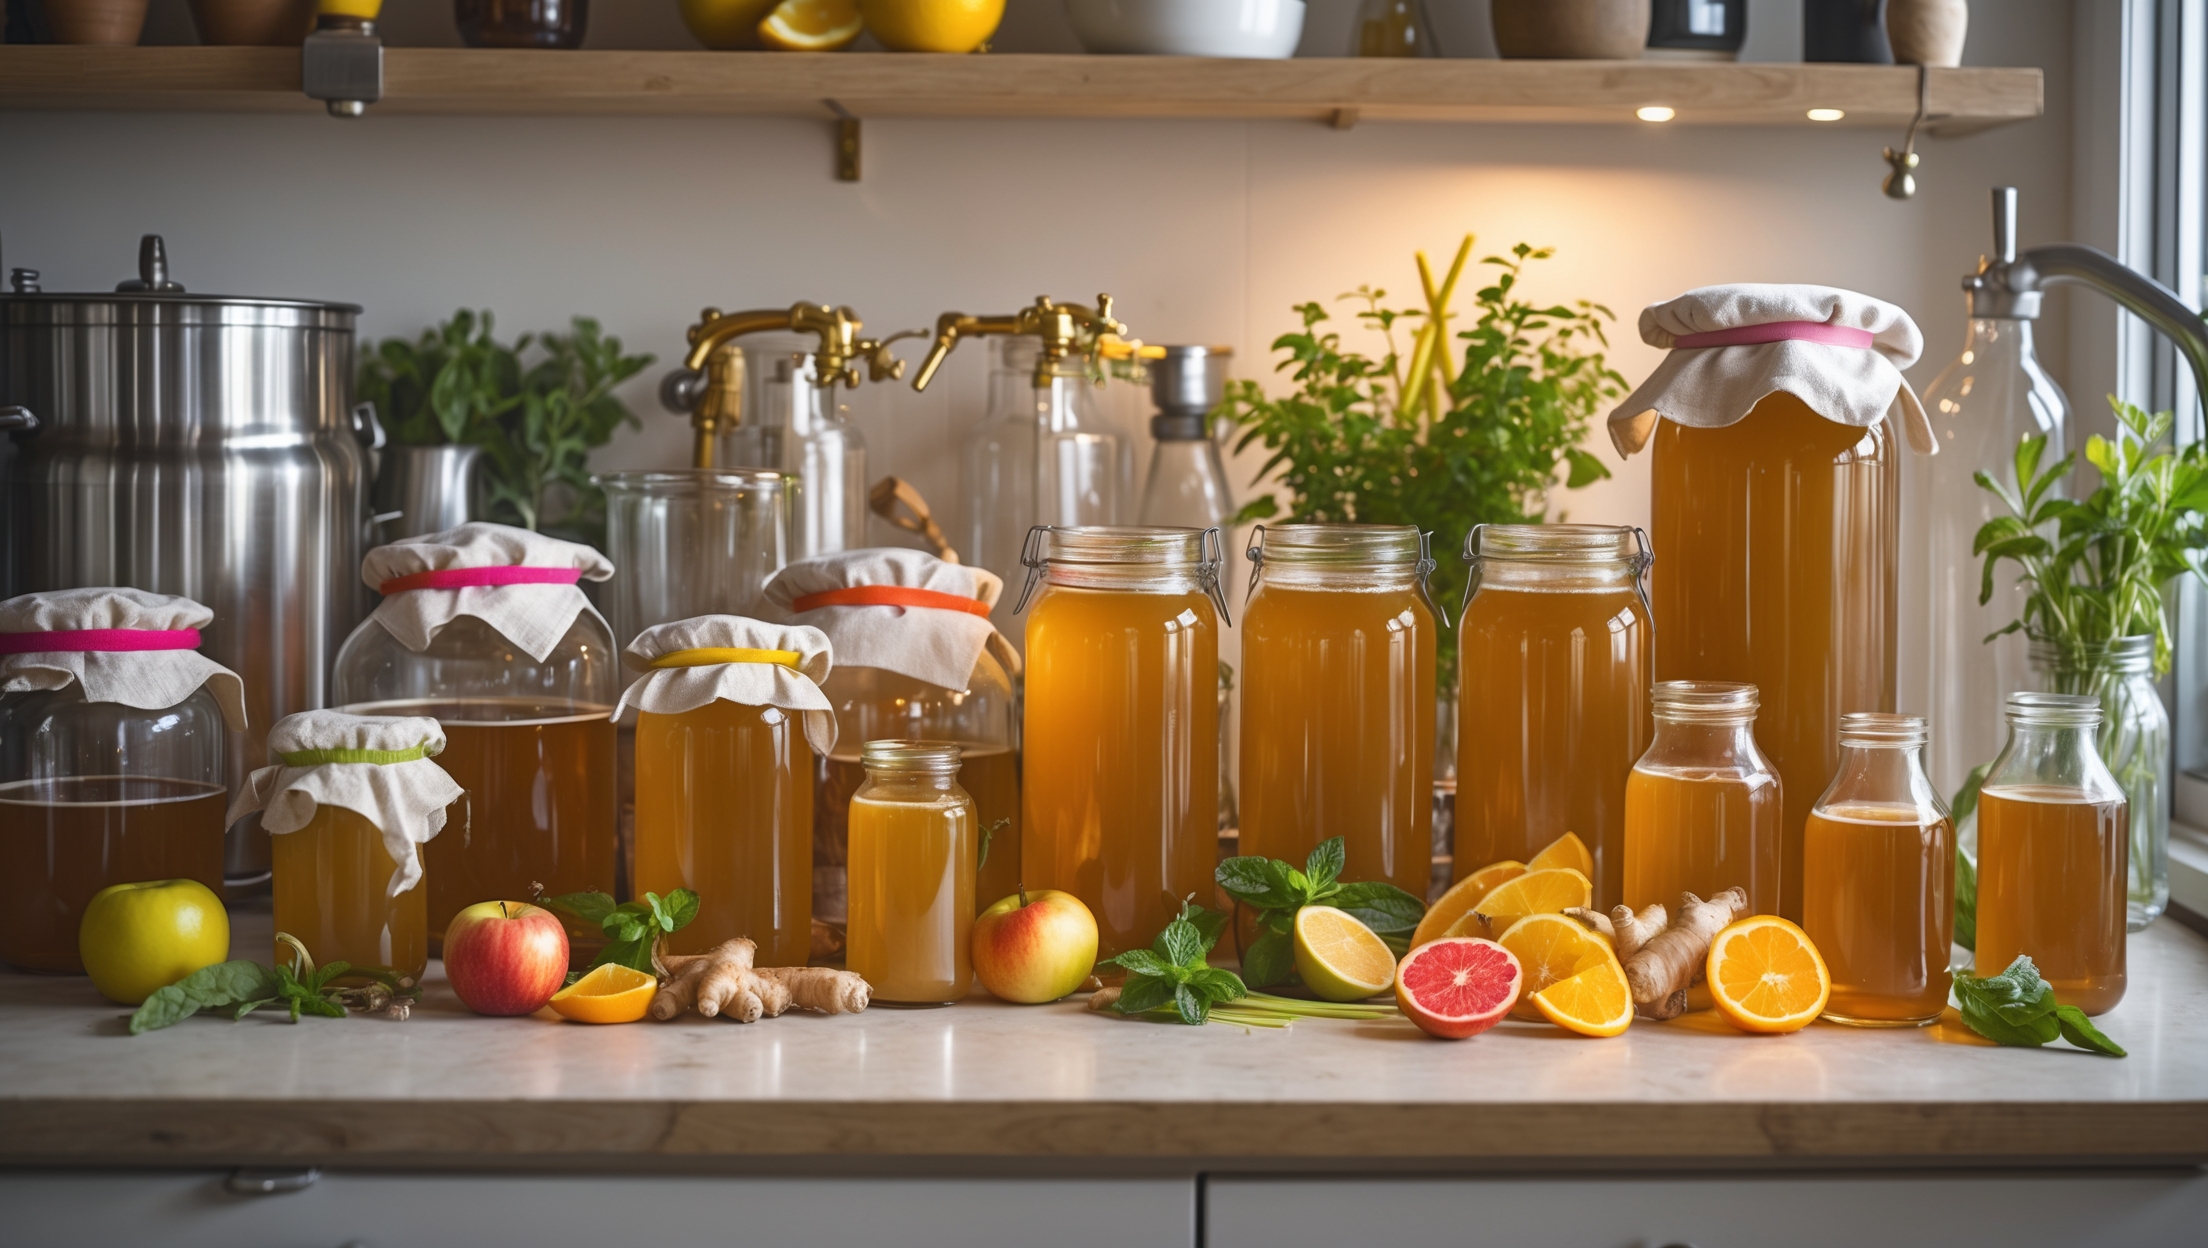
Your fermentation vessel is the heart of your kombucha operation. The most popular and recommended choice is a glass jar, typically in the 1–2 gallon range. Glass is non-reactive, easy to sanitize, and lets you monitor your brew visually. Food-grade ceramic crocks are another good option, provided they’re lead-free—always double-check glazes!
- Glass Jars (1–2 gallons): Mason jars or sun tea jars with wide mouths are ideal. Look for ones with a spigot for easy bottling.
- Ceramic Crocks: Ensure they are certified lead-free and food safe. Avoid decorative ceramics, which often contain heavy metals.
- Avoid Plastic: Even food-grade plastic can scratch, harbor bacteria, and eventually leach chemicals. Not worth the risk.
Breathable Covers: Cloth, Coffee Filters, and Rubber Bands
Kombucha’s fermentation requires airflow while keeping out dust and insects. The classic method is a tightly woven cloth or a coffee filter secured with a rubber band. Avoid loose weaves or cheesecloth, which can invite fruit flies.
- Tightly woven cotton kitchen towels (wash before use)
- Coffee filters (large basket-style)
- Sturdy rubber bands (to ensure a tight seal)
SCOBY Hotel Jar
Every dedicated brewer needs a separate jar to store spare SCOBYs (Symbiotic Culture Of Bacteria and Yeast) and extra starter liquid. A half-gallon glass jar works well. This ensures you always have backup cultures in case of contamination or experimentation.
Measuring and Mixing Tools
- Heat-resistant glass measuring cups (for steeping tea and dissolving sugar)
- Stainless steel or silicone stirring spoons (avoid wood, which can harbor bacteria)
- Digital kitchen scale (for weighing loose-leaf tea and sugar precisely)
Thermometer
Temperature matters. A stick-on fermentation thermometer or a digital probe helps ensure your brew stays in the optimal 75–85°F (24–29°C) range. Too cold, and fermentation stalls; too hot, and you risk killing your SCOBY.
pH Test Strips
While not strictly mandatory, pH strips are invaluable for monitoring acidity. Kombucha should be below pH 4.6 to inhibit harmful bacteria. Aim for a final pH between 2.5 and 3.5 for tangy, safe kombucha.
Advanced Bottling and Flavoring Tools
Bottles: Swing-Top vs. Recycled Glass
Bottling is where kombucha’s carbonation magic happens. The best vessels are swing-top (Grolsch-style) bottles, which form an airtight seal and withstand pressure. Avoid bottles with screw caps unless they’re specifically designed for carbonated beverages. Recycled soda or beer bottles with new crown caps are also options, but require a capper.
- 16–32 oz swing-top bottles: Durable, reusable, and easy to clean.
- Glass growlers: For larger batches, but ensure tight seals.
- Plastic soda bottles (for testing): Some brewers use one plastic bottle per batch to gauge carbonation by feel—never store long-term in plastic.
Funnels and Strainers
Pouring kombucha into bottles can get messy. Use a stainless steel or food-grade plastic funnel for precision, and a fine-mesh strainer to remove stray yeast strands or SCOBY bits. For flavor infusions, a larger strainer can help filter out fruit pieces after secondary fermentation.
Flavoring Tools
- Cutting boards and paring knives: For prepping fruit, ginger, or herbs.
- Microplane or zester: To incorporate citrus zest or ginger for bold flavors.
- Measuring spoons: For spices and extracts.
Bottle Cleaning Brushes and Drying Racks
Sanitation is key for successful kombucha. Invest in a set of bottle brushes (narrow, long-handled) and a dedicated dish rack or drying tree for air-drying bottles. Avoid towels, which can introduce lint or bacteria.
Sanitizing and Cleaning Gear
Sanitizer Solutions: Food-Grade Options
- Star San or Iodophor: Widely used in homebrewing, these no-rinse sanitizers are safe and highly effective.
- Diluted vinegar solution: Suitable for cleaning, but not as reliable for full sanitation.
Never use harsh chemical cleaners or scented soaps, as they can harm your SCOBY and impact flavor.
Dedicated Sponges and Towels
Keep a set of sponges, dishcloths, and towels solely for kombucha equipment—never for greasy dishes or general cleaning. This prevents cross-contamination and ensures your brew stays pure.
Optional Gear for Scaling Up and Experimenting
Heating Pads or Fermentation Mats
If your home runs cool, a low-wattage heating pad designed for fermentation can keep your brew in the optimal temperature range year-round. Look for models with thermostatic control to avoid overheating.
Auto-Siphon or Bottle Filler
For large batches, an auto-siphon or spring-loaded bottle filler makes transferring kombucha clean and efficient, minimizing oxygen exposure and mess.
Digital Timer or Smart Plug
Consistency is key for flavor and fizz. Use a digital timer or smart plug with reminders to help you stick to your fermentation schedule—especially for secondary flavoring rounds.
Setting Up Your Home Kombucha Brewery: Step-by-Step
Step 1: Designate a Brewing Space
Choose a clean, low-traffic area out of direct sunlight—think kitchen counters, pantry shelves, or a dedicated brewing nook. Avoid spots near trash cans, fruit bowls, or other ferments (like sourdough or kimchi) to minimize cross-contamination and fruit flies.
Step 2: Organize Your Equipment
- Arrange your fermentation vessel, SCOBY hotel jar, and tools on a tray, shelf, or cart for easy access.
- Group cleaning supplies together, away from food prep zones.
- Store bottles, flavoring tools, and spare covers within arm’s reach.
Step 3: Sanitize Everything Before Each Batch
Before brewing, thoroughly wash and sanitize all vessels, utensils, and bottles. Allow to air-dry completely before use. Even a small lapse in sanitation can ruin a batch or harm your SCOBY.
Step 4: Set Up for Fermentation
- Add sweet tea and cooled starter liquid to your fermentation vessel.
- Gently add the SCOBY and cover with your cloth and rubber band.
- Place the vessel in your chosen spot and attach a thermometer if needed.
Step 5: Monitor and Record
Check your brew daily for signs of healthy fermentation: a new SCOBY layer, mild sour aroma, and bubbles. Use pH strips periodically. Keep a brewing log to track batches, flavor combos, and fermentation times.
Step 6: Bottle and Flavor
- After 7–14 days (or to taste), decant the kombucha using a sanitized funnel and strainer into bottles.
- Add your chosen flavorings (fruit, ginger, herbs) and seal bottles tightly.
- Store at room temperature for 2–7 days to carbonate, then refrigerate.
Maintenance Best Practices for Longevity and Safety
Routine Cleaning
After every batch, wash all equipment with hot water and mild unscented soap, then sanitize. Pay special attention to bottle necks and spigots. Inspect cloth covers for wear and replace as needed.
SCOBY Health Checks
- Regularly examine your SCOBY for mold (fuzzy, colored spots—discard immediately if found).
- Rotate and retire older SCOBYs from your hotel to keep cultures vigorous.
Storage Tips
- Keep bottled kombucha refrigerated after carbonation to slow fermentation and prevent overpressure.
- Store unused equipment dry and away from dust.
- Replace any scratched or cloudy glassware, as bacteria can lurk in tiny crevices.
Safety Checklist: Your Kombucha Brewing Essentials
- Use only lead-free, food-grade vessels.
- Sanitize all equipment before each use.
- Keep brewing area clean and free of pests.
- Monitor pH to ensure a safe, acidic environment.
- Check SCOBYs regularly for signs of contamination.
- Never use flavored teas with oils or artificial additives—they can disrupt fermentation and harm your SCOBY.
- Label bottles with brew dates and flavors to track fermentation and avoid over-carbonation.
Conclusion: Crafting Kombucha Success at Home
Setting up your own home kombucha brewery is an investment in both health and creativity. With the right tools and equipment, you’ll unlock the freedom to experiment with flavors, dial in your preferred fizz, and share the probiotic goodness with friends and family. Remember, safety and sanitation are the backbone of successful brewing—never cut corners on cleaning or monitoring your fermentation. Start with the essentials: a quality fermentation vessel, reliable bottles, and thorough sanitizing practices. As you gain confidence, expand your toolkit with gadgets like auto-siphons, heating mats, or pH meters to streamline your process and elevate your results.
Most importantly, keep detailed notes and trust your senses. Every homebrew setup and household environment is unique, so let your observations guide you. With patience and care, your kitchen can become a small-batch kombucha factory, turning simple tea and sugar into a living, evolving beverage. So gather your gear, roll up your sleeves, and start brewing—your taste buds (and your gut) will thank you!
I noticed you recommend glass jars or lead-free ceramic crocks for fermentation. Are there any particular brands or features I should look for when choosing a vessel, especially for someone just starting out?
When starting out, look for one-gallon glass jars with wide mouths for easy cleaning and access. Brands like Anchor Hocking and Bormioli Rocco are popular and reliable. If you prefer ceramic, make sure it’s labeled lead-free and food-safe. Avoid any containers with metal parts inside or decorative glazes unless they’re certified safe for food fermentation.
I see you recommend avoiding plastic for fermentation vessels due to the risk of scratches and bacteria. Are there any scenarios where plastic might be acceptable, like for secondary fermentation or short-term batches, or do you suggest avoiding it altogether?
Plastic is best avoided for primary fermentation, as scratches can harbor bacteria and leach chemicals. For secondary fermentation or very short-term batches, food-grade, BPA-free plastic bottles are sometimes used, especially for carbonation. Just inspect them for scratches and replace them regularly to minimize risk.
You mentioned that glass jars are ideal for fermentation because they’re non-reactive and easy to clean. Are there any brands or specific types you recommend that include a spigot for easier bottling?
Glass jars with spigots are a great choice for kombucha brewing. Look for beverage dispensers made from lead-free, food-grade glass. Brands like Kivita, Circleware, and Bormioli Rocco often offer 2 to 5-gallon jars with stainless steel spigots. Make sure the spigot is also non-reactive and easy to disassemble for cleaning.
For someone just starting out, about how much should I budget for all the essential equipment you listed, like jars, covers, and bottling tools? I want to avoid overspending before I know if I’ll stick with homebrewing kombucha.
If you’re starting from scratch, plan on spending around $40 to $70 for the essential kombucha equipment. This includes a large jar, cloth cover, rubber band, thermometer, pH strips, strainer, funnel, and a few glass bottles for storing your finished brew. You can often repurpose items you already have at home, which helps keep costs low while you decide if kombucha brewing is right for you.
How much should I expect to budget for the core equipment you listed to get my home kombucha setup going, especially if I already have some standard kitchen tools?
If you already have basics like measuring cups and a pot, you can expect to spend around $40 to $80 for the core kombucha equipment. This includes a glass brewing jar, breathable cloth cover, thermometer, pH strips, bottles for storing finished kombucha, and a funnel. The price may vary depending on the quality and size of the items you choose.
You mentioned making sure ceramic crocks are lead-free, but how can I be 100% certain the glaze is safe if I buy used or from a thrift store?
To be completely certain the glaze is safe, you can use a lead testing kit, which is available at hardware stores. Apply the kit to an inconspicuous area of the crock. If the test detects lead, it’s best not to use that vessel for brewing.
When choosing a glass fermentation vessel, do you recommend a sun tea jar with a spigot, or are there any concerns about the spigot materials interacting with the kombucha during fermentation?
It’s important to be cautious with sun tea jars that have spigots, as many spigots are made of plastic or metals that can react with the acidic kombucha, possibly leaching unwanted substances. If you use a vessel with a spigot, make sure the spigot is made from food-grade stainless steel or high-quality, food-safe plastic. Avoid vessels with unknown or questionable spigot materials.
If I want to start brewing on a tight budget, which core equipment items are non-negotiable for both safety and quality, and what can I safely improvise or skip in the beginning?
To keep costs low, the essentials are a large glass jar for fermenting, a breathable cloth cover with a rubber band, and a non-metal stirring utensil. For safety and quality, avoid plastic or metal vessels. You can improvise with upcycled glass jars and clean kitchen towels. Skip fancy bottling equipment or pH meters at first, but always use clean, food-safe materials.
After bottling, what’s the best way to clean and sanitize the spigot on glass jars to ensure it doesn’t harbor any bacteria for the next batch?
After bottling, fully disassemble the spigot from the glass jar. Wash all parts with hot, soapy water using a small brush to reach inside the spout. Then soak the spigot pieces in a sanitizing solution approved for brewing, such as Star San or a diluted bleach solution, for several minutes. Rinse thoroughly with clean water before reassembling.
You mention avoiding plastic vessels for fermenting kombucha because of chemical leaching and bacteria risk. Are there any types of food-grade plastic that are considered truly safe, or is it best to never use plastic at all?
While some food-grade plastics like HDPE or polypropylene are generally regarded as safer, they can still scratch over time, creating spots for bacteria to hide. Strong acids in kombucha may also cause leaching, especially during long ferments. For best safety and flavor, glass is strongly recommended over any plastic.
Can you share how often you need to replace glass jars or ceramic crocks when brewing kombucha at home? I am concerned about durability and long-term safety if I plan to brew regularly.
Glass jars and ceramic crocks are both very durable choices for brewing kombucha, and with proper care, they rarely need to be replaced. Just inspect them regularly for chips, cracks, or scratches, especially on the interior, as any damage can harbor bacteria or compromise safety. As long as they remain intact and clean, you can use them for many years.
You mention using glass jars or ceramic crocks for fermentation, but I’m wondering how to tell if a ceramic crock is truly lead-free and food safe. Are there specific certifications or tests I should look for before buying one?
To ensure a ceramic crock is lead-free and food safe, look for products labeled as compliant with FDA or EU food safety standards. Certifications like NSF or statements that it’s safe for food use are helpful. Avoid vintage or decorative crocks unless they’re clearly certified. Some retailers also provide third-party test results. If in doubt, you can buy lead test kits and check the crock yourself before use.
Could you clarify how strict I need to be about using only glass jars for fermentation? If I find a container labeled food-grade plastic but in perfect condition, is there still a risk of chemical leaching over several batches?
It’s highly recommended to stick with glass jars for fermenting kombucha, as glass is non-reactive and won’t interact with the acidic tea. Even if a plastic container is labeled food-grade and looks new, acids and repeated use can increase the risk of chemical leaching over time. For consistent safety and flavor, glass is the best choice.
When it comes to bottling gadgets, what basic equipment do you recommend for someone on a tight budget who still wants to avoid contamination or breakage during the bottling process?
For budget-friendly bottling, start with clean glass bottles that have swing-top or screw-cap lids to prevent leaks and contamination. Use a basic plastic funnel and an affordable auto-siphon or food-grade tubing for easy, sanitary transfers. Make sure everything is sterilized before use, and avoid using old or chipped bottles to reduce the risk of breakage.
For someone just starting out and looking to keep costs down, which pieces of equipment from your list are truly essential versus nice-to-have upgrades?
To get started making kombucha affordably, you’ll need just the basics: a large glass jar for fermentation, a cloth cover or coffee filter with a rubber band, a wooden or plastic stirring utensil, and bottles for storing finished kombucha. Items like pH meters, spigots, or fancy bottling tools are helpful upgrades but not necessary when you’re beginning.
Could you clarify what type of cloth works best as a breathable cover for the fermentation vessel? Are coffee filters actually as effective as tightly woven fabric at keeping out fruit flies and dust?
A tightly woven cotton cloth, like a clean dish towel or several layers of cheesecloth, is ideal for covering your kombucha fermentation vessel. It allows airflow but keeps out dust and fruit flies better than single coffee filters, which can let tiny pests through. If you use coffee filters, double up and secure them tightly for the best protection.
When choosing between glass jars and ceramic crocks, does the shape or width of the vessel impact the fermentation process or flavor development at all?
The shape and width of the vessel do make a difference. A wider opening allows for better airflow, which can speed up fermentation and encourage a thicker SCOBY. Narrower or deeper vessels limit exposure to air, potentially slowing fermentation. Both glass and ceramic work well, but consider a vessel that’s wide enough for the SCOBY to grow and for easier maintenance.
When choosing between a glass jar with a spigot and one without, is there a significant difference in terms of ease of cleaning or risk of contamination over multiple brewing cycles?
A glass jar with a spigot is very convenient for serving kombucha, but spigots can be harder to clean thoroughly, increasing the risk of residue and potential contamination over time. Jars without spigots are simpler to clean and sanitize, making them a bit safer for long-term use unless you’re diligent about taking apart and cleaning the spigot after each batch.
For someone just getting started on a tight budget, which pieces of equipment would you consider truly essential, and where is it okay to cut corners or improvise safely?
For beginners on a budget, the essentials are a large glass jar, a breathable cloth or coffee filter with a rubber band, and a non-metal stirring utensil. You can use recycled jars for brewing and repurpose old kitchen towels as covers. It’s fine to improvise with containers and covers as long as they’re clean and non-metallic, but avoid cutting corners on hygiene to ensure safe fermentation.
If I’m just starting out, would you suggest investing in a glass jar with a spigot right away, or is it fine to use a regular mason jar and transfer the kombucha later when bottling?
Starting out, it’s absolutely fine to use a regular mason jar and transfer the kombucha to bottles later. Many beginners do this, as it’s inexpensive and simple. A glass jar with a spigot is convenient but not essential for your first batches—you can always upgrade later if you decide you enjoy brewing.
I’m curious, for someone starting with a pretty tight budget, are there any safe ways to repurpose containers I already have at home for fermentation, or is it best to stick strictly to the recommended glass jars?
You can safely use glass containers you already own, as long as they’re food-grade, free of cracks, and have wide mouths for airflow. Avoid metal, plastic, or ceramic vessels, since these can react with the kombucha or leach unwanted chemicals. Just make sure to clean them thoroughly before you start.
Could you give more details on how to ensure ceramic crocks are truly lead-free and food safe? I inherited one from my grandmother and want to be sure it’s okay to use for kombucha.
To ensure your ceramic crock is lead-free and food safe, check for any markings, labels, or manufacturer information on the bottom or sides. If there’s uncertainty due to age or lack of details, you can use a lead test kit, available at hardware stores, to check for lead in the glaze. Also, avoid using crocks with any cracks or worn spots, as older ceramics are more likely to contain lead.
After choosing the right vessel and cover, what is the best way to sanitize everything between batches to avoid contamination, especially with kids in the house who might touch the equipment?
To sanitize your kombucha equipment, wash everything with hot, soapy water first. Then rinse well and soak the items in a solution of 1 tablespoon unscented bleach per gallon of water for a few minutes. Rinse thoroughly afterward to remove any residue and let air dry. Store sanitized equipment out of reach of children until you’re ready to use it again.
If I’m just starting out and on a tight budget, is it okay to use a large mason jar without a spigot for my first few batches, or will bottling be a huge hassle without one?
Using a large mason jar without a spigot is absolutely fine for your first kombucha batches. When it’s time to bottle, simply use a clean ladle or pour carefully to transfer the liquid. It might take a bit more time than using a spigot, but it’s totally manageable for small batches.
I noticed the article recommends glass jars with spigots for easy bottling. Are there any issues with cleaning the spigot parts, or tips to prevent mold buildup around the spigot area during fermentation?
Cleaning spigot parts can be a challenge since residues may build up in small spaces. It’s important to completely disassemble and clean the spigot with a bottle brush after each batch. To prevent mold, always dry the area thoroughly and check for leaks. Sanitizing spigots before use also helps keep mold at bay during fermentation.
For someone just starting out, do you have recommendations on where to find affordable, lead-free ceramic crocks? I’m having trouble figuring out how to spot the right ones online versus decorative options.
When shopping online, look for ceramic crocks specifically labeled as food-safe and lead-free. Check product descriptions and reviews for safety certifications or compliance with FDA standards. Reputable kitchenware brands or stores often carry kombucha crocks. Avoid decorative or vintage ceramics unless the seller confirms they are safe for food fermentation.
I’m concerned about sourcing a truly lead-free ceramic crock since a lot of options online don’t list detailed materials. Are there brands or certifications you recommend checking for when shopping?
Look for crocks that are certified as lead-free or meet FDA food-safe standards. Brands like Ohio Stoneware and Boleslawiec are often recommended for their safety. If possible, choose items made in the US or EU, as they’re subject to stricter regulations. Always check for explicit lead-free labeling and ask the seller for test results if in doubt.
If I’m just starting out and working with a tight budget, which items from your essential gear list can I safely substitute or skip at first without compromising the safety and taste of my kombucha?
You can safely use a large glass jar or food-grade plastic container you already have instead of buying a new brewing vessel. Skip specialty funnels and strainers if you have kitchen alternatives, and use plain cloth or a clean dish towel for jar covers. Just avoid metal containers and be sure everything is very clean to keep your kombucha safe and tasty.
Once I choose my fermentation vessel and set up my equipment, how long does it usually take to actually get my first batch of kombucha ready to drink at home?
After you’ve set up your vessel and equipment, your first batch of kombucha typically takes about 7 to 14 days to ferment at room temperature. The exact time depends on your taste preference—shorter for a sweeter brew, longer for a tangier flavor. Taste it after a week and decide when it’s just right for you.
I’m interested in upgrading to a fermentation vessel with a spigot, like you suggested. Are there certain brands or features I should look for to avoid leaks or contamination during bottling?
When choosing a fermentation vessel with a spigot, look for glass or high-quality food-grade plastic options. Opt for vessels with stainless steel spigots instead of plastic, as these are less prone to leaks and easier to sanitize. Make sure the spigot has a secure, tight seal and is easy to disassemble for thorough cleaning. Brands like Fermentaholics and Kilner are popular for their reliability.
For someone starting on a tight budget, which equipment pieces from your list could be skipped or substituted with common household items without compromising safety or the quality of the final kombucha?
If you’re just starting out, you can safely substitute a large glass jar (like a cleaned pickle jar) for a specialty fermenter, and use a clean kitchen towel secured with a rubber band as a cover. You don’t need a fancy bottling wand; a funnel and clean glass bottles or jars work fine. Just make sure all items are thoroughly cleaned and sanitized to protect the kombucha’s quality and your safety.
Could you share some tips on how to double-check if a ceramic crock’s glaze is truly lead-free before purchasing? I’m hoping to avoid any health risks when setting up my home brewery.
To ensure a ceramic crock’s glaze is lead-free, ask the seller for certification or documentation confirming it’s food-safe and lead-free. Look for labeling that states compliance with FDA or EU food safety standards. You can also use at-home lead test kits on the glaze surface before use, and choose reputable brands that specialize in fermentation supplies.
You mention that glass jars are preferred for fermentation, but are there any particular brands or features to look for if I want a spigot that doesn’t leak or jam up during bottling?
When choosing a glass jar with a spigot, look for jars with stainless steel or high-quality food-grade plastic spigots, as these are less likely to leak or jam compared to cheaper materials. Some reliable brands to consider are Kitchentoolz, Estilo, and Circleware. Make sure the spigot has a silicone washer and gasket to prevent leaks, and always check user reviews for ease of cleaning and reliable flow during bottling.
If I want to start small, is it okay to use a 1-gallon mason jar without a spigot, or does bottling get too tricky that way? I’m wondering if it’s worth the extra cost for one with a spigot right at the beginning.
Using a 1-gallon mason jar without a spigot is absolutely fine for starting out. You can easily pour the finished kombucha into bottles using a funnel. While a spigot is convenient, it’s not essential for small batches, so you can save that expense for later if you prefer.
You mention the importance of using lead-free ceramic crocks for fermentation. Are there any particular certifications or brands you recommend to ensure the ceramics are truly safe for food use?
When choosing ceramic crocks for kombucha, look for certifications like FDA approval or those labeled as food-safe. NSF certification is also a reliable indicator. Brands such as Ohio Stoneware and The Ceramic Shop are known for producing lead-free, food-safe fermentation vessels. Always check the product description for specific safety assurances.
I noticed you recommend glass jars or ceramic crocks for fermentation, but as a beginner, I’m wondering if there’s a big difference between using a mason jar versus a sun tea jar with a spigot. Does the spigot make cleaning or bottling harder?
A sun tea jar with a spigot can make bottling kombucha easier because you can dispense it directly, but cleaning around the spigot can be tricky and it may harbor bacteria if not thoroughly sanitized. Mason jars are simpler to clean and less likely to develop problems, so many beginners prefer them.
If I plan to scale up and experiment with larger batches, at what point does the equipment need to be upgraded, and are there particular pitfalls to watch for with bigger home setups?
When scaling up beyond 2–3 gallons per batch, it’s important to use larger glass or food-grade stainless steel vessels and ensure your equipment can handle the volume—especially for heating, bottling, and storage. Watch out for temperature control issues, longer fermentation times, and sanitation challenges, as bigger setups can be harder to keep clean and consistent.
For someone starting from scratch on a budget, which pieces of equipment are absolutely essential to get started, and which can be upgraded later as you get more into brewing?
To start brewing kombucha on a budget, you’ll only need a large glass jar, a cloth or coffee filter with a rubber band, a pot for boiling water, a stirring utensil, and bottles for storing your finished brew. Items like spigoted jars, pH meters, and fancy bottles can wait until you’re ready to upgrade.
Could you elaborate on what features to look for in a lead-free ceramic crock? There seem to be a lot of options online, and I am not sure how to verify that a glaze is truly safe for fermentation.
When choosing a lead-free ceramic crock, look for products labeled as food-safe and certified lead-free by reputable organizations or standards. Ask sellers for documentation or third-party testing results on the glaze used. Avoid antiques or unlabeled crocks, as their glazes might contain lead or other unsafe materials. Smooth, non-porous glazes are best for fermentation, and reputable brands often highlight their suitability for fermenting acidic foods like kombucha.
The article mentions avoiding plastic for fermentation because of the risk of chemicals and bacteria. Is this advice as important for smaller batches, or could a high-quality food-grade plastic container still work safely for beginners on a budget?
Using high-quality food-grade plastic can be safe for small kombucha batches, especially if you’re just starting out and want to keep costs down. However, glass is still the safest choice because it’s non-porous and doesn’t leach chemicals over time. If you do use plastic, make sure it’s BPA-free and thoroughly cleaned between batches.
The article says plastic isn’t really recommended because it can scratch and harbor bacteria. If I’m on a tight budget, is it still okay to use a new food-grade plastic container for my first batch, or is it really worth waiting until I have a glass one?
If you need to start with a new food-grade plastic container, it’s possible, but there are some risks. Plastic can scratch easily, making it harder to keep sterile and increasing the chance of contamination. If you can, try to borrow a glass jar or buy an inexpensive one, as it’s a safer and longer-lasting option for brewing kombucha.
If I want to experiment with different batch sizes, do you recommend separate fermentation vessels for each flavor or is there a safe way to split batches after the first fermentation?
It’s best to use separate fermentation vessels for each flavor, especially if you want to experiment with different batch sizes or avoid cross-contamination. You can safely split your primary batch after the first fermentation into clean containers for flavoring during the second fermentation stage.
I noticed you suggest avoiding plastic fermentation vessels due to the risk of scratching and leaching chemicals. Would stainless steel be a safe alternative, or are there other concerns with using metal for kombucha brewing?
Stainless steel is generally safe for brewing kombucha, as long as it’s food-grade (like 304 or 316) and free from scratches or rust. Avoid other metals such as aluminum or copper, which can react with the acidic kombucha. Glass is still the most popular option, but food-grade stainless steel works well if cleaned carefully.
When you talk about avoiding plastic vessels, does that also include BPA-free plastics, or are those still considered risky for fermentation? I’m just trying to figure out if I can use any of my existing kitchen containers.
BPA-free plastics still aren’t recommended for kombucha fermentation, because acids from the brew can leach chemicals from the plastic, even if it’s BPA-free. The safest choices are glass or food-grade stainless steel. Using your glass kitchen containers is ideal for brewing kombucha at home.
You mention that decorative ceramics often contain heavy metals. Are there any specific brands or certifications I should look for to make sure my crock is safe for brewing?
When choosing a crock for brewing kombucha, look for products labeled as ‘food-safe’ or ‘lead-free.’ Brands that specifically mention compliance with FDA standards or NSF certification are good choices. Avoid crocks with brightly colored or decorative glazes unless the manufacturer guarantees they’re free from heavy metals.
You mentioned using glass jars with spigots for easy bottling, but do those spigots need to be a specific material or brand to avoid rust or chemical leaching during fermentation?
It’s important to use spigots made from food-grade stainless steel or high-quality BPA-free plastic to prevent rust and chemical leaching during fermentation. Avoid spigots made from regular metal, as they can corrode over time. While brand isn’t critical, ensure the materials are safe for acidic liquids like kombucha.
When you mentioned using a spigot jar for bottling, do you have any tips for making sure the spigot doesn’t get clogged by SCOBY strands or sediment during the pour? That’s something I’ve run into before.
To prevent the spigot from clogging, position the jar so the spigot sits just above the layer of sediment and SCOBY. You can also place a fine mesh strainer or piece of cheesecloth inside the jar, just above the spigot opening, to catch stray strands. Pour slowly, and if you notice buildup, pause and clear the spigot before continuing.
I noticed you recommend avoiding plastic fermentation vessels, even food-grade ones. Are there any circumstances where plastic might be acceptable, such as for short-term use or for specific styles of kombucha?
While glass is generally safest for kombucha due to its resistance to acids and ease of cleaning, food-grade plastic can be used for very short-term fermentation—typically less than a week—if you’re in a pinch. However, avoid using plastic for repeated batches or long-term storage, as scratches can harbor bacteria and the acidity can eventually cause leaching.
If I’m just getting started and want to keep things affordable, is it okay to use a large mason jar I already have, or are there specific features I should make sure it has for kombucha brewing?
A large mason jar is a great, budget-friendly choice for starting kombucha. Just make sure it’s made of glass, has a wide mouth for airflow, and is clean with no cracks or chips. Avoid metal lids—use a cloth and rubber band to cover the top so the kombucha can breathe.
For the glass fermentation vessels, is there a particular brand or type you’ve found works best? I’ve seen some sun tea jars with plastic spigots—are those safe to use for kombucha or could they affect the taste or safety?
For fermenting kombucha, it’s best to use high-quality glass jars without plastic spigots. Plastic can sometimes leach chemicals, especially with acidic liquids like kombucha, which may affect taste and safety. Look for glass vessels with stainless steel spigots or simply use wide-mouth glass jars and ladle out the finished kombucha.
I noticed you recommend glass jars with spigots for easy bottling. Have you run into any issues with cleaning the spigot parts, or is there a specific maintenance routine you’d suggest to avoid contamination?
Spigots can harbor residue if not cleaned regularly, so it’s important to fully disassemble them after each batch. Wash every part with hot, soapy water and use a small brush to reach tight areas. Rinse thoroughly and let them air dry before reassembling to keep your brew contamination-free.
When you mention using glass jars with spigots for easy bottling, do those spigots need any special cleaning or maintenance to prevent mold or off flavors during brewing?
Yes, spigots on glass jars do need extra cleaning attention. After each batch, fully disassemble the spigot if possible and wash all parts thoroughly with hot, soapy water, using a small brush to reach inside. Rinse well to remove any soap residue. Regular cleaning helps prevent mold growth and off flavors from developing.
You mentioned double-checking that ceramic crocks are lead-free. Are there specific certifications or markings I should look for to be sure they’re actually safe for brewing kombucha?
When choosing a ceramic crock for kombucha, look for labels like ‘food-safe,’ ‘lead-free,’ or certifications such as FDA approval. Some crocks may have a stamp on the bottom or packaging stating they meet safety standards for food use. If in doubt, contact the manufacturer directly to confirm the crock is safe for acidic beverages like kombucha.
For someone getting started on a tight budget, which pieces of equipment from your guide would you consider absolutely essential, and which ones can be safely added later as you get more experience?
If you’re just starting out and watching your budget, you’ll need a large glass jar, a breathable cloth or coffee filter with a rubber band, and some basic measuring tools. Everything else, like a pH meter, bottling wand, or fancy bottles, can be added later as you get more comfortable. Focus on the must-haves first to get brewing!
If I’m starting out on a tight budget, which equipment items are truly essential and which ones can I save up for and add later without compromising safety or flavor?
To get started on a budget, you’ll need a glass brewing jar, a breathable cloth or coffee filter with a rubber band, a SCOBY, tea, sugar, and bottles for storing the finished kombucha. Items like pH strips, spigots, or fancy bottlers are helpful but not essential—you can add those later once you’re comfortable with the basics.
I’m curious about the issue of ceramic crocks—if I already have a ceramic vessel but I’m unsure about the glaze, is there a way to test it for lead safely at home before using it for kombucha?
You can use an at-home lead test kit, which is available at most hardware stores, to check your ceramic crock’s glaze. Be sure to follow the instructions carefully. If the test indicates any lead, it’s best not to use the vessel for fermenting kombucha, as acidity can leach harmful metals.
How do you know when it’s time to upgrade your basic home kombucha setup? Are there signs that your current equipment isn’t keeping up, or does it mostly depend on how much you’re brewing?
If you find yourself brewing larger batches more frequently, struggling with limited storage, or noticing inconsistent results due to overcrowding, it could be time to upgrade your setup. Common signs include running out of bottles, needing more fermentation space, or wanting more control over flavoring and carbonation.
If I’m just getting started and want to keep costs low, what would be the absolute minimum gear I need from your list to brew a safe batch, and what could I upgrade later on?
To brew kombucha safely on a budget, you’ll need a large glass jar, a cloth cover with a rubber band, a pot to boil water, a wooden or plastic spoon, tea, sugar, and a SCOBY with starter liquid. You can upgrade later with a spigot jar, pH strips, or dedicated bottling bottles for better results and convenience.
What’s the best way to avoid contamination if I plan to brew multiple batches at once? Does the guide recommend separate equipment for each batch, or is careful cleaning usually enough?
The guide suggests that thorough cleaning and sanitizing of all equipment before each use is usually sufficient to avoid contamination, even when brewing multiple batches. However, if you want to be extra cautious, dedicating certain tools like stirring spoons or fermentation jars to each batch can further reduce the risk.
I noticed the article warns against using plastic vessels, even food-grade ones, because of scratching and chemical leaching. Is there ever a situation where food-grade plastic is safe to use for kombucha, maybe just for short-term storage or bottling?
Food-grade plastic is generally not recommended for fermenting kombucha, even for short-term storage, because acids in kombucha can cause leaching and scratches can harbor bacteria. For bottling or very brief storage, glass is a much safer choice. If you must use plastic temporarily, ensure it’s spotless, undamaged, and intended for acidic foods, but switch to glass as soon as possible.
Once I’ve got the basic setup with a 1–2 gallon glass jar and the right cover, what’s the next piece of equipment I’ll need before starting my first batch? Is there an order you suggest buying things in?
After your glass jar and cover, the next important items are a brewing thermometer to monitor temperature and a plastic or wooden stirring utensil for mixing. Next, get a funnel and bottles for storing your finished kombucha. It’s best to buy in this order: thermometer, stirring tool, then bottles and funnel.
I’d like to keep my setup affordable. What essential equipment would you recommend for someone just starting out, and what can wait until I’ve brewed a few batches and know I want to invest more?
To keep it affordable, start with a large glass jar, a breathable cloth or coffee filter with a rubber band, a plastic or wooden stirring spoon, and bottles for storing your finished kombucha. You can wait on buying a heating mat, pH meter, or fancy bottles until you’re sure you want to continue brewing.
Do you have any tips for sourcing affordable, lead-free ceramic crocks in the US? I’ve found it challenging to confirm if glazes are truly food-safe, especially when shopping online.
It can definitely be tricky to ensure crocks are lead-free and food-safe when shopping online. Look for reputable US brands that specifically state their ceramics are tested to meet FDA standards for food safety. Contact sellers directly to request test results or certifications. Farmers’ markets, local pottery studios, and specialty kitchenware stores are also good places to find safe options, where you can often speak with the maker about their materials.
I noticed you mentioned avoiding decorative ceramics because of possible heavy metals. If I already have a ceramic crock but I’m not sure if it’s food safe, is there a way to test it before using it for kombucha?
You can test your ceramic crock for lead by using a home lead test kit, which is available at most hardware stores. Follow the instructions on the kit to check the interior surfaces. If you’re unsure or the test is positive, it’s safest not to use the crock for kombucha brewing.
For someone who’s totally new to this, what’s the minimal set of equipment I need to get started brewing kombucha without compromising on safety? I don’t want to overspend right away.
To start brewing kombucha safely and affordably, you’ll need just a large glass jar (1–2 gallons), a tight-weave cloth or coffee filter with a rubber band to cover the jar, a plastic or wooden stirring utensil, measuring cups, and bottles for storage. Avoid metal containers, as they can react with the tea. That’s all you need for a basic, safe setup.
You mentioned that plastic isn’t recommended because it can scratch and harbor bacteria, but is there ever a safe situation for using a food-grade plastic container, maybe for short-term storage or transport?
Using food-grade plastic for very short-term storage or transport is generally considered acceptable, as long as the kombucha is not exposed for extended periods. Just ensure the plastic is labeled food-safe, remains undamaged, and is cleaned thoroughly. For brewing or fermentation, however, glass is still the best option.