
Introduction
Watering your garden or landscape can be a time-consuming and inefficient process, especially during hot, dry periods. Traditional sprinklers often waste water through evaporation, runoff, and overspray, while hand-watering can quickly become a daily chore. Enter the drip irrigation system—a simple, efficient, and cost-effective solution that delivers water directly to the roots of your plants, right where they need it most. Whether you have a vegetable patch, flower beds, or container plants, installing a DIY drip irrigation system can save you hours of labor each week and significantly reduce your water usage. This in-depth guide will walk you through every step of planning, installing, and fine-tuning a drip irrigation setup tailored to your home garden. We’ll cover essential components, layout strategies, assembly, troubleshooting, and practical maintenance tips, ensuring you achieve healthy, thriving plants while keeping your water bill in check. Let’s dive in and transform your garden into a model of efficient, sustainable watering!
Understanding Drip Irrigation: How It Works
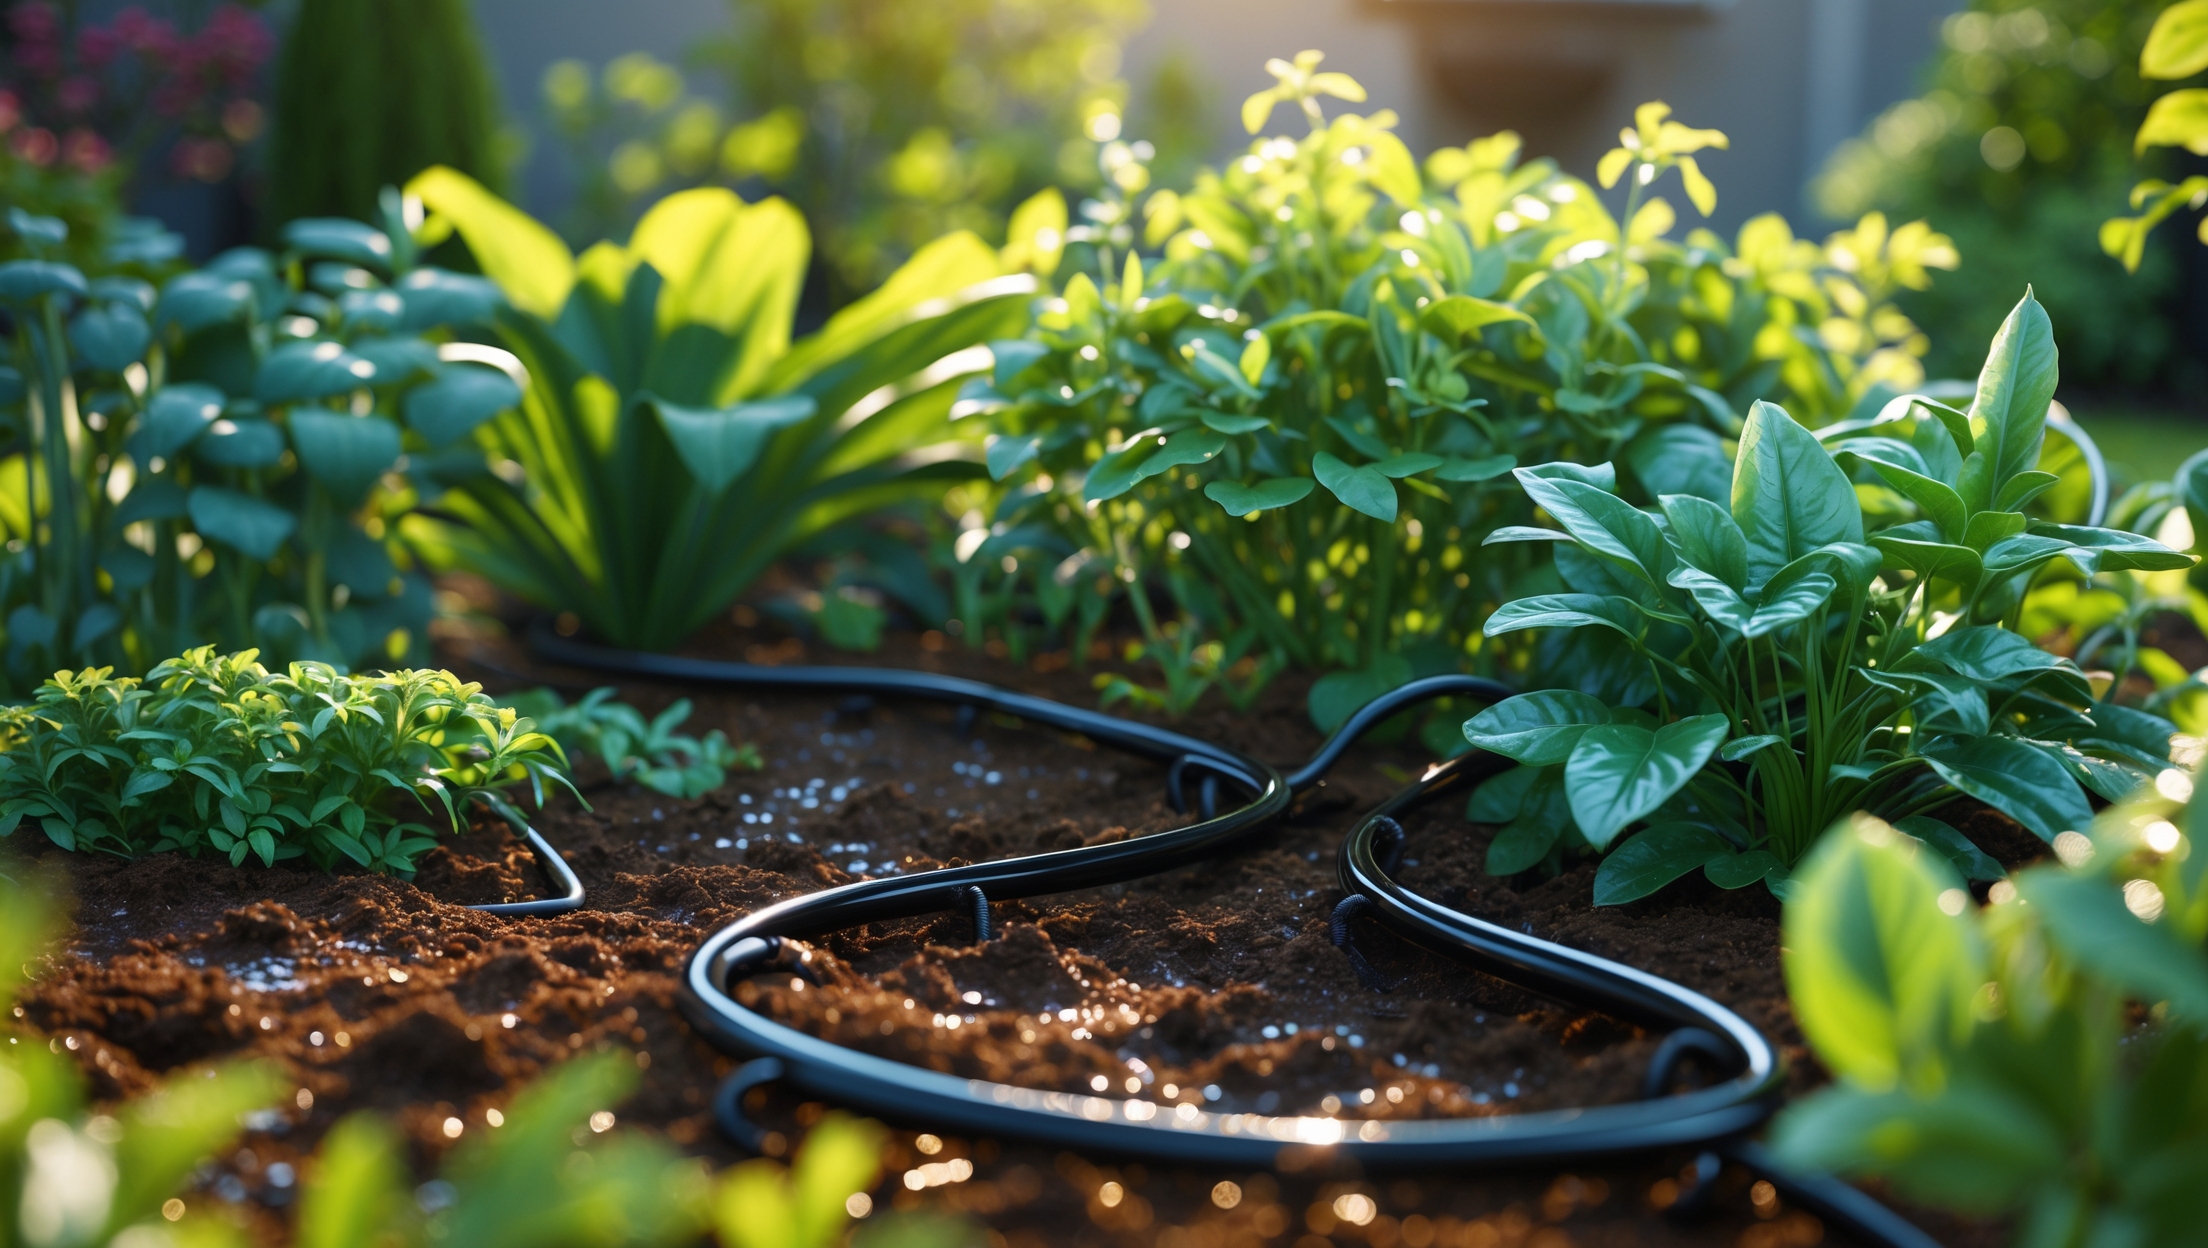
Drip irrigation is a method of delivering water slowly and directly to the base of plants through a network of tubes, emitters, and connectors. Unlike sprinklers, which spray water across a broad area, drip systems target the root zone, minimizing waste and ensuring each plant receives the optimal amount of moisture. This method not only conserves water but also reduces weed growth and the risk of plant diseases associated with wet foliage.
Key Benefits
- Water Efficiency: Drip systems use 30-50% less water than conventional methods.
- Healthier Plants: Consistent moisture at the roots encourages robust growth.
- Reduced Labor: Automating your watering routine frees up your time.
- Minimal Weeding: Watering only the root zone starves weeds of moisture.
- Flexibility: Easily expand or adjust as your garden evolves.
Planning Your Home Drip Irrigation System
Before purchasing any equipment, spend time planning your system. Good planning ensures efficient coverage, minimizes leaks, and avoids costly mistakes.
Assess Your Garden’s Needs
- Map Your Planting Areas: Draw a rough sketch of your garden, noting the types and locations of plants.
- Group Plants by Water Needs: Place plants with similar watering requirements together when possible.
- Identify Water Source: Most home systems connect to an outdoor spigot or rain barrel.
- Measure Distances: Calculate the length of tubing needed to reach each bed or container.
Determine Water Pressure and Flow Rate
Drip emitters require low pressure (10-30 psi). Measure your source’s pressure using a gauge, and note the flow rate (gallons per minute). This helps determine how many emitters can run simultaneously without losing performance.
Choose a System Layout
- Mainline: A 1/2-inch or 5/8-inch polyethylene tubing acts as your system’s backbone.
- Lateral Lines: 1/4-inch tubing branches off the mainline to reach individual plants.
- Emitters/Drippers: Devices that regulate water flow to each plant (e.g., 0.5, 1, or 2 gallons/hour).
- Optional Accessories: Timers, filters, pressure regulators, and end caps improve performance and ease.
Tools and Materials: What You’ll Need
- Measuring tape
- Garden hose (for layout planning)
- 1/2-inch (or 5/8-inch) poly tubing (mainline)
- 1/4-inch micro tubing
- Assorted drip emitters (various flow rates)
- Barbed connectors, tees, elbows, and couplers
- Hole punch (for tubing)
- Pressure regulator (10-30 psi, if not built into the filter)
- Y-filter (to prevent clogging)
- Backflow preventer (to protect household water supply)
- End caps/figure-8 clamps
- Stakes/clamps (to secure tubing)
- Automatic timer (optional but highly recommended)
- Scissors or tubing cutter
- Bucket and stopwatch (for testing flow rate)
Step-by-Step Installation Guide
Step 1: Prepare the Site
Remove weeds, rocks, and debris from planting beds. Use a garden hose to outline where your mainline tubing will run—this helps visualize and adjust the layout before committing.
Step 2: Assemble the Water Supply Head
- Attach a Y-filter to the outdoor spigot or rain barrel outlet.
- Install a pressure regulator downstream of the filter.
- Connect a backflow preventer to prevent contamination of your home’s water supply.
- Attach the mainline tubing to the assembly. Most fittings are threaded or use a compression fitting for a watertight seal.
- If using a timer, install it between the spigot and the filter.
Step 3: Lay Out the Mainline Tubing
- Unroll the 1/2-inch poly tubing and let it warm in the sun (this makes it more flexible).
- Lay the tubing along the planned route, weaving between rows or beds as needed.
- Use stakes or clamps to secure the tubing every 2-4 feet and at turns.
- Cut the tubing with scissors or a tubing cutter at the desired length.
- Cap the end with a figure-8 clamp or dedicated end cap.
Step 4: Add Lateral Lines and Emitters
- Use a punch tool to create holes in the mainline wherever you want to branch off.
- Insert barbed connectors and attach 1/4-inch micro tubing to reach individual plants or containers.
- Secure the micro tubing with stakes, guiding it to the base of each plant.
- Attach drip emitters to the ends of micro tubing. Choose flow rates based on plant needs—vegetables and annuals usually need more water than succulents or established shrubs.
Step 5: Test the System
- Turn on the water supply and watch for leaks at connections.
- Check each emitter to ensure water is dripping evenly and at the expected rate.
- Adjust or replace emitters as needed for even coverage.
- Flush the system by running it for several minutes before adding mulch or covering tubing.
Step 6: Final Adjustments and Mulching
- Bury or cover tubing with mulch to protect it from sunlight and reduce evaporation.
- Make final tweaks to tubing placement, ensuring emitters are close to plant roots but not touching stems (to prevent rot).
- Set the timer for early morning or late evening watering to maximize efficiency.
Troubleshooting and Fine-Tuning
Even well-installed drip systems may need occasional adjustments. Here’s how to address common issues:
- Clogged Emitters: Remove and soak in vinegar to dissolve mineral buildup. Always use a filter to keep debris out.
- Uneven Watering: Confirm water pressure is within the optimal range. Replace damaged or blocked tubing.
- Leaks at Connections: Ensure fittings are fully inserted. Replace cracked connectors or tubing as needed.
- Low Flow at End of Line: Limit mainline runs to 200 feet, or install a second zone if necessary.
Customizing Your System for Different Garden Types
Vegetable Gardens
Place emitters at the root zone of each plant or use soaker tubing for rows of closely spaced crops. Adjust the number of emitters as your plants grow.
Flower Beds
Space emitters 12-18 inches apart, targeting the base of perennial clusters. Use variable flow emitters for mixed plantings with different water needs.
Container Gardens
Run micro tubing to each pot and use pressure-compensating emitters, especially for pots on a slope or of varying sizes.
Hanging Baskets
Install micro sprayers or adjustable emitters to provide gentle, consistent moisture to baskets suspended above ground level.
Maintenance Best Practices
- Check Filters Regularly: Clean or replace filters monthly during the growing season.
- Flush Lines: Open end caps and flush the system every few weeks to remove sediment.
- Inspect Connections: Tighten loose fittings and replace worn parts to prevent leaks.
- Winterize: In cold climates, disconnect and drain tubing before freezing temperatures arrive.
- Monitor Plant Health: Adjust emitter placement or flow rates in response to plant growth and weather.
Budgeting and Cost Breakdown
Drip irrigation is remarkably affordable, especially when compared to the cost of wasted water and plant loss. Here’s a typical budget for a small-to-medium home system (covering 200-300 sq. ft.):
- Mainline tubing (50 ft): $12-20
- Micro tubing (50 ft): $6-10
- Emitters (20-30 pcs): $8-15
- Connectors, tees, end caps: $8-12
- Filter and pressure regulator: $18-28
- Backflow preventer: $8-15
- Timer (optional): $25-40
- Total estimated cost: $60–$120 (excluding tools you may already own)
Costs scale with system size and complexity. DIY installation saves significant labor expense compared to hiring a professional.
Safety and Compliance: What to Know
- Backflow Prevention: Always install a backflow device to protect household water from contamination.
- Code Compliance: Check local regulations; some municipalities require permits for large irrigation systems, though most small home setups are exempt.
- Outdoor Electrical: If using an automatic timer, ensure it is weatherproof and connected to a GFCI outlet.
Conclusion
Building a DIY drip irrigation system is one of the smartest upgrades you can make for your home garden. Not only does it provide consistent, efficient watering with minimal waste, but it also frees you from the daily demands of hand-watering, letting you enjoy your garden instead of constantly tending to it. Over time, you’ll notice healthier plants, fewer weeds, and lower water bills—clear evidence of your system’s effectiveness. By planning carefully, using quality components, and following best practices for installation and maintenance, your drip irrigation setup will serve you reliably for years to come. Don’t be afraid to experiment and adjust as your garden grows; the true power of drip irrigation lies in its flexibility and scalability. Whether you’re a first-time gardener or a seasoned pro looking to optimize your watering routine, this project is well within reach and pays dividends all season long. So gather your tools, roll out your tubing, and take the first step toward a greener, more sustainable landscape today!
How much time does it usually take to install a DIY drip irrigation system for a mid-sized backyard garden, and are there any unexpected costs or tools that most beginners overlook when starting this project?
For a mid-sized backyard, installing a DIY drip irrigation system usually takes about 4 to 6 hours if you have all the materials ready. Beginners sometimes overlook costs like extra connectors or pressure regulators, and tools such as a hole punch for emitters or Teflon tape for leak prevention. It’s smart to review your garden layout and double-check your supply list before starting.
How do you handle situations where your garden layout isn’t a simple shape? Do you recommend any specific connectors or layout strategies for odd or sharply angled beds to make sure the whole area gets covered?
For gardens with unusual shapes or sharply angled beds, use flexible tubing and specialized connectors like elbows, tees, and joiners to navigate corners and odd angles. You can branch off the main line with tees, and elbows help you turn corners cleanly. Lay out the tubing to closely follow the edges and curves of your beds, and use emitters or drip lines that match each section’s needs for even coverage.
When planning a drip irrigation system like you describe, do you recommend any particular type of tubing or emitter for gardens with a mix of vegetables and potted flowers? I want to make sure I pick the right equipment for different plant types.
For mixed gardens with both vegetables and potted flowers, consider using half-inch mainline tubing with quarter-inch drip tubing as needed for pots. Use adjustable emitters for potted flowers, so you can control water flow, and 1-gph or 2-gph button emitters for vegetables. This setup allows you to tailor watering to each plant’s needs.
Can you give an estimate of the total setup cost for a small home garden, including all the basic components mentioned, or suggest budget-friendly sources for getting started with drip irrigation?
For a small home garden, the total setup cost for a basic drip irrigation system typically ranges from $30 to $70. This includes tubing, emitters, connectors, a filter, and a pressure regulator. Many local hardware stores and big-box retailers offer starter kits at affordable prices, and you can also find budget-friendly options online by comparing kits or purchasing components individually.
You mention reduced weeding as a benefit since only the root zone gets watered. Have you noticed a big difference in weed growth compared to using regular sprinklers?
Yes, there’s a noticeable difference. With drip irrigation, weeds tend to grow much less because the water is delivered directly to the plant roots, leaving surrounding soil dry. When I used sprinklers, weeds appeared everywhere, but after switching to drip, they’re mostly limited to right around the plants, making weeding much easier.
When you talk about components and troubleshooting, are there common mistakes beginners make when assembling their first drip irrigation system, and what should I check first if some plants don’t seem to be getting enough water?
Beginners often overlook securing connections tightly or may not flush the system before use, leading to clogs. If plants aren’t getting enough water, first check for clogged emitters, kinks in the tubing, and ensure all fittings are properly sealed. Also, confirm your water pressure matches system recommendations.
If I have a pretty tight budget, are there any suggested ways in your guide to reuse old hoses or affordable alternatives for the tubing and connectors?
Yes, the guide suggests reusing old garden hoses for your main water lines as a cost-effective option. You can punch small holes in them for water outlets and use inexpensive barbed connectors or even zip ties to attach parts. Local hardware stores often carry affordable tubing and DIY-friendly connectors, too.
I see that drip systems can use 30-50% less water compared to traditional sprinklers. Do you think the upfront cost to set one up is worth it for someone just starting with a small garden, or is it better for larger spaces?
For a small garden, the upfront cost of a drip irrigation system is generally quite reasonable—basic starter kits are affordable and easy to install. Even for smaller spaces, you’ll benefit from water savings and targeted plant care, which can actually save you money and effort in the long run. Drip irrigation isn’t just for large gardens; it’s a great choice for beginners, too.
How do you recommend protecting the tubing and emitters from being chewed by squirrels or other critters? I’ve had trouble with animals damaging irrigation lines in the past.
To deter animals like squirrels from chewing on your tubing and emitters, consider burying the irrigation lines a few inches underground or covering them with mulch. You might also use protective conduit or flexible PVC pipe as a shield. Some gardeners find that spraying the tubing with animal repellents or using motion-activated deterrents helps reduce damage as well.
Since drip irrigation systems are said to be easy to expand as the garden grows, how does the initial installation account for future changes? Are there fittings or components you suggest including from the start to simplify upgrades later?
When installing your drip irrigation system, consider using mainline tubing with extra length and installing T-fittings or shut-off valves at key points. This makes it easy to add new branches or zones later. Also, keep some extra connectors and end caps on hand for quick expansions as your garden grows.
I run a small plant shop and like that drip systems can cut down on labor, but I’m worried about maintenance. What are some common issues that can crop up with home drip irrigation setups, and how often should I expect to check or clean the system?
With drip irrigation systems, clogs from dirt or mineral buildup in emitters and tubing are the most common issues. You might also encounter leaks or pressure drops from loose connections. It’s a good idea to check the system for clogs and leaks at least once every couple of weeks and flush the lines or clean filters monthly, especially in a retail environment.
You mentioned that drip irrigation can really help with water efficiency, but do you have any budget tips for families trying to DIY this without spending too much upfront?
Absolutely! For a budget-friendly drip irrigation system, try using recycled plastic bottles as slow-drip emitters or repurpose old garden hoses with small holes punched in them. Buying components like tubing and connectors in bulk or from local hardware stores can also save money. Start small and expand your system as needed.
You mentioned that drip irrigation can be easily expanded as the garden grows. How difficult is it to add new rows or containers later on without having to redo the whole system?
Adding new rows or containers to your drip irrigation system is quite straightforward. Most systems use flexible tubing and connectors, so you can simply cut the main line and insert a new connector or branch line to the new area. You won’t need to redo the entire setup—just extend from your existing lines and attach new emitters as needed.
For a small business with both flower beds and container plants, is it possible to set up separate drip zones for each, and will that complicate the system much?
Yes, you can definitely set up separate drip zones for flower beds and container plants. This approach lets you tailor watering schedules for each area. It adds a bit of complexity, mainly by requiring multiple valves or timers, but it remains manageable and can actually improve watering efficiency.
If I want to automate the watering schedule, is there a particular type of timer or controller you’d recommend for beginners? I’m also curious if they are hard to set up for a small garden.
For beginners, a simple battery-operated hose timer is a great choice. These timers attach directly to your outdoor faucet and let you set specific watering days and durations. They’re designed to be user-friendly and are perfect for small gardens. Most just require you to screw them onto your tap, set the schedule with a dial or buttons, and you’re done—no wiring or complex setup needed.
I’m curious about troubleshooting leaks at the connectors—do you recommend any specific brands or sealants that hold up well in hot US summers, or is regular tightening usually enough to prevent drips?
For hot US summers, using a high-quality Teflon plumber’s tape on threaded connectors can help create a better seal. Brands like Orbit or Rain Bird offer connectors designed to withstand heat. Regular tightening helps, but if leaks persist, adding a weather-resistant sealant or replacing old washers is more reliable.
How much time does it usually take for a beginner to plan and install a basic drip irrigation system for a medium-sized garden before seeing it fully up and running?
For a beginner, planning and installing a basic drip irrigation system in a medium-sized garden usually takes about one full weekend. You can expect to spend a few hours on planning and gathering materials, and another 4 to 6 hours on installation and testing. Once set up, the system should be fully operational right away.
How do you handle maintenance for the tubes and emitters over time? For example, do they get clogged easily, and what should I be watching out for as the system ages?
Over time, tubes and emitters can clog due to mineral deposits or debris, especially if you’re using hard water. It’s helpful to periodically flush the system with clean water and check for any slow or blocked emitters. Cleaning or replacing filters and occasionally soaking emitters in vinegar can prevent buildup. Inspect the system each season for leaks or wear to keep it running smoothly.
I’m on a college budget, so I’m wondering roughly how much it might cost to set up a basic drip irrigation system for a small veggie patch. Are there affordable starter kits you’d recommend for beginners?
Setting up a basic drip irrigation system for a small veggie patch can be quite affordable, often costing between $20 and $40 if you use a starter kit. Many home improvement stores and online retailers offer beginner-friendly kits that include tubing, emitters, connectors, and a filter. Look for kits labeled as ‘starter’ or ‘beginner,’ and consider DIY solutions using simple tubing and connectors to save even more.
How much time would it typically take to install a DIY drip irrigation system for a medium-sized home garden if I’m handling it on a weekend? Just trying to plan ahead with my business schedule.
For a medium-sized home garden, most people can install a DIY drip irrigation system in about 4 to 6 hours, depending on the garden layout and your familiarity with basic tools. If you have a clear plan and all your materials ready, you should be able to complete it comfortably in one afternoon or split it over a weekend.
For someone on a tight budget, what are the most essential components to buy first if I want to start a small drip system and then expand it over time as my garden grows?
To start small and save money, begin with a basic drip tubing or hose, a pressure regulator, and a simple filter to protect the system. Add a few emitters or drippers for your current plants. You can easily expand later by purchasing more tubing, connectors, and emitters as your garden grows.
You mentioned that drip systems are more water-efficient than sprinklers. If I switch to drip irrigation, about how much could I expect my water bill to drop for a small home garden?
Switching to drip irrigation can typically reduce water use for a small home garden by 30-50% compared to sprinklers. The exact savings on your water bill will depend on your garden size, local rates, and watering habits, but most people notice a noticeable decrease after making the switch.
You mention automating the watering routine to save time, but can you explain what kind of timer or controller works best with a DIY drip irrigation setup, especially if my water pressure varies throughout the day?
For DIY drip irrigation with varying water pressure, look for a timer or controller labeled as ‘drip irrigation compatible’ or ‘low-pressure compatible.’ Battery-powered hose timers work well, but pick one with adjustable run times and multiple start times. Models with pressure regulation or built-in filters help keep performance steady despite pressure changes.
In the planning section, do you recommend a specific type of tubing material or diameter for different plant types, or is there a standard size that works for most home gardens?
For most home gardens, 1/2-inch polyethylene tubing is commonly used as the main supply line because it’s durable and versatile. For branching out to individual plants, 1/4-inch tubing works well. This setup suits most plant types, but for larger plants, you might increase emitter flow rate rather than tubing size.
You mention that drip irrigation systems can be easily expanded or adjusted as the garden changes. Can you share some tips on how to retrofit or modify an existing system if I decide to add more plants later on?
To expand your drip irrigation system, you can add more tubing and drip emitters as needed. Use T-connectors or couplers to branch off from your main line to new plant areas. It’s also a good idea to check your water pressure to ensure it can support the additional emitters. If you need to move or adjust lines, tubing stakes and quick-connect fittings make repositioning easy.
I noticed you talked about the flexibility of expanding the system as your garden grows. Would you recommend starting with a basic setup for beginners, or is it better to plan for expansion right from the start to avoid reworking everything later?
It’s best to start with a basic drip irrigation setup, especially if you’re new to it. However, use connectors and tubing sizes that can easily accommodate future expansion. This way, you can add more lines or emitters later without having to redo the whole system.
When setting up a DIY drip irrigation system, how do you determine the right spacing and flow rate for the emitters if you have plants with different water needs in the same bed?
To handle plants with different water needs, group similar plants together as much as possible. For different needs in the same bed, use adjustable emitters or choose emitters with different flow rates for each plant. Space emitters so each plant’s root zone receives adequate water, typically 12-24 inches apart, adjusting based on plant size and layout.
How do you figure out how many emitters you need per plant or bed, especially if you have a mix of vegetables and flowers with different water needs?
To determine emitter quantity, check each plant type’s water needs—vegetables generally need more water than flowers. For thirsty plants, use one or more emitters per plant; for drought-tolerant flowers, space emitters further apart. For beds, place emitters every 12–18 inches, adjusting based on plant density and needs. You can also use adjustable emitters for flexibility.
Can you share any tips on estimating the upfront cost for a basic home drip irrigation system, and are there budget-friendly alternatives for large gardens or multiple beds?
To estimate the upfront cost, list items like tubing, emitters, connectors, and a timer. For a basic home system, expect to spend $40–$100 for small gardens. For larger areas or multiple beds, you can save by buying kits in bulk, using recycled containers as reservoirs, or choosing simpler manual systems instead of automated timers.
Did you cover how to connect a drip irrigation system to a timer or smart controller for full automation? I’m wondering if there are specific controllers that work better with basic DIY setups like the one you described.
The article covers connecting your drip irrigation system to a basic timer, explaining where to install it at the faucet or hose bib. While it doesn’t go into smart controllers, most battery-operated or simple programmable timers work well with DIY setups. If you want more automation, look for controllers compatible with standard garden hose fittings and capable of handling low-pressure drip systems.
Is it possible to use a drip irrigation system for both flower beds and a vegetable patch at the same time? If so, do I need different types of emitters or tubing for each area?
Yes, you can definitely use one drip irrigation system to water both flower beds and a vegetable patch at the same time. It’s a good idea to choose emitters based on each area’s water needs. Flower beds might need lower-flow emitters, while vegetables often benefit from slightly higher-flow emitters. You can use the same main tubing, but customize the emitters and their spacing to suit each section.
The article highlights that drip systems can be easily expanded or adjusted. Could you elaborate on how to modify the system as your garden layout changes over time?
You can modify your drip system by adding or moving tubing and emitters as your garden grows or changes. Simply cut the tubing where needed, insert connectors or tees, and attach new lines to reach new plants. Emitters can be plugged into the tubing at any location, and unused holes can be sealed with goof plugs. This flexibility lets you easily adapt your watering system to different garden layouts over time.
Can you explain how to troubleshoot uneven watering if some plants seem to be getting more water than others? I want to avoid accidentally overwatering parts of my vegetable patch.
Uneven watering is often due to clogged emitters, pressure differences, or uneven hose placement. Check each emitter for blockages and clean or replace clogged ones. Make sure all tubing is laid evenly and that the system is level. You can also install pressure-compensating emitters to help ensure even flow across your vegetable patch.
Is there a big difference in the cost or difficulty between installing a drip system for raised beds compared to container plants? Trying to budget out supplies before I get started.
Installing a drip system for raised beds generally costs a bit more and can be slightly more complex than for container plants, since you’ll need longer tubing and more emitters to cover the bed area. For containers, setup is simpler and usually requires fewer supplies. The overall price difference depends on the number and size of your beds or containers, but both are manageable for DIY projects.
I noticed the article mentions automating the watering routine. Is there a beginner-friendly timer setup you suggest for someone who doesn’t have an outdoor electrical outlet nearby?
You can use a battery-operated hose timer, which attaches directly to your outdoor faucet and doesn’t require an electrical outlet. These timers are easy to program, weather-resistant, and perfect for beginners. Just insert batteries, set your watering schedule, and connect your drip system.
I’m curious, based on the benefits you mentioned like reduced water usage and healthier plants, how quickly did you notice results in your own garden after switching to drip irrigation?
After setting up the drip irrigation system, I started noticing healthier, more consistently watered plants within the first two weeks. Water usage dropped almost immediately, as the system targeted roots directly and minimized waste. With regular use, the garden seemed visibly more vibrant by the end of the first month.
Could you clarify what kind of tubing connectors work best for reducing leaks when assembling the drip system? I’ve had issues with cheaper barbed fittings popping off under pressure in the past.
For a more secure and leak-resistant drip system, opt for compression fittings or locking fittings instead of basic barbed connectors. Compression fittings create a tight seal and are less likely to pop off, even under higher pressure. Locking fittings, which screw into place, offer additional security and are ideal if you’ve experienced issues with cheaper connectors.
I’m new to drip irrigation, and I’m a little confused about how to choose the right emitters for different types of plants, like veggies versus flowers. Does the article explain how to match emitter flow rates to plant needs?
The article does cover selecting emitters and gives guidance on matching flow rates to plant needs. It recommends using lower flow emitters for flowers and more sensitive plants, while vegetables or thirstier plants may benefit from higher flow rates. It also suggests checking each plant’s water requirements to fine-tune your emitter choices.
I’m new to drip irrigation and a bit confused about all the components mentioned. Could you explain how to figure out which emitters and connectors I need for different plants in my vegetable patch versus my flower beds?
For your vegetable patch, use emitters with higher flow rates (like 2 gallons per hour) since veggies often need more water. For flower beds, lower flow emitters (around 0.5–1 gallon per hour) are usually enough. Use T-connectors or elbows to branch your tubing where needed, and match connector size to your tubing. Group similar plants together and plan the emitter type based on how much water each area requires.
You mentioned automating the watering routine—what type of timer or controller would you recommend for a small home system, and how hard is it to add one to a DIY setup?
For a small home drip irrigation system, a basic battery-powered hose timer works well and is easy to install. You simply attach it between your outdoor faucet and the irrigation tubing. Most models let you set simple schedules, and installation usually takes under 10 minutes with no wiring needed.
You mention that drip irrigation can significantly reduce water bills, but what is the typical upfront cost for the key components, and are there any budget-friendly tips for beginners just starting out?
The upfront cost for a basic home drip irrigation kit usually ranges from $25 to $60, depending on your garden size. To save money, consider starting with a simple starter kit and expanding as needed. Using recycled containers as reservoirs and reusing old hoses can also help keep costs down.
When trying to keep costs down, are there certain parts of a drip irrigation setup, like types of emitters or tubing, that you think are worth spending more on for durability or better plant results?
Investing in good-quality tubing and durable emitters is wise, even on a budget. Tubing forms the backbone of your system, so sturdy materials prevent leaks and breakdowns. Reliable emitters deliver consistent water flow, helping plants thrive and saving money by avoiding frequent replacements.
You mention automating the watering routine with drip irrigation. Does the article go over how to set up a timer or controller, and are there budget options suitable for a small home garden?
The article does touch on adding automation, including basic steps for connecting a timer or controller to your drip irrigation system. It also suggests several affordable timer options that work well for small home gardens, so you’ll find budget-friendly choices and setup advice within the guide.
How do you determine how many emitters you’ll need for different types of plants, like vegetables versus flowers or shrubs, when planning the drip layout for your garden?
To decide how many emitters each plant needs, consider the water requirements and mature size. Vegetables and flowers usually need 1 emitter per plant, using 1-gph emitters. Larger shrubs or deep-rooted plants may need 2-4 emitters each with higher flow rates. Always check plant tags or gardening guides for specific water needs, and space emitters to cover the root zone.
How do you suggest troubleshooting if some emitters deliver too much water while others barely drip, even though the system is new and installed according to the guide?
Uneven water output is often due to pressure differences or partially blocked emitters. First, check that all emitters are the same type and flow rate. Make sure your main line is level. Clean any emitters delivering too little water, as debris can clog them even in new systems. If the issue persists, consider installing a pressure regulator or using shorter drip lines to balance the flow.
You mention automating the watering routine—what would I need to add to this DIY drip irrigation setup to make it work with a timer, and does it really save a lot of labor during busy weeks?
To automate your DIY drip irrigation, you’ll need to add a hose-end or in-line irrigation timer, which connects between your water source and the drip system. Most timers are battery-operated and easy to program. Automation really does save labor since you won’t need to remember or manually water your plants, especially helpful during busy weeks or when you’re away.
What is a realistic estimate of the initial cost and time commitment for setting up a basic drip irrigation system for a medium-sized home vegetable garden?
For a medium-sized home vegetable garden, you can expect the initial cost of a basic drip irrigation system to be around $40 to $100, depending on the quality and brand of components. The setup usually takes about 2 to 4 hours if you follow a step-by-step guide and have all the materials ready.
Can you explain how to adjust a DIY drip irrigation system if I have both raised beds and container plants in the same area? Is there a way to tailor the setup for different plant needs?
You can tailor your drip irrigation system by using different types of emitters and tubing. For raised beds, lay drip lines or soaker hoses along the rows. For container plants, run microtubing from the main line and use adjustable emitters at each container. This way, you can control the water output based on each plant’s needs, ensuring both raised beds and containers get adequate moisture.
You mention that drip irrigation systems can be expanded as the garden evolves. How easy is it to add new lines or emitters later if I want to plant more vegetables mid-season?
Adding new lines or emitters to your drip irrigation system mid-season is quite straightforward. Most systems use connectors that let you tap into the main tubing easily. Just punch a hole where you need it, insert a connector, and attach the new tubing or emitter to reach your new plants.
Does the tutorial cover how to troubleshoot if some plants aren’t getting enough water, or if you notice pooling around certain emitters? I’d like to avoid overwatering or dry spots.
The tutorial does explain how to check your system for uneven watering, including signs of under- or overwatering. It suggests inspecting each emitter for clogs or leaks, adjusting emitter flow rates, and repositioning lines as needed to ensure all plants get adequate moisture without pooling or dry spots.
The guide says the system can be expanded as the garden grows. Is it difficult to add more emitters or tubing later, or is it better to plan for future expansion from the start?
Adding more emitters or tubing later is entirely possible and not very difficult, but planning for expansion at the start makes things much easier. If you anticipate your garden growing, consider using connectors and a slightly larger main supply line to handle extra flow. This way, you can simply tap into the system when you want to add more lines or emitters.
What are the most common troubleshooting issues that come up after installing a home drip irrigation system, and do you cover how to fix clogs or uneven watering in the tutorial?
Some of the most common issues after installing a drip irrigation system are clogged emitters, leaks, and uneven water distribution. The tutorial does cover how to identify and fix clogs in emitters, as well as how to adjust the system for even watering. It also offers tips on regular maintenance to help prevent these problems.
When planning the setup, how can I estimate the total cost for a medium-sized vegetable garden, including all essential components recommended in the guide?
To estimate the total cost, make a list of all essential components mentioned in the guide, such as tubing, emitters, connectors, stakes, a timer, and a filter. Measure the area of your garden to calculate how much tubing and how many emitters you’ll need. Check local hardware or garden store prices for each item and add them up for a realistic total.
How much time does it usually take to install a basic drip irrigation setup for an average home garden, and do I need any special tools that aren’t commonly found in a regular toolbox?
Installing a basic drip irrigation system for an average home garden typically takes about 2 to 4 hours, depending on the garden’s size and your familiarity with the process. You usually only need standard tools like scissors or a utility knife, a screwdriver, and perhaps a pair of pliers. Specialized tools aren’t necessary for most kits.
You mentioned drip irrigation reduces weed growth by delivering water only to the root zones. Are there specific types of emitters or layouts that work best for keeping weeds down in larger flower beds?
To minimize weeds in large flower beds, use drip emitters or inline drip tubing placed close to the base of each plant. Point-source emitters work well for individual plants, while inline drip lines are ideal for rows. Avoid soaker hoses or wide spray patterns, as these can dampen areas between plants and encourage weed growth.
I’m new to irrigation setups and was wondering if the installation is manageable in an afternoon or if it usually takes a whole weekend for a beginner?
For most beginners, setting up a basic home drip irrigation system can usually be done in an afternoon, especially if your garden area is small to medium-sized. If you have a larger space or want to customize zones, it may take a bit longer, possibly a full day. Preparing your materials and having a clear plan will help keep things on track.
The article mentions that drip irrigation can reduce water usage by 30-50%. About how much should I budget for a basic DIY system for a small backyard vegetable garden, including all the essential components?
For a small backyard vegetable garden, you can typically budget between $40 and $80 for a basic DIY drip irrigation system. This includes tubing, emitters or drippers, connectors, stakes, and a simple filter. Prices vary based on garden size and the quality of materials you choose.
Can you estimate how long it typically takes to plan and install a basic drip irrigation system for a medium-sized yard, especially for someone who’s never done it before?
For someone new to drip irrigation, planning and installing a basic system for a medium-sized yard usually takes about 4 to 6 hours. This includes mapping out your watering zones, gathering materials, assembling the system, and testing it. Breaking the project into planning, setup, and adjustment phases can make the process smoother.
What kind of regular maintenance does a DIY drip irrigation system need to keep it working efficiently, especially to prevent clogging of the emitters over time?
To keep your DIY drip irrigation system running smoothly, regularly check and clean the filters, flush the tubing every few weeks, and inspect emitters for debris or mineral buildup. Replacing clogged emitters and ensuring the water source is free of sediment will also help prevent blockages over time.
You mention that drip irrigation systems can be expanded or adjusted as the garden evolves. How difficult is it to add new lines or emitters once the initial system is in place?
Adding new lines or emitters to your existing drip irrigation system is usually straightforward. Most kits use connectors that let you easily splice in extra tubing or attach more emitters. You’ll just need to punch small holes in your main line and snap in the new components, making sure everything stays watertight.
If I want to expand my drip system to new flower beds later, is it easy to add onto the existing tubing, or would I need to rework the whole layout?
You can easily expand your existing drip system without reworking the whole layout. Just use connectors or tees to branch off your main tubing and run new lines to the new flower beds. Make sure your water pressure and flow are adequate for the added area.
I have a mix of flower beds and raised vegetable boxes in my yard. Is it possible to set up one drip irrigation system for both, or would I need different layouts or components for each type of planting area?
You can absolutely use one drip irrigation system for both flower beds and raised vegetable boxes. Just make sure to plan separate lines or zones to account for different plant needs and layouts. You might use drip emitters for vegetables and drip lines for flowers, adjusting spacing and output as needed.
The article mentions the flexibility of drip irrigation systems as gardens evolve. Can you clarify how difficult it is to add or move emitters if I expand my garden beds later in the season?
Adding or moving emitters in a drip irrigation system is quite simple. Most systems use tubing and emitters that snap or twist into place. If you expand your beds, you just cut the tubing, insert new connectors or emitters, and seal any unused holes with plugs. No special tools are usually needed beyond scissors or a hole punch.
Does the tutorial explain how to connect a DIY drip system directly to a typical outdoor faucet, or do I need to buy special adapters for most setups in the US?
The tutorial covers how to connect your drip irrigation system to a standard outdoor faucet, which is common in most US homes. However, it does mention that you will typically need a few basic adapters, like a hose-to-drip adapter and a pressure regulator, to ensure a secure and functional fit.
Could you explain more about how to figure out the layout for the tubes and emitters before I actually start installing anything? I am not sure how to decide where each line should go for different types of plants.
To plan your layout, first map your garden and mark where each plant or row is located. Place main lines along central paths, then branch off with smaller tubes to each plant. Group plants with similar watering needs together, and space emitters based on plant size—closer for thirsty or closely spaced plants, farther for drought-tolerant ones. Sketching this out helps visualize and adjust before installing.
When setting up the tubing layout, how do you recommend handling areas with lots of curves or obstacles like raised beds? The article mentions layout strategies, but I could use a few practical tips.
For curvy areas or spots with obstacles like raised beds, use flexible tubing to easily bend around corners. Secure the tubing with stakes to keep it in place, and for sharp turns, use elbow or tee connectors. If you need to go over a bed edge, consider running the tubing up and over using clamps or guides to prevent kinking.
I’m a bit worried about accidentally over or under watering my plants. Are there any tips in the planning stage for making sure each plant gets just the right amount of water, especially if some need more than others?
To make sure each plant receives the right amount of water, group plants with similar water needs together. During planning, you can use adjustable emitters or select different flow rates for each plant. Also, test your system before final installation to observe how much water each spot receives and make adjustments as needed.
For a home gardener in a region with frequent water restrictions, do you have tips on integrating a rain barrel or other alternative water source into a DIY drip irrigation setup as described here?
Absolutely, integrating a rain barrel is a smart way to conserve water. Place the barrel on an elevated stand near your garden to increase water pressure. Connect a filter and a spigot at the bottom, then attach your drip irrigation tubing directly. Be sure to use a fine mesh screen on the barrel to keep debris out, and check local guidelines on rainwater use.
How do I figure out the right layout strategy for my garden if I have both raised beds and lots of potted plants? Should I run separate lines for each type or can they all connect to the same system?
You can connect both raised beds and potted plants to the same drip irrigation system, but it’s important to consider their different water needs. Use separate drip lines or zones for each type if possible, so you can control the flow rate and watering schedule more precisely. For potted plants, include pressure-compensating emitters to avoid overwatering. Planning the main line along the perimeter, with branch lines to both beds and pots, usually works well.
If my garden has a mix of container plants and in-ground beds, will one drip system setup work for both, or would I need separate lines or components?
You can use one drip system for both container plants and in-ground beds, but you’ll likely need to run separate lines or branches to each area. Container plants usually need emitters with lower flow rates, while in-ground beds might use higher-flow emitters or drip tubing. This way, each plant type gets the right amount of water.
When setting up a drip system for a vegetable patch versus a flower bed, are there different layout strategies or emitter types you recommend? The article mentions tailoring setups, and I’d like to know how to choose the right approach for different garden types.
Yes, the layout and emitter choice should match your plant types. For vegetable patches, use drip lines or tapes that run along rows to evenly water each plant. In flower beds, individual drip emitters or adjustable sprayers work well, letting you target water to different plant sizes or spacing. Consider plant density and water needs to decide the best setup.
What is a realistic ballpark cost for all the materials needed to set up a basic home drip irrigation system for a medium-sized garden in the US?
For a medium-sized garden in the US, the total cost for a basic drip irrigation system typically ranges from $50 to $120. This estimate covers tubing, emitters, connectors, a filter, stakes, and a pressure regulator. Prices can vary depending on garden size and the specific brands you choose.
You mention that drip irrigation can significantly reduce water usage compared to traditional sprinklers. Do you have any tips for calculating how much water savings I might expect for a small backyard garden?
To estimate your water savings, compare your current sprinkler’s water use (check its flow rate and how long you water) with your drip system’s expected output (usually 0.5–2 gallons per hour per emitter). Drip systems typically use 30–50% less water. For better accuracy, track your water meter before and after watering sessions with both methods.
You mentioned reduced weeding as a benefit. In your experience, does drip irrigation really keep weed growth down in vegetable beds, or do weeds still pop up between plants over time?
Drip irrigation does help minimize weed growth because water is delivered directly to the base of your vegetable plants, so the soil between rows or plants stays drier. However, some weeds may still appear, especially right next to the drip emitters or in areas where water spreads, but overall, you’ll notice fewer weeds compared to overhead watering.
I’m curious about maintenance—does the system require frequent cleaning to prevent clogging, especially if using hard water, and are there specific troubleshooting tips for common issues like uneven watering?
Yes, regular maintenance is important, especially if you use hard water, as mineral buildup can clog emitters. Flush the system every few weeks and clean filters as needed. For uneven watering, check for blocked emitters, leaks, or uneven ground, and adjust water pressure or emitter placement to ensure even coverage.
The article mentions reduced labor with automation, but could you recommend a reliable timer or controller that works well with typical DIY drip kits?
A popular and reliable choice for DIY drip irrigation systems is the Orbit hose timer, which is easy to set up and works with most standard drip kits. Another good option is the Rain Bird digital timer, known for its durability and user-friendly programming. Both allow you to automate watering schedules efficiently.
I’m new to drip irrigation and a bit confused about how to plan the actual layout for different types of plants. Do you have any advice on figuring out how many emitters or lines I should use for veggies versus flower beds?
For vegetables, it’s best to place one emitter per plant or every 12 inches along the row, as veggies usually need more water at the roots. For flower beds, use emitters spaced 12–18 inches apart or try a soaker line for even coverage. Group plants with similar water needs on the same line for efficiency.
Can you explain what kinds of regular maintenance are involved to keep the drip irrigation system running efficiently? For example, do the emitters clog up often, and how would I troubleshoot if some plants aren’t getting water?
Regular maintenance includes checking for clogged emitters, flushing the system to clear debris, and inspecting tubing for leaks or damage. Emitters can clog from dirt or mineral buildup, so it’s helpful to remove and clean them periodically. If some plants aren’t getting water, check for blockages or kinks in the tubing near those plants and ensure emitters are properly attached and not clogged.
I have kids and pets that run around the yard. Are there certain drip irrigation parts or layouts that hold up better to foot traffic or accidental bumps?
For yards with kids and pets, it’s best to use sturdy drip tubing designed for outdoor use and bury it slightly below the surface or secure it with landscape staples. Avoid above-ground emitters and exposed lines, as they can be tripped over or damaged. Look for heavy-duty fittings and keep mainlines close to fences or garden edges to minimize accidental bumps.
I noticed you mentioned that drip irrigation can reduce weed growth. Does that mean I won’t have to worry about weeds at all, or are there specific weeding tips that work best with this system?
Drip irrigation helps limit weed growth because water goes directly to your plants’ roots, leaving the surrounding soil drier and less hospitable to weeds. However, you may still get some weeds, especially from wind-blown seeds. It’s best to check your garden regularly and pull any weeds early. Adding mulch around your plants can also further suppress weed growth when using drip irrigation.
Could you elaborate on how much initial setup time is typically required for a beginner installing a DIY drip irrigation system in a small to medium-sized backyard garden?
For a beginner setting up a drip irrigation system in a small to medium-sized backyard garden, you can expect the initial installation to take about 3 to 5 hours. This includes planning the layout, assembling components, laying out tubing, connecting emitters, and testing the system for leaks or adjustments.
When figuring out the layout for a DIY drip system like you described, how do you determine the best spacing between emitters for different types of plants? I’m growing both vegetables and perennials and want to make sure I get coverage right.
Emitter spacing depends on the water needs and root spread of your plants. For most vegetables, spacing emitters 12 to 18 inches apart along the row is effective. For perennials with wider root zones, place emitters 18 to 24 inches apart. Adjust based on your specific plant size and how quickly your soil absorbs water to ensure each root zone gets enough moisture.
I’m a bit concerned about ongoing maintenance since our team is small. What are the most common issues after installation—like clogging or uneven watering—and how much time should I budget for upkeep compared to conventional sprinkler systems?
Common issues with drip irrigation systems include clogging of emitters, uneven watering due to pressure differences, and occasional leaks in tubing. Regular maintenance usually means flushing the system, checking for clogs, and inspecting for leaks every few weeks. Compared to conventional sprinklers, upkeep is often less time-consuming—plan for 10–20 minutes per week, especially during peak growing seasons.
If I set up a drip irrigation system in my raised vegetable beds, how do I prevent clogging in the emitters, especially if my water supply has a lot of sediment?
To prevent emitter clogging when your water has sediment, install a filter on your main supply line before the tubing. Also, flush the system regularly by opening the end caps, and periodically check and clean the filter. Using pressure regulators and high-quality emitters can further reduce clogging issues.
If I want to keep the project budget-friendly, are there certain components of a drip irrigation system that can be reused or easily upgraded in the future as my garden expands?
You can definitely keep costs down by choosing reusable components like tubing, emitters, and connectors, which can be detached and rearranged as your garden grows. The mainline tubing and filter are usually long-lasting, so you’ll only need to add more emitters or branch lines for future expansion.
I’m curious about the upfront costs for a basic DIY drip irrigation setup sized for a small backyard garden. What should I expect to spend on materials and how long does installation usually take for a beginner?
For a small backyard garden, you can expect to spend around $30 to $60 on materials like tubing, emitters, connectors, and a timer if you choose one. As a beginner, setting up the system usually takes 2 to 4 hours, depending on your garden’s layout and the complexity you want.
For someone trying to stay on a budget, about how much should I plan to spend upfront for all the basic components covered in your tutorial for a small home vegetable garden?
For a small home vegetable garden, you can expect to spend around $25 to $50 on the basic drip irrigation components mentioned in the tutorial. This includes tubing, emitters, connectors, and a basic timer. The total cost will depend on your garden size and brand choices, but staying within this range is typical for a budget setup.
For gardens with both raised beds and container plants, do you recommend setting up separate drip lines for each, or is there a way to efficiently connect them within the same system?
You can connect both raised beds and container plants within the same drip irrigation system by using a main supply line and branching off with tubing to reach each area. Just be sure to use appropriate emitters for each plant type and consider flow restrictors for containers to avoid overwatering. This setup keeps things efficient while giving each section the water it needs.
You talk about water savings compared to sprinklers and hand-watering, but what about the initial costs? About how much should I expect to spend to set up a basic drip irrigation system for a small home garden?
For a small home garden, a basic drip irrigation system kit usually costs between $25 and $60, depending on the brand and features. If your garden has unique needs, you might need to spend a bit more on extra tubing or connectors, but most small gardens stay within that range for materials.
How much time does it take to install and get a basic DIY drip irrigation system up and running if I only get a couple of hours each weekend to work on it?
If you have a couple of hours each weekend, you can expect to have a basic DIY drip irrigation system set up in about 2 to 3 weekends. The main tasks include planning, laying out the tubing, connecting emitters, and testing the system. Breaking these steps up into manageable sessions makes it easy to complete without rushing.
For a small business with a mix of raised beds and container plants, does the tutorial recommend one main water supply line or separate lines for each area? I’m trying to figure out the best layout for efficiency.
The tutorial suggests using a single main water supply line, then branching off with smaller feeder lines to different areas like raised beds and container plants. This setup helps you control water distribution efficiently while keeping the layout simple and easy to manage.
You mentioned that drip irrigation can reduce weed growth since it only waters the root zones. Does this mean I wouldn’t have to mulch as much, or is mulching still recommended with a drip system?
With drip irrigation, you’ll likely see fewer weeds since water reaches only your plants’ roots, not bare soil. However, mulching is still recommended. Mulch helps conserve moisture, maintain soil temperature, and further suppress any weeds that do manage to sprout, making your system even more efficient.
What kinds of troubleshooting should I expect if parts of my garden have different water needs or are on uneven ground?
If your garden has plants with different water needs or is on uneven ground, you might find some areas get too much or too little water. To troubleshoot, use adjustable emitters or flow regulators for specific plants, and consider adding pressure-compensating drippers for slopes. This helps ensure each section receives the right amount of water, even on tricky terrain.
Can you give a rough estimate of the average upfront cost for installing a basic home drip irrigation system compared to traditional sprinklers?
A basic home drip irrigation system usually costs between $50 and $150 to set up, depending on yard size and materials. Traditional sprinkler systems can range from $300 to over $1,000 for installation. Drip systems tend to be much more budget-friendly, especially for DIY projects.
In the article, you mention reduced weeding as a benefit. If some of my beds already have a lot of weeds, should I remove them before installing the drip system, or will it help suppress them over time on its own?
It’s best to remove existing weeds before installing your drip irrigation system. Drip systems help suppress new weed growth by delivering water directly to your plants, but they won’t eliminate weeds that are already there. Clearing out weeds first will give you a cleaner start and help your drip system work more effectively.
If I want to automate my watering routine using a simple timer, do you have any recommendations for affordable timers that integrate well with home DIY drip systems?
You can look for basic hose timers that connect directly to your outdoor faucet, as these work well with most DIY drip systems. Brands like Orbit and Raindrip offer affordable, easy-to-use models that allow you to set schedules without needing a smart home setup.
Does the guide mention how to handle areas with both vegetable beds and container plants? I’m wondering if it’s possible to connect both types to the same drip system, or if they need separate setups.
The guide does mention handling different planting areas, including vegetable beds and container plants. It explains that you can connect both to the same drip irrigation system by using different emitters or tubing sizes to suit each area’s needs. You don’t need separate setups—just adjust the layout and flow rates for each section.
I like the idea of reducing weeding with targeted watering, but are there any tips for troubleshooting if I notice weeds still popping up between plants after installing a drip system?
If weeds are still appearing between plants after installing your drip system, try adding a layer of mulch around your plants to block sunlight and suppress weed growth. Also check that your emitters are positioned close to the plant bases so only those areas get watered, limiting moisture for weeds elsewhere.
You say drip irrigation reduces labor and automates watering, but how complicated is it to set up a timer system? Is it something a beginner could handle, or does it need electrical work?
Setting up a timer for a drip irrigation system is generally quite beginner-friendly. Most timers simply attach to your outdoor faucet and require no electrical wiring—they run on batteries and have user-friendly controls. You just set your watering schedule, connect the system, and you’re good to go. No electrical work or special skills needed.
You mentioned drip systems help reduce plant diseases compared to traditional sprinklers. Can you explain a bit more about how keeping foliage dry makes such a difference with common garden issues?
Keeping foliage dry with drip irrigation limits the time leaves stay wet, which is important because many common garden diseases, like mildew and blight, thrive in moist conditions. By delivering water directly to the soil and roots rather than spraying leaves, drip systems help prevent these diseases from getting the moisture they need to spread.
How much time should I expect to spend setting up a basic drip irrigation system if I only have weekends free? Is it reasonable to get it all done in a couple of afternoons?
You can definitely set up a basic drip irrigation system over a couple of weekend afternoons. Most DIY installations for small to medium gardens take about 4 to 6 hours, including layout planning, assembly, and testing. Just make sure you have all your materials ready before you start to keep things running smoothly.
For someone on a tight budget, what are the most cost-effective components to prioritize when buying parts for a DIY drip system, and are there items that can be safely reused or substituted?
Focus your budget on quality drip tubing and emitters, as these are key for efficient watering. You can often reuse plastic bottles as DIY drip emitters or repurpose old garden hoses for supply lines. Hose connectors and stakes can sometimes be substituted with sturdy household items like zip ties or metal wire, as long as they’re safe for outdoor use.
I’d like to keep the project budget-friendly—can you suggest any tips for sourcing drip irrigation components without sacrificing efficiency or plant health?
You can save money by using recycled materials like old plastic bottles for emitters or searching for drip system kits at local hardware stores during sales. Consider buying components in bulk with neighbors or checking online marketplaces for gently used parts. Just make sure the tubing and emitters match your plants’ water needs to keep everything healthy.
I see you mention that drip irrigation uses 30-50% less water than traditional methods. How quickly did you see a difference in your water bill after installing your own setup, and were there any unexpected costs I should look out for as a beginner?
Most people notice a difference in their water bill within the first billing cycle after installing a drip irrigation system, especially during peak watering months. Unexpected costs can include buying extra connectors, repairing leaks, or upgrading timers if your initial estimates or parts don’t fit your garden layout. Planning your layout carefully helps minimize these surprises.
Does the DIY drip irrigation system need to be automated with a timer, or can it be run manually just as efficiently? I’m worried about the upfront costs and wanted to know what’s actually necessary for basic use.
You don’t need a timer to start using a DIY drip irrigation system—it can be run manually by turning the water on and off yourself. A timer adds convenience and consistency, but for basic use and to keep costs down, manual operation works well. You can always add a timer later if you find it helpful.
Do you have any recommendations for which types of drip emitters work best for container plants compared to vegetable beds? I want to make sure I’m getting the right components for each area.
For container plants, pressure-compensating drip emitters (like 1-2 gallons per hour) work well because they deliver water evenly, even with varying pressure. For vegetable beds, inline drip tubing with spaced emitters or adjustable drippers lets you cover larger areas and customize flow to each plant row. This way, each area gets the right amount of water.
Since drip irrigation helps minimize weed growth by targeting the root zone, does this mean weeds won’t grow at all in the areas that stay dry, or should I still expect to do some weeding?
While drip irrigation does reduce weed growth by delivering water directly to your plants’ roots and keeping surrounding soil drier, it’s unlikely to prevent all weeds. Some weeds are hardy and can sprout with minimal moisture, so you may still need to do occasional weeding, but overall you’ll notice far fewer weeds compared to traditional watering.
If my home garden layout changes throughout the season, how easy is it to adjust the drip system you describe, and do I need to buy new components each time?
Adjusting the drip system for changes in your garden layout is quite manageable. Most drip irrigation kits use flexible tubing and connectors that can be moved or rearranged as needed. You usually won’t need to buy new components unless you add more plants or significantly expand your system.
I noticed that drip irrigation systems claim to use 30-50% less water than regular sprinklers. Did the guide include any tips on how to estimate upfront costs versus potential savings on water bills over time?
The guide mainly focused on how to set up the drip irrigation system and highlighted water savings, but it didn’t provide specific advice on calculating upfront costs versus long-term savings. If you’d like, I can suggest some basic ways to estimate those figures.
What would be a reasonable budget range for setting up a basic DIY drip irrigation system for a medium-sized vegetable garden, including all the essential components?
For a medium-sized vegetable garden, you can expect to spend between $40 and $100 on a basic DIY drip irrigation system. This usually covers tubing, emitters, connectors, stakes, and a simple filter. The final cost depends on your garden size and whether you choose higher-end or basic components.
You mention that drip irrigation reduces weed growth, but are there specific layout strategies or equipment that help maximize this benefit in larger vegetable patches?
To reduce weeds in larger vegetable patches, use drip lines or soaker hoses laid close to plant rows, ensuring water goes directly to roots and not between rows where weeds can grow. Mulching over the drip lines further prevents weed seeds from germinating in moist soil away from the plants.
Does your guide include any recommendations for the best type of emitters to use if I have both container plants and in-ground beds, since I noticed you mention flexibility in setup?
Yes, the guide offers suggestions for both situations. For container plants, it recommends adjustable drip emitters so you can control water flow for each pot. For in-ground beds, it suggests using inline drip tubing or fixed-rate emitters spaced along the lines, making it easy to cover larger areas evenly.
I noticed the article mentions that drip irrigation systems can reduce water usage by up to 50%. Is there a way to estimate how much I might actually save on my water bill for a typical small vegetable garden?
You can estimate your water savings by comparing your current garden water use to what a drip system would use. Track your current watering schedule and the amount of time you run sprinklers or hoses. With drip irrigation, you’ll generally use about half as much water. Multiply your current garden water usage by 0.5 to estimate your potential savings, then check your water bill to see how much that reduction could mean in dollars.
Could you elaborate on what types of tubing and emitters are best for a vegetable patch versus flower beds? I want to make sure I’m choosing the most effective components for different areas of my garden.
For vegetable patches, use 1/2-inch mainline tubing with adjustable drip emitters (1-2 gallons per hour) to target individual plants. For flower beds, soaker dripline or 1/4-inch tubing with pre-installed emitters spaced every 12 inches works well to cover broader areas. This setup ensures each garden area gets the right amount of water.
About how much time should I realistically expect to spend on maintenance each month once the system is set up? I’m hoping to save time long-term but want to plan ahead.
Once your drip irrigation system is set up, you should plan to spend about 30 minutes to an hour each month on basic maintenance. This includes checking for clogs, adjusting emitters, looking for leaks, and cleaning the filter. Most of the time, maintenance is quick and helps keep the system running efficiently, saving you time overall compared to manual watering.
I’m interested in setting this up for my vegetable patch, but what maintenance tasks should I expect over the summer to keep the drip lines from clogging or leaking?
To keep your drip irrigation system running well through the summer, regularly check the lines for leaks or blockages. Flush the system every few weeks to clear sediment, clean or replace filters as needed, and inspect emitters for clogs. Also, look for any damage caused by sun exposure or animals.
If I want to automate my drip irrigation system to run on a set schedule, do you explain how to integrate a timer in your guide, and is there a type that works best for beginners?
Yes, the guide covers how to add a timer to your drip irrigation setup. For beginners, a simple battery-operated hose timer is recommended—they’re easy to install and set up, usually requiring just a few button presses to schedule watering times.
You mentioned that drip irrigation uses 30-50% less water than sprinklers. Is there a way to estimate how much my monthly water bill might go down after switching, or is it really just trial and error?
You can estimate your potential savings by checking your current water use for outdoor watering, then reducing that amount by 30-50% to reflect the savings from drip irrigation. Compare the reduced usage to your utility rate to estimate your new bill. Keep in mind that actual savings can vary depending on your yard size, plant types, and how efficiently you set up your system.
You said a drip system is cost-effective compared to traditional sprinklers. For a small vegetable patch, what kind of budget should I expect for all the basic components to set this up at home?
For a small vegetable patch, expect to spend around $25 to $50 for a basic drip irrigation setup. This covers tubing, emitters, connectors, and a simple timer if desired. The exact amount may vary depending on the size of your patch and any extra features you add, but most home gardeners can set up an efficient system within this range.
My garden beds have both containers and in-ground plants. Will one drip system work for both, or do I need different setups for each area?
You can use one drip irrigation system for both containers and in-ground plants. Just make sure to adjust the tubing layout and use appropriate emitters for each area. For containers, consider using adjustable emitters or micro-sprayers, as containers often need more frequent watering than in-ground plants. You may need to run separate lines from the main tubing to reach each container efficiently.
How much does a typical home drip irrigation setup cost to install and maintain, especially when factoring in all the essential components mentioned in the guide?
A typical home drip irrigation setup costs between $50 and $200 to install, depending on your yard size and quality of materials. This includes tubing, emitters, connectors, filters, and a timer. Annual maintenance—mainly replacing clogged emitters or damaged tubing—usually costs $10 to $30.
I’m curious how the initial setup cost for a home drip irrigation system compares to traditional sprinklers, especially if I want to cover both flower beds and a small vegetable garden.
Drip irrigation systems usually have a higher initial setup cost than basic traditional sprinklers, mainly due to tubing, emitters, and fittings. However, for flower beds and a small vegetable garden, you can often assemble a starter kit for a modest price. Over time, drip systems save water and reduce plant disease, potentially offsetting the upfront cost.
I’m new to drip irrigation and was wondering, do these systems work well for container gardens with different types of plants, or is there a risk of overwatering some containers if they have different water needs?
Drip irrigation can work very well for container gardens with mixed plants. To avoid overwatering, use adjustable emitters or different flow rates for each container, matching the water output to each plant’s needs. You can also group containers by similar water requirements on the same line for better control.
For someone working with a limited budget, are there particular drip system components or brands that strike a good balance between affordability and durability for a small home garden?
For a small garden on a budget, look for generic or store-brand drip irrigation kits, which often include everything you need at a lower price. Brands like Raindrip and Orbit offer affordable starter kits that are durable enough for home use. You can also mix and match components; just make sure tubing sizes and connectors are compatible.
How do you determine the right emitter spacing for different types of plants? I have a mix of vegetables and flowers, and I’m not sure if I need different tubing layouts for each.
Emitter spacing depends on the water needs and root spread of your plants. Vegetables usually do well with emitters 12 to 18 inches apart, while flowers can vary—denser flowers may need 6 to 12 inches. You can use the same tubing but adjust emitter placement along each row to match the plant type. For mixed beds, group similar plants together and space emitters accordingly to ensure even watering.
In the section about minimizing weed growth, do you have recommendations for the type or spacing of emitters to further prevent weeds from sprouting between plants?
To help minimize weed growth, use emitters that deliver water directly to the base of each plant rather than using soaker hoses or closely spaced emitters along the whole row. Space emitters just wide enough to reach each plant’s root zone. This keeps the surrounding soil dry, making it less hospitable for weeds to sprout between your plants.
You mentioned automating the watering routine—can your system easily connect to a standard outdoor faucet with a basic timer, or do you recommend installing a more advanced controller for better results?
You can definitely connect the DIY drip irrigation system to a standard outdoor faucet using a basic timer. This setup works well for most gardens and makes automation simple. If you want features like moisture sensors, multiple zones, or smartphone control, consider a more advanced controller, but it’s not required for basic use.
You mentioned that drip systems help reduce weed growth, but do I need to lay down weed barrier fabric too, or is the targeted watering usually enough to keep weeds from popping up?
Targeted watering with drip irrigation does help reduce weed growth by keeping water away from areas between plants. However, using weed barrier fabric offers extra protection, especially in gardens prone to stubborn weeds. Combining both methods gives you the best results for keeping weeds under control.
I noticed you mention drip irrigation reduces weed growth. If I plan to switch from sprinklers to a drip system, how quickly should I expect to see fewer weeds in my landscape beds?
Switching to a drip irrigation system can start reducing weed growth within a few weeks, especially in landscape beds. Since drip irrigation waters only plant roots and not bare soil, weed seeds get less moisture and have trouble germinating. You should notice fewer new weeds after one or two watering cycles, but existing weeds will need to be removed manually for best results.
If I want to set up the system for container plants on a patio, do I need any special connectors or adapters, or will the same drip tubing work as for garden beds?
For container plants on a patio, you can use the same drip tubing as for garden beds, but you might need additional connectors like barbed tees or elbows to branch the tubing into each container. Small emitters or adjustable drippers are also helpful to control the water flow to each pot.
I’m curious about the water efficiency claim of saving 30-50% compared to conventional methods. Is there a way to measure or monitor water usage with a DIY drip system to verify these savings over time?
You can measure your water savings by installing a water flow meter on your irrigation line to track the exact amount used by your drip system. Compare this data with your previous water bills or records from conventional watering methods over the same period. Some DIYers also use smart irrigation controllers with built-in monitoring features for more detailed tracking.
The guide says drip irrigation can cut water use by up to 50 percent compared to sprinklers. Have you seen this hold true in areas with super dry summers, or does the climate make a difference?
Yes, even in regions with very dry summers, drip irrigation often achieves close to the same water savings compared to sprinklers. Since drip systems deliver water directly to plant roots and minimize evaporation, they remain efficient regardless of climate. However, extremely hot or windy conditions may slightly reduce savings, but the method is still much more water-efficient than sprinklers.
How much should I budget for a basic starter drip irrigation system for a small veggie patch, including all the essential components mentioned? I’m looking for a ballpark figure before heading to the hardware store.
For a small veggie patch, you can expect to spend around $30 to $60 on a basic starter drip irrigation system. This estimate covers essential components like tubing, emitters, connectors, a filter, and a pressure regulator. Prices may vary depending on the brand and quality, but this range should help you plan your trip to the hardware store.
When setting up a drip irrigation system for a vegetable patch and some flower beds, is it better to run separate zones for each, or can everything be connected to the same tubing and emitters?
It’s usually best to set up separate zones for your vegetable patch and flower beds. This is because different plants often have different watering needs, and separate zones let you control the amount and frequency of water for each area. If you connect everything to the same tubing, you might end up over- or under-watering certain plants.
Does the guide explain what to do if some plants start getting too much or too little water after installing everything? I’m worried about accidentally overwatering certain areas.
Yes, the guide addresses how to handle uneven watering after your system is set up. It suggests checking each emitter and adjusting their flow rates or moving them to better suit your plants’ needs. You can also add or remove emitters as needed to fine-tune water distribution.
In the planning section, do you have any recommendations for choosing the right type of tubing or emitters for different types of plants, like vegetables versus flowers?
For vegetables, it’s best to use 1/2-inch tubing as a main line and 1/4-inch drip lines or soaker hoses to deliver steady moisture. For flowers or delicate plants, try adjustable emitters or micro-sprayers that let you control water flow to avoid overwatering. Matching the emitter flow rate (typically 1-2 gallons per hour for vegetables and 0.5-1 gallon per hour for flowers) will help you tailor the system to your plants’ needs.
How do you recommend setting up a drip irrigation system if my garden has both raised beds and container plants? Do I need separate lines or can I connect everything to one main system?
You can connect both raised beds and container plants to one main drip irrigation system by branching off the main line with smaller tubing. Use emitters or adjustable drippers for different water needs. Just make sure each plant type gets the right amount of water and check that your water pressure is sufficient for the whole setup.
For gardeners in regions with hard water, are there any particular drip emitters or filters you recommend to prevent clogging over time? I want to make sure my system stays low-maintenance as described.
For hard water areas, use emitters labeled as ‘pressure-compensating’ or ‘turbulent flow,’ as they resist clogging better. Installing a fine mesh filter (around 150 mesh) at the start of your system is also important. Flushing the lines occasionally and choosing emitters that can be opened for cleaning will help keep your system low-maintenance.
The article mentions that drip irrigation can significantly reduce weeds because it only waters the root zone. Is there a specific layout or type of emitter that works best for minimizing weed growth in larger garden beds?
To minimize weed growth in larger garden beds, use drip lines or drip tape with emitters spaced to match your plant layout, ensuring water only reaches plant roots. Avoid soaker hoses, which wet wider areas. Place emitters close to stems and only where needed to keep surrounding soil dry and discourage weeds.
Is it possible to connect a DIY drip irrigation system directly to an outdoor hose faucet, or do I need a pressure regulator or filter before I start assembling the tubing?
You can connect a DIY drip irrigation system directly to an outdoor hose faucet, but it’s highly recommended to install a pressure regulator and a filter first. Drip systems work best at lower pressure and clean water helps prevent clogging in the emitters. Adding these components improves performance and extends the system’s lifespan.
You mention that drip irrigation minimizes weeds by targeting the root zone. Are there specific layout strategies for veggie patches to prevent weeds in between rows, or should I still expect to do some hand weeding?
Drip irrigation does help reduce weed growth by delivering water directly to your plants, but some weeds can still sprout between rows. For veggie patches, placing drip lines or emitters close to plant bases and using mulch between rows can further discourage weeds. Hand weeding may still be needed occasionally, but you should notice fewer weeds overall.
You mention drip irrigation uses 30-50% less water than traditional methods. About how much would I expect my water bill to go down if I switched my whole backyard to this system?
Switching your entire backyard to drip irrigation can often reduce your outdoor water use by 30-50%. The actual savings on your water bill depend on how much you currently water your yard, but most people see a noticeable drop, sometimes saving tens of dollars each month during peak watering seasons.
How complicated is it to expand a DIY drip irrigation setup as my landscaping grows? Are there certain connectors or emitters that are easier or more cost-effective to add as I add more plant beds?
Expanding a DIY drip irrigation system is generally straightforward. Mainline tubing can be extended with simple couplers, and adding more rows or plant beds just means connecting additional tubing, emitters, or drip lines. Barbed connectors and adjustable emitters are particularly easy to add and quite budget-friendly. Look for universal connectors so you’re not tied to one brand, making future expansions easier.
You mention that drip systems use up to 50% less water than traditional methods. Do you have any guidelines for estimating how much a small vegetable patch might actually save on a monthly water bill?
To estimate savings for your vegetable patch, compare your current watering usage (like hose or sprinkler output per week) to the drip system’s flow rate times the hours used. Drip irrigation typically delivers 1–4 gallons per hour per emitter. Track how much less you water using the system over a month, then multiply that reduction by your water rate to see possible savings.
If I want to automate my drip irrigation system, what timer options work best for a beginner, and are there any affordable models you recommend for small to medium-sized gardens?
For beginners, battery-operated hose timers are very user-friendly and work well for small to medium gardens. Models like the Orbit Single-Outlet Hose Watering Timer or the Raindrip Analog Timer are affordable and easy to set up. These timers usually let you set watering frequency and duration with simple dials, making automation straightforward.
As someone looking to save on costs, could you give an estimate on the upfront investment needed for a basic DIY drip irrigation setup for a small garden mentioned in the article?
For a small garden, you can expect the upfront cost for a basic DIY drip irrigation system to be around $30 to $60. This covers tubing, connectors, emitters, and a basic filter. Prices can vary depending on garden size and the quality of materials you choose.
Does this drip irrigation setup work well for container plants on a sunny patio, or would I need a different type of system for pots versus garden beds?
This drip irrigation setup can work very well for container plants on a sunny patio. You may want to use adjustable emitters or micro-tubing to direct water precisely into each pot, as pots often need more targeted watering than garden beds. Just check that the emitters provide the right flow rate for your containers’ size and sun exposure.
I’m trying to stick to a student budget—are there any specific materials or components in the setup where it’s worth spending a little more, versus things you can go cheap on without sacrificing water efficiency?
It’s smart to prioritize spending on quality connectors and the main hose, since leaks or breaks here can waste a lot of water and require repairs. Emitters and simple tubing can often be bought at lower cost without major issues, as long as they fit properly. Avoid very cheap timers—they tend to fail quickly and can affect efficiency.
Does installing a drip system require connecting it directly to my main water supply, or is there a way to hook it up to a rain barrel? Are there special parts needed for that setup?
You can connect a drip irrigation system to either your main water supply or a rain barrel. For a rain barrel setup, you’ll need a filter to keep debris out, a pressure regulator since gravity-fed systems have lower pressure, and fittings that match your barrel’s outlet. Some kits are designed specifically for rain barrels, making the process simpler.
For someone on a tight budget, about how much should I expect to spend on the basic components for a small vegetable patch using this DIY method?
For a small vegetable patch, you can expect to spend around $20–$40 on the basic components like tubing, connectors, a simple filter, and a timer (optional). Costs depend on the size of your patch and whether you already own a hose or tap adapter.
When planning a layout for a vegetable patch and a couple of flower beds, is it better to run one main line with branches, or separate lines for each area? I want to avoid issues if I expand the garden later.
Using one main line with branches for each area is usually the best choice. It keeps things simple, allows for easy pressure control, and makes future expansion much easier—you can just add more branches as your garden grows instead of redoing the whole system.
Can you clarify if this drip irrigation system is compatible with rain barrel setups, or does it require standard household water pressure from a spigot?
This drip irrigation system can work with a rain barrel, but you may need to elevate the barrel to provide enough gravity-fed pressure. Standard setups using a household spigot benefit from higher, more consistent pressure, but adapters and pressure compensating emitters can help make rain barrels effective for drip irrigation too.
If my garden is on a slope, are there specific troubleshooting tips or adjustments I should be aware of when installing and maintaining a drip irrigation system to ensure even watering?
When installing drip irrigation on a slope, water can flow downhill and cause uneven watering. To help, use pressure-compensating emitters so each plant gets the same amount of water regardless of elevation. Install the main supply line along the highest point and run laterals across the slope. Regularly check for leaks or pooling at the lower end and adjust emitter placement as needed.
You mention that drip systems use 30-50% less water than conventional methods. Is there a way to estimate how much water I might actually save compared to using sprinklers on a typical vegetable garden?
To estimate your water savings, check how much water your sprinklers use per hour (often listed on the packaging or manufacturer’s site). Compare this to the flow rate of your drip emitters (usually in gallons per hour each), multiplied by how many emitters you use. Drip systems direct water more precisely, so you’ll generally use about half as much water, or sometimes even less, depending on how closely you space your emitters.
I see the article mentions automating the watering routine with drip irrigation. Could you recommend a simple timer or controller that’s reliable for small business gardens but not overly expensive or complicated to set up?
For small business gardens, a simple and reliable option is a battery-operated hose timer like the Orbit Single Outlet Programmable Timer. It’s easy to install—just screw it onto your faucet, set the watering schedule with a dial, and you’re set. It keeps things hassle-free without the need for complex wiring or a big investment.
I like that drip irrigation cuts down on weeding, but how often do you need to check or clean the emitters to prevent clogging, especially if you use water from a rain barrel or well?
If you’re using water from a rain barrel or well, it’s best to check and clean your drip emitters every 2–4 weeks since debris or sediment can clog them more easily than municipal water. Installing a filter before the system also helps reduce clogging and maintenance needs.
You mention that a drip system can be easily expanded as the garden evolves. Are there any specific connectors or planning tips I should keep in mind to make future expansions less complicated?
To make future expansions easier, use universal drip irrigation connectors like T-connectors, end caps, and couplers, which allow you to add new lines or branches later. When planning, leave extra mainline tubing exposed in key areas so you can tap into it as your garden grows. Also, consider using quick-connect fittings for easier changes or repairs.
Does this system need a specific water pressure to work properly, or can I connect it directly to my regular outdoor faucet without any special attachments?
You can usually connect a DIY drip irrigation system directly to a regular outdoor faucet. Most systems are designed to work with typical household water pressure. However, to avoid damaging the drip emitters, a simple pressure regulator is often recommended. This is an inexpensive attachment and ensures a consistent, gentle flow for your plants.
When planning a drip irrigation system for a vegetable patch that has plants with different water needs, does the article suggest using separate zones or is it possible to adjust emitters individually?
The article suggests that both options are possible. You can create separate zones for plants with similar water needs, which lets you control watering times for each group. Alternatively, you can adjust individual emitters by choosing ones with different flow rates, so each plant gets the right amount of water.