
Introduction
Water is the most precious resource in any home garden, yet it’s astonishing how much is wasted every season due to inefficient watering methods. Enter drip irrigation—a system renowned for its ability to deliver water directly to plant roots with minimal waste. Whether you’re growing vegetables, herbs, ornamentals, or fruit trees, a drip irrigation setup can transform your garden’s efficiency, boost crop yields, and save you both time and money. In this comprehensive step-by-step tutorial, you’ll discover how to plan, purchase, assemble, and maintain a DIY drip irrigation system tailored to your backyard’s unique layout. We’ll break down the process into clear, actionable stages, highlight common pitfalls, and provide practical tips to ensure lasting success. Even if you’ve never worked with irrigation equipment before, this guide will empower you to confidently create a system that keeps your plants thriving—without the hassle of daily hand-watering or the guilt of water waste.
Why Choose Drip Irrigation for Your Home Garden?
Efficiency and Conservation
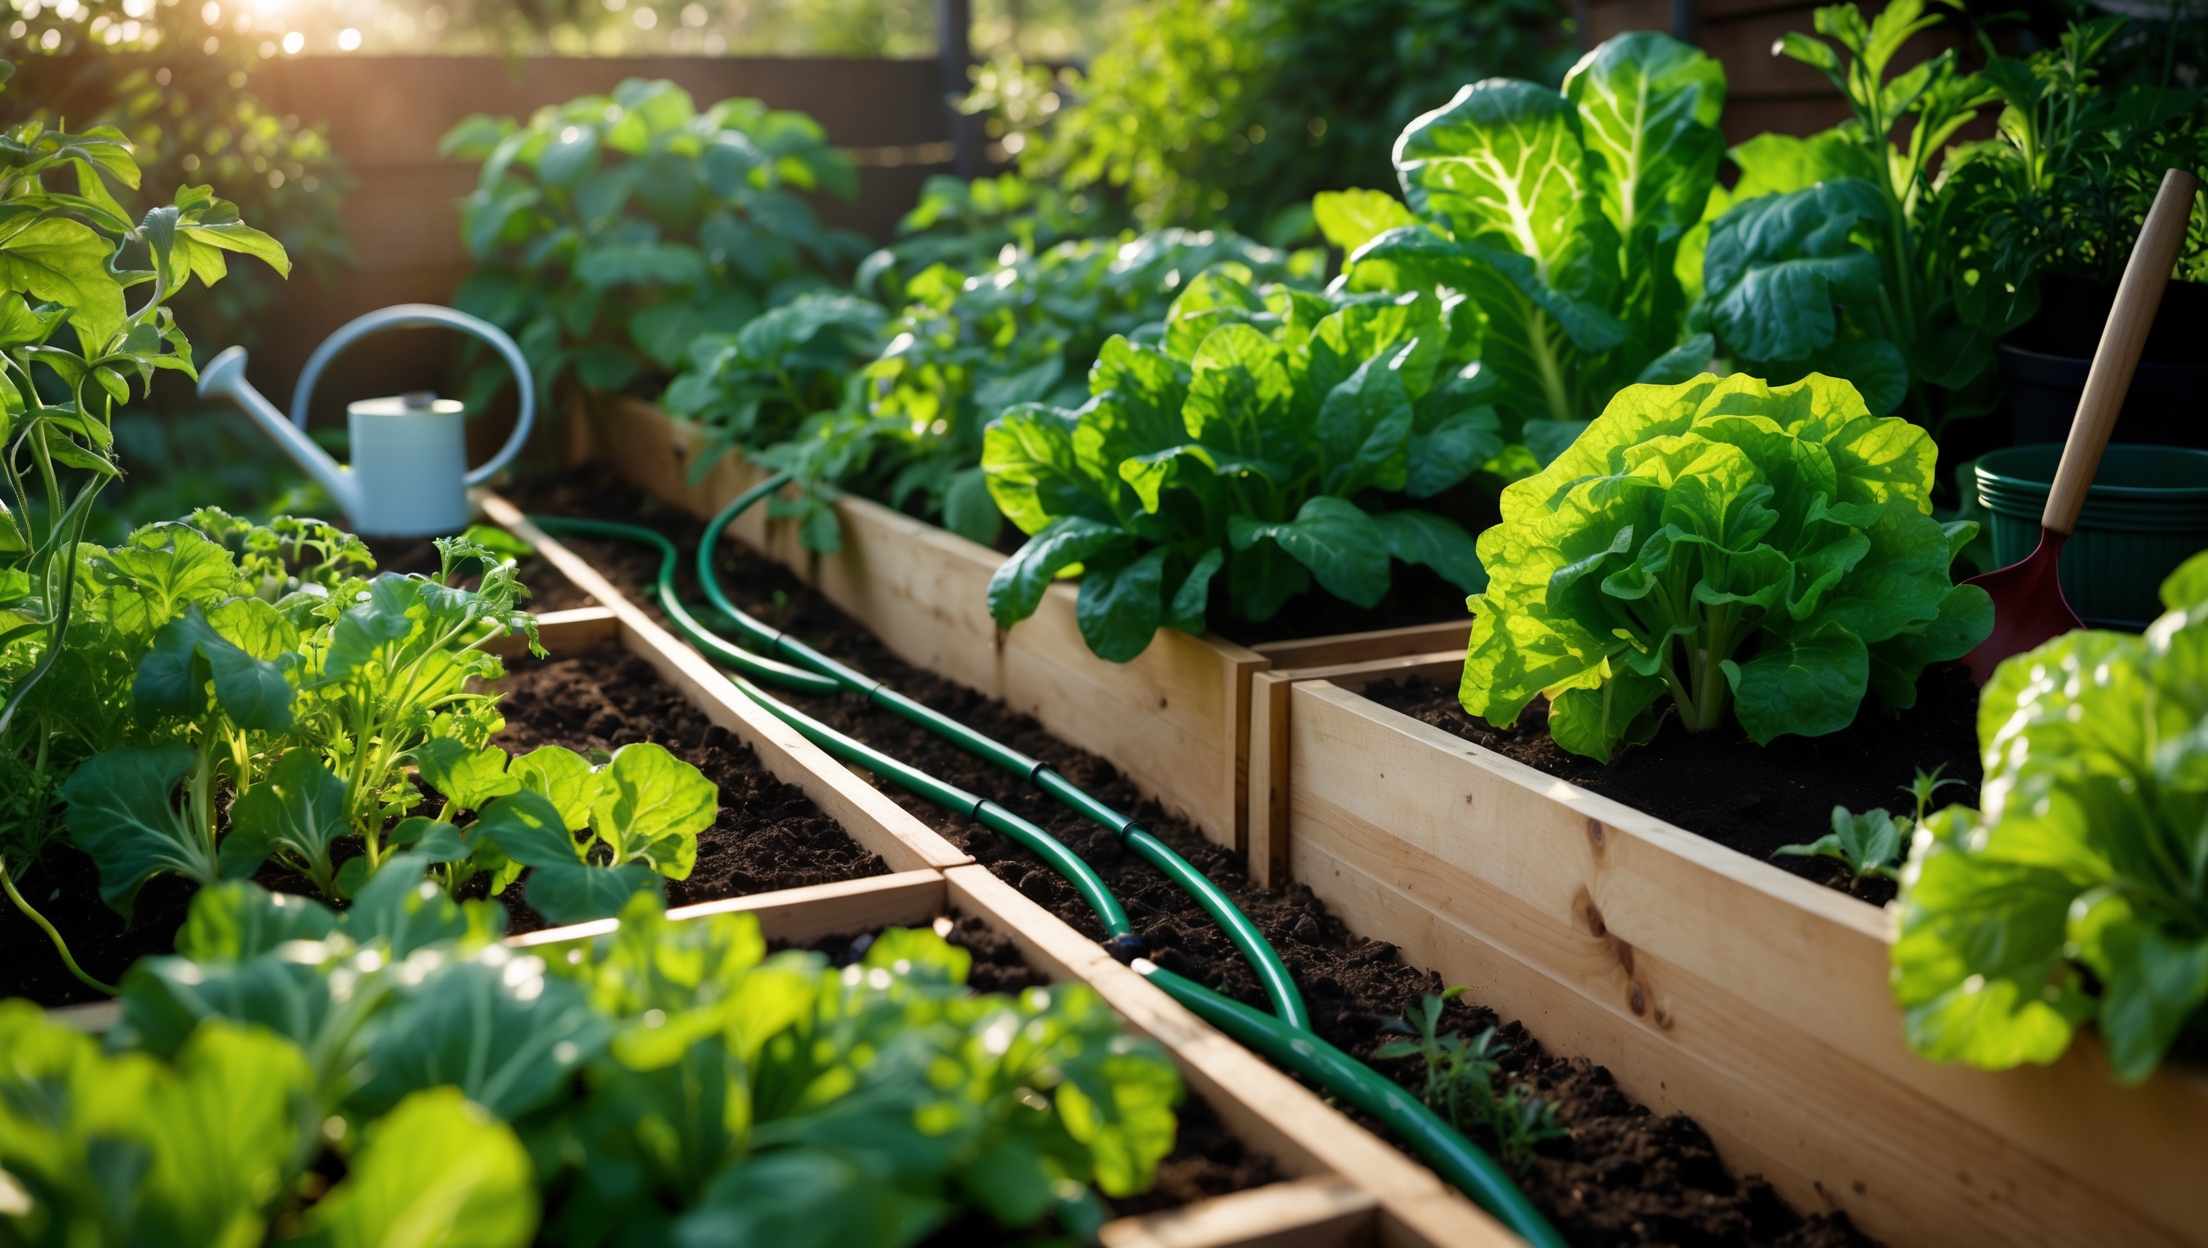
Drip irrigation delivers water directly to the soil around each plant’s root zone. Unlike sprinklers, which lose water to evaporation and runoff, drip systems can reduce water usage by up to 60%. This method is especially valuable in drought-prone regions or for gardeners who want to minimize their environmental footprint.
Healthier Plants, Fewer Weeds
By supplying water exactly where it’s needed, you’ll encourage stronger root development and reduce the risk of disease associated with wet foliage. Since only targeted spots are watered, weeds between rows receive less moisture and are less likely to thrive.
Time Savings
Once installed, a drip irrigation system can be left to run automatically with the help of a timer, freeing you from the chore of daily watering and allowing you to focus on plant care and harvest.
Planning Your Drip Irrigation System
Assessing Your Garden Layout
Begin by sketching a scale diagram of your garden beds, noting the locations of all plants, rows, and raised beds. Identify water sources—spigots or outdoor faucets—and measure the distance from these to your planting areas.
Determining Watering Needs
- Plant Spacing: Group plants with similar watering requirements together.
- Soil Type: Clay holds water longer; sandy soil drains faster and may require more frequent watering.
- Sun Exposure: Full-sun beds may need more water than shaded areas.
System Type and Coverage
- Drip Lines: Best for row crops and vegetable beds. Tubing with built-in emitters spaced at regular intervals.
- Emitter Tubing: Use individual emitters for shrubs, trees, or widely spaced plants.
- Micro-Sprayers: Useful for groundcovers or densely planted flower beds.
Essential Tools and Materials
- 1/2-inch or 5/8-inch mainline tubing (polyethylene)
- 1/4-inch drip tubing
- Assorted emitters (0.5–2 gallons per hour, as needed)
- Barbed connectors, tees, elbows, and end caps
- Pressure regulator (set to 20–30 PSI for drip systems)
- Backflow preventer (prevents contamination of household water supply)
- Filter (removes particulates that can clog emitters)
- Tubing stakes and clamps
- Battery-powered or mechanical timer (optional but highly recommended)
- Hole punch tool (for inserting emitters)
- Scissors or tubing cutter
Step-by-Step Installation Guide
Step 1: Assemble at the Water Source
Attach the following in order at your faucet or spigot:
- Backflow preventer
- Filter
- Pressure regulator
- Timer (if using)
Secure each component tightly to prevent leaks.
Step 2: Lay Out Mainline Tubing
Unroll the mainline tubing and let it warm in the sun for easier handling. Run the tubing along the perimeter of your beds or rows, following your plan. Use stakes to secure it every 3–5 feet and at corners.
Step 3: Branch Off to Plants
Use the hole punch tool to make holes in the mainline tubing at each plant or row location. Insert barbed connectors, then attach 1/4-inch tubing to reach individual plants or emitters. Cut tubing to length as needed, using sharp scissors or a tubing cutter.
Step 4: Install Emitters or Drip Lines
- For Row Crops: Lay emitter tubing along each row, securing with stakes. Connect to mainline using tees or connectors.
- For Individual Plants: Insert a drip emitter into the end of each 1/4-inch tube and stake it at the plant’s root zone.
- For Trees/Shrubs: Use two or more emitters per large plant, spaced evenly around the drip line.
Step 5: Cap and Test the System
Seal the end of each mainline and branch line with end caps or figure-eight clamps. Turn on the water slowly and observe the entire system. Check each emitter for proper flow and inspect all connections for leaks. Adjust the placement of emitters as needed to ensure even coverage.
Step 6: Bury or Mulch Tubing (Optional)
Cover exposed tubing with mulch to protect it from UV damage, reduce evaporation, and improve aesthetics. Avoid burying tubes too deeply, as this can make inspection and maintenance difficult.
Customizing for Beds, Rows, and Containers
Raised Beds
Use emitter tubing spaced 12 inches apart for dense plantings. Secure lines with stakes and ensure emitters are positioned at the base of each plant. For wide beds, run multiple parallel lines to ensure even watering.
Traditional Rows
Run mainline tubing along the end of your rows, then branch off with 1/4-inch tubing and emitters spaced every 12–18 inches along the row.
Container Gardens
Attach a short length of 1/4-inch tubing with a small emitter directly to each container. Use a pressure-compensating emitter (1 GPH is typical for pots) to ensure uniform watering regardless of elevation.
Scheduling and Automation
How Often Should You Water?
Start with 30–45 minute runs twice per week, then adjust based on plant needs and soil moisture. Check soil 2–3 inches down; if it’s dry, increase frequency or duration. In hot weather or for thirsty crops, you may need daily watering.
Using Timers
Install a battery-powered or mechanical timer to automate your watering schedule. Set it to run early in the morning for best absorption and minimal evaporation. Most timers allow flexible programming for different days and durations.
Troubleshooting Common Issues
- Emitter Clogs: Regularly flush lines and clean filters. Prevent debris by using a high-quality filter at the water source.
- Uneven Watering: Check for tubing kinks, leaks, or pressure drops at the end of long runs. Use pressure-compensating emitters if needed.
- Leaks: Ensure all connections are snug and properly inserted. Replace worn-out tubing or connectors as needed.
- Low Pressure: Avoid running too many emitters off a single line or exceeding recommended tubing lengths (typically 200 feet per mainline run).
Maintenance Best Practices
- Flush the system at the start and end of each season to remove sediment.
- Check filters monthly and clean or replace as needed.
- Inspect emitters for clogs or algae build-up. Soak clogged emitters in vinegar overnight to dissolve mineral deposits.
- Periodically check for leaks, especially after mowing or garden work.
- Replace any cracked or UV-damaged tubing promptly.
Budgeting and Cost Breakdown
Drip irrigation systems are cost-effective, especially when installed DIY. Here’s a rough breakdown for a typical 200-square-foot vegetable garden:
- Mainline tubing (50 ft): $12–$18
- 1/4-inch tubing (50 ft): $7–$10
- Emitters (20–30): $10–$15
- Connectors, stakes, end caps: $10
- Filter, pressure regulator, backflow preventer: $20–$30 (often available as a starter kit)
- Timer (optional): $25–$40
Total estimated cost: $60–$120, depending on your garden size and the components selected. Over time, water savings can quickly offset initial expenses.
Pro Tips for Long-Term Success
- Label or color-code lines if you have different zones with distinct watering needs.
- Keep a small repair kit with extra connectors and tubing on hand for quick fixes.
- Winterize your system by draining lines and storing removable components indoors in freezing climates.
- Upgrade to smart timers with soil moisture sensors for truly hands-off watering.
Conclusion
Installing a DIY drip irrigation system is one of the most impactful upgrades you can make to your home garden. With careful planning, the right components, and a weekend’s worth of effort, you’ll create a system that delivers precise moisture to each plant, reducing waste and stress while helping your garden reach its full potential. Beyond the environmental and financial benefits, drip irrigation frees up your time so you can enjoy your garden rather than fret over watering chores. The system’s modular nature allows for easy expansion or adaptation as your garden evolves, ensuring it remains a valuable asset for years to come.
Remember, even the best systems require occasional maintenance—so check emitters, clean filters, and inspect for leaks regularly. The peace of mind that comes from knowing your plants are cared for, even when you’re away, is well worth the investment. Whether you’re cultivating a lush vegetable patch, a collection of patio containers, or a vibrant landscape of ornamentals, drip irrigation is your ally in sustainable, successful gardening. Start small, learn as you go, and watch your home garden thrive with less effort and more joy!
If I’m working with a fairly limited budget, are there any tips for choosing the most essential components or ways to save money when buying the parts for a basic drip irrigation system?
Absolutely, you can keep costs down by starting with only the basics: main tubing, a pressure regulator, connectors, and a few emitters or drip lines for your key plants. Shop at local hardware stores or garden centers for bulk tubing, and consider starter kits, which often bundle essentials cheaper than buying parts separately. You can also reuse old containers as water reservoirs.
The article talks about reducing weeds since only targeted areas are watered. How precise can you get with placement, and does soil type affect how far the water spreads from the emitters?
You can get quite precise with drip emitter placement—positioning each emitter right at the base of specific plants ensures only those spots are watered. However, soil type does matter: in sandy soil, water spreads out less and drains quickly, while in clay soil, it spreads further sideways but more slowly. Testing your setup and adjusting emitter placement or flow rates helps optimize for your soil’s behavior.
Could you give some advice on choosing the right timer for automating a drip irrigation system? Are there types you recommend for beginners or features that make setup easier?
When choosing a timer for your drip irrigation system, look for a programmable digital timer—they’re usually easiest for beginners. Models with clear displays, simple controls, and preset watering options can save time. Battery-operated timers are convenient if you don’t have an outdoor power outlet nearby. Some timers also offer rain delay features, which help prevent overwatering.
Your article mentions the efficiency of using a timer with drip irrigation systems. Do you have any recommendations for reliable timers that work well with hose bib setups, and are there features I should prioritize for a backyard veggie garden in the US?
For hose bib setups, look for outdoor-rated digital hose timers like those from Orbit or Raindrip, which are reliable and easy to program. Prioritize timers with multiple watering schedules, rain delay, and manual override. Battery-powered models are convenient for most backyard veggie gardens in the US and handle weather well. Durability and ease of use are also helpful features to consider.
I have a mix of raised beds and potted plants—can the same drip irrigation system be used for both, or do I need separate setups? Any advice on connecting them all to one timer?
You can use the same drip irrigation system for both raised beds and potted plants. Just run main tubing from your water source to each area, then branch off with smaller tubing and emitters to individual beds and pots. Make sure to adjust emitter flow rates for different plant needs. Connecting everything to a single timer works well, as long as all your plants need watering on a similar schedule.
I’m curious about how you deal with water pressure differences across larger garden beds. Does the basic DIY drip setup described here work for longer rows, or do you need extra equipment to keep the flow even?
For longer rows or bigger garden beds, water pressure can drop by the time it reaches the end of the line, leading to uneven watering. The basic DIY setup works for small areas, but for larger layouts, you might need a pressure regulator or use thicker main tubing. Also, consider installing drip emitters that self-regulate pressure to help keep flow even across the whole system.
If something goes wrong, like a clogged emitter or a leak, what’s the quickest way to troubleshoot and fix it without having to redo the whole layout you helped us plan in the tutorial?
For a clogged emitter, simply unscrew it, flush it with water, and reinstall; replace it if it’s still blocked. For a leak, check the connection points and tighten or reseal as needed. Most repairs can be made by isolating the affected section, so you don’t need to redo your entire setup.
When planning out the drip irrigation system as described, how do you determine the right flow rate for emitters if you have a mix of vegetables and fruit trees? I want to avoid over or under-watering certain plants.
To determine the right emitter flow rates, consider each plant’s water needs. Fruit trees usually need higher flow emitters (2–4 gallons per hour), while vegetables often do fine with lower rates (0.5–1 gallon per hour). Group plants with similar water requirements on the same line, and adjust emitter flow rates or numbers accordingly to ensure each plant receives the right amount.
How do you recommend calculating how much tubing and connectors I’ll need if my vegetable garden layout changes a bit every season?
To handle changing layouts, sketch your garden each season and measure the distance between beds and rows you plan to irrigate. Add up these lengths for the total tubing needed, and count each split or turn for connectors. Always buy a bit extra to account for adjustments or unexpected changes.
The article mentions that drip irrigation can save up to 60% of water compared to sprinklers. Are there particular emitter types or layout strategies that maximize these savings for vegetable gardens with rows versus beds?
Yes, for vegetable gardens with rows, inline emitters or drip tape can target root zones efficiently and minimize water loss. For garden beds, use individual emitters or micro-sprayers close to each plant. Spacing emitters appropriately and running lines close to plant bases helps maximize water savings in either setup.
When it comes to planning the system, I’m not sure how to estimate how much tubing and how many emitters I’ll need for my garden’s layout. Do you have any tips or formulas to help with that?
To estimate tubing, sketch your garden and measure the distance from your water source to each plant or row; sum these lengths for total tubing needed, adding a bit extra for corners. For emitters, count each plant or group of plants needing water—typically, one emitter per small plant and two for larger ones. Reviewing your plant spacing will help ensure accurate numbers.
If I have a mix of raised beds and containers in my backyard, would the same drip irrigation layout work for both or do I need to plan separate systems?
You can use one drip irrigation system for both raised beds and containers, but you’ll need to adjust the layout. Run a main supply line to both areas, then branch off with smaller tubing to each bed and container. Make sure each has emitters suited to its size and water needs.
When assessing my garden layout as suggested, should I factor in future expansion or changes, or is it better to just focus on what’s currently planted? I’d like to avoid having to redo the whole system if I add more beds.
It’s a good idea to plan for future expansion when assessing your garden layout. Designing your drip irrigation system with extra capacity or accessible connection points now can save you time and effort if you add more beds later. This way, you won’t have to redo the entire setup.
Does your tutorial include any specific recommendations for timers or automation devices compatible with DIY drip irrigation systems, especially for gardeners who want to minimize daily maintenance?
Yes, the tutorial suggests using programmable hose-end timers as a practical option for automating DIY drip irrigation systems. These devices can be set to water your garden at specific times and durations, helping you reduce daily maintenance. The article highlights compatibility with most standard hose and drip system setups, but always check product specifications to ensure they meet your garden’s needs.
I’m wondering about the initial investment for setting up a basic drip irrigation system as described here. What is a reasonable budget for a medium-sized vegetable garden, and are there particular brands or materials you recommend?
For a medium-sized vegetable garden, you can expect to spend around $50 to $150 for a basic drip irrigation setup, depending on your layout and water source. Many gardeners find Rain Bird and DIG kits reliable and easy to install. Look for UV-resistant tubing and quality emitters to ensure durability.
I’m new to irrigation and a bit nervous about the maintenance part. Could you give more examples of what routine upkeep looks like for a DIY drip system, especially during the growing season?
Routine upkeep for a DIY drip system involves regularly checking for clogged emitters, cleaning filters, looking for leaks or broken lines, and making sure all connections remain tight. During the growing season, it’s helpful to flush the system every few weeks, inspect for damage from garden tools or animals, and adjust emitter placement as plants grow.
If my garden layout changes from season to season, is it easy to reconfigure a DIY drip irrigation system, or will I need to buy new parts each time?
A DIY drip irrigation system is designed to be flexible, so you can usually reconfigure it as your garden layout changes. Most of the tubing and emitters are reusable. You might only need a few extra connectors or end caps if your layout gets much larger or more complex, but you won’t have to buy a whole new system each time.
The article mentions reducing weeds by only watering targeted spots. Have you noticed if drip irrigation makes a big difference with weeds compared to using sprinklers in vegetable gardens, or does it just help a little?
Drip irrigation usually does make a noticeable difference in weed control compared to sprinklers. Since water goes directly to your plants’ roots, fewer weed seeds in the surrounding soil get moisture, so they’re less likely to sprout. Most gardeners find that weeds are much less of a problem after switching to drip.
For someone putting this together in a medium-sized vegetable garden, do you have any good tips on keeping the initial costs down? Are there places where it makes sense to buy higher end parts versus cheaper ones?
To keep costs down, consider buying basic tubing and connectors in bulk, which are often cheaper by the roll or pack. Save on emitters by using simple adjustable drippers instead of more complex models. Invest a bit more in a quality timer and main filter, as these parts are crucial for long-term reliability. Repurposing old hoses as main lines can also help lower expenses.
Could you explain how to integrate a timer with a DIY drip system? Are there specific brands or features you’ve found essential for reliability, especially in areas with unpredictable weather?
To integrate a timer, simply attach it between your outdoor faucet and the drip system’s main hose. Look for timers with rain delay and moisture sensor compatibility for reliability. Brands like Orbit and Rain Bird offer durable options, and weatherproof housing is helpful if you get sudden rain or temperature changes.
If my garden layout changes each season, is there an efficient way to modify or expand the drip irrigation system without replacing most of the components every year?
Absolutely, you can design your drip irrigation system for flexibility. Use quick-connect fittings and modular tubing layouts, which make it simple to reroute lines or add emitters as your garden changes. This way, you only need to adjust the layout rather than replace the whole system each season.
What is the typical upfront cost for all the basic supplies recommended in this tutorial, and are there any reliable budget-friendly kits you suggest for a small vegetable garden?
The typical upfront cost for basic drip irrigation supplies mentioned in the tutorial is around $30 to $70, depending on your garden size and local prices. For a small vegetable garden, budget-friendly kits from brands like Raindrip and Rain Bird are well-reviewed and often available at home improvement stores. These kits usually include all the essentials and are easy to expand if your garden grows.
I noticed you talked about using a timer for automatic watering. Is there a specific type or brand you recommend that’s easy for beginners to set up and works well with most DIY drip kits?
A battery-operated hose timer is usually the easiest for beginners. Look for digital models that have simple controls and clear displays—brands like Orbit and Raindrip are popular for their reliability and user-friendly setup. Most standard timers connect directly to your outdoor faucet and work well with common DIY drip irrigation kits.
When planning the spacing for drip emitters, is there a recommended distance for different types of plants, like vegetables versus ornamentals, or does it mostly depend on individual plant requirements?
Emitter spacing does vary depending on what you’re growing. For vegetables, emitters are often placed 12 to 18 inches apart, while ornamentals can usually have emitters spaced 18 to 24 inches apart. However, it’s best to also consider each plant’s individual water needs and how widely their roots spread.
When you mention using a timer for automating the drip irrigation system, do you have any recommendations for affordable timers that work well with basic DIY setups?
For a basic DIY drip irrigation setup, mechanical hose timers are a budget-friendly option and easy to use. Brands like Orbit and Raindrip offer simple, durable models that connect directly to your outdoor faucet. Digital timers are also available at a slightly higher price, offering more precise scheduling if you need it.
Could you explain how to decide where to place the main water line if my garden beds are a mix of raised and in-ground areas? The article mentions assessing layout, but I’m unsure about mixed configurations.
For mixed gardens with raised and in-ground beds, place the main water line along the most central or accessible path that runs by both bed types. Try to minimize sharp turns and keep the line close enough so you can branch off easily to each area with shorter tubing. This helps ensure even water distribution and makes future adjustments simpler.
If I plan to expand my garden next season, is it better to install a larger system now or can most DIY drip irrigation setups be easily modified later on?
Most DIY drip irrigation systems are designed to be modular, so you can easily expand them later by adding more tubing and emitters. If you’re not sure about your future layout, it’s usually fine to start with what you need now and simply modify the setup as your garden grows.
When putting together a DIY drip irrigation system like the one described, how do you recommend handling zones with very different plant watering needs, like vegetables versus ornamental shrubs? Is it better to create separate lines or can you adjust the emitters?
For areas with very different watering needs, it’s best to set up separate lines or zones for each plant group, such as vegetables and ornamental shrubs. This allows you to control watering times and frequencies more precisely. While you can adjust emitters for some flexibility, separate zones give you the most control and prevent over- or under-watering.
If my backyard has a lot of different plant types, like veggies and fruit trees in the same area, can I use one drip irrigation system for all of them, or do I need separate setups for different water needs?
You can use one drip irrigation system for your mixed backyard, but it’s important to group plants with similar water needs on the same line or zone. Use separate drip lines, emitters, or adjustable flow emitters to fine-tune water delivery for veggies, fruit trees, and other plant types. This way, you can meet each plant group’s specific requirements without needing entirely separate systems.
Can you recommend what kind of timer works best for a home drip irrigation system? I’d like to automate the watering, but I’m not sure how to make sure it doesn’t over- or under-water my plants.
A digital hose timer with customizable schedules is ideal for home drip irrigation. Look for one with multiple daily settings and rain delay features, so you can adjust watering times based on your plants’ needs and local weather. Be sure to test and monitor your system at first to fine-tune the schedule.
If I have different types of plants with varying water needs, do I need separate drip lines for each, or is there a way to adjust water flow to each plant within one system?
You don’t need separate drip lines for each plant type. You can use adjustable emitters or different flow-rate emitters along the same drip line to control how much water each plant receives. This lets you match the water output to each plant’s needs without setting up multiple lines.
When planning the layout for a drip system, how do you account for changes in water pressure if your garden has beds at different elevations? I’d love some tips on avoiding uneven watering in those situations.
Elevation changes can affect water pressure, causing higher beds to get less water and lower beds to get more. To avoid uneven watering, consider using pressure-compensating emitters, which deliver a consistent flow regardless of elevation. Also, run your main supply line along the highest point and branch off to lower beds, or use multiple zones so you can control each area separately.
You mention the system helps with reducing water waste and weeds. Did you notice a big difference in your water bill or weed growth after switching to drip irrigation? Wondering if the savings are noticeable in a typical backyard garden.
After switching to drip irrigation, I did see a noticeable drop in my water bill, especially during the summer months when watering needs are highest. Weed growth also decreased because water goes straight to the plant roots instead of the open soil, making it harder for weeds to thrive. For a typical backyard garden, you should expect both water savings and less weeding effort over time.
When you mention using a timer for automation, do you have recommendations on how to determine the optimal watering schedule for vegetables vs. ornamentals? I’m not sure how to match the timing to my plants’ needs.
To set the optimal schedule, consider the needs of each plant type. Vegetables usually need more frequent watering—try starting with 20–30 minutes every other day, adjusting for weather and soil. Ornamentals typically require less, so 15–20 minutes two or three times per week often works. Monitor soil moisture and plant health, then tweak the timer as needed.
If I live in an area where we sometimes have heavy rainfall, would a drip irrigation system make sense, or should I be worried about overwatering my garden?
A drip irrigation system can still be very useful, even in areas with heavy rainfall. You can add a rain sensor or manually turn off the system during rainy periods to prevent overwatering. This way, the system only waters your garden when it’s actually needed.
I noticed you mention adding a timer for automatic watering. Is there a particular type or brand of timer you recommend for beginners, and does it need to be compatible with certain drip system kits?
For beginners, a simple battery-operated hose timer works well, and brands like Orbit or Rain Bird are user-friendly and reliable. Most timers connect directly to a standard outdoor faucet and work with nearly any drip irrigation kit, as long as they fit standard hose threads. Just check that the timer matches your hose size and water pressure requirements.
In the planning section, do you recommend a specific type of tubing or emitter size for gardens with both vegetables and ornamentals, or should those be kept on separate lines for best results?
For gardens with both vegetables and ornamentals, it’s best to use separate lines if possible, since different plants often have unique water needs. Vegetable beds typically benefit from 1/2-inch tubing with emitters delivering 1 gallon per hour, while ornamentals may need less frequent watering with smaller emitters—like 0.5 gallons per hour. This approach lets you customize watering for each area and achieve better results.
The article highlights water savings with drip systems, but are there any specific components or layout tips you recommend for gardens with oddly-shaped or sloped beds to avoid uneven watering?
For oddly-shaped or sloped beds, use pressure-compensating emitters to ensure even water flow throughout the system. Flexible tubing and adjustable emitters can help you adapt to curves and corners. On slopes, running the main supply line along the highest point and branching down helps prevent pooling and dry spots. Consider adding check valves to prevent low-end drainage.
What are some common issues that can come up after installing a drip system, like leaks or clogged emitters, and how can I prevent or quickly fix those problems?
After installing a drip system, leaks often happen at loose connections, so check all fittings and tighten them as needed. Clogged emitters are usually caused by debris; using a filter at your water source and flushing the lines regularly helps prevent this. If emitters clog, remove and rinse them or replace if needed. Inspect your system periodically to catch small problems before they grow.
I’m interested in setting up a DIY drip irrigation system like you described, but I’m not sure how to handle gardens with both raised beds and in-ground rows. Do you have recommendations for adapting the layout and tubing to work efficiently in mixed setups?
For gardens with both raised beds and in-ground rows, use a main supply line (like 1/2-inch tubing) running along a central path. From this line, branch off with 1/4-inch tubing to each bed and row. Raised beds may need looped tubing, while in-ground rows often work well with straight lines. Add separate shut-off valves for each section to control water flow as needed.
If my garden has both raised beds and in-ground rows, will I need separate drip lines for each or is there a way to combine them into one system efficiently?
You can definitely combine both raised beds and in-ground rows into a single drip irrigation system. Use a main supply line, then branch off with separate drip lines or tubing to each area. Just ensure each section gets the right amount of water by adjusting emitters or flow rates as needed.
Would this drip irrigation method work well for raised garden beds, or does it need to be adjusted compared to in-ground gardens? My backyard has several small raised beds and I’d like to know what to consider.
You can definitely use this drip irrigation method for raised garden beds. The main adjustment is to arrange the tubing so that emitters or drip lines run along each raised bed, making sure all plants get coverage. You might also need shorter tubing runs since raised beds are usually more compact. Just ensure the water pressure is balanced across the system.
Can you clarify if the drip irrigation system works well with raised beds, or will I need special connectors compared to a traditional in-ground garden layout?
Drip irrigation systems work very well with raised beds. You typically won’t need special connectors—standard drip lines and fittings should fit both raised beds and in-ground gardens. Just measure your bed dimensions and cut the tubing accordingly. If your raised beds have uniquely thick sides, longer stakes or risers might help secure the lines neatly.
Could you give a ballpark estimate of the total cost to install a drip irrigation system for a medium-sized home garden, including all the parts and tools mentioned in your guide?
For a medium-sized home garden, you can expect to spend about $60 to $120 for a complete DIY drip irrigation setup. This includes tubing, emitters, connectors, a filter, pressure regulator, timer (optional), and basic tools like a hole punch and scissors. Prices vary based on garden size and brand choices.
You mention that drip irrigation can reduce water usage by up to 60%. How long does it usually take for those savings to offset the initial cost of installing the system for a medium-sized backyard?
For a medium-sized backyard, most homeowners see the initial cost of a DIY drip irrigation system offset within one to two growing seasons. The exact time depends on local water rates and how much you currently water your garden, but significant reductions in water bills usually make up for the upfront investment fairly quickly.
If my garden layout changes each season, how easy is it to reconfigure a DIY drip irrigation system like the one described here? Are there certain components I should use so I can move things around without buying a whole new setup?
Reconfiguring a DIY drip irrigation system is actually quite simple if you use flexible tubing, quick-connect fittings, and adjustable emitters as described in the tutorial. These components can be disconnected and repositioned easily, letting you adapt the system each season without needing to buy everything new. Save any extra connectors or stakes for future layout changes.
If I want to automate my drip system with a timer, do you recommend any particular brands or features to look for that are easy for beginners to use?
When choosing a timer for your drip irrigation system, look for simple digital timers with clear displays and easy programming, such as Orbit and Rain Bird models. Features like multiple start times, manual override, and weather resistance are helpful. Battery-operated options are great for beginners and don’t require wiring.
If I want to automate the system with a timer, are there any weather or seasonal tips for adjusting the watering schedule to avoid over- or under-watering my garden?
Yes, using a timer is a great way to automate watering, but you’ll want to adjust the schedule based on weather and season. During hot, dry periods, increase the frequency or duration, but reduce watering during rainy spells or cooler months. Early mornings or late evenings are best to minimize evaporation. Also, check soil moisture regularly to ensure your plants are getting just the right amount.
You mention using timers to automate watering—do you have any tips for selecting a timer that can handle irregular watering schedules, like for different plant types in the same system?
Look for a programmable irrigation timer that offers multiple independent zones and customizable schedules. This lets you set different watering times and frequencies for each group of plants. Digital timers with flexible programming are ideal—they often allow you to tailor watering days, duration, and even skip days for each zone, making it easy to accommodate various plant needs.
If I want to start small and just set up drip irrigation for a few raised beds, any recommendations for a budget-friendly starter kit or brands that are easy for beginners to use?
For a small setup with just a few raised beds, look for basic drip irrigation starter kits from brands like Raindrip, DIG, or Rain Bird. These usually include tubing, emitters, connectors, and a simple filter. They’re beginner-friendly, easy to expand later, and widely available at garden centers or online. Make sure the kit covers the number of beds you have.
For gardeners on a budget, are there specific drip irrigation kit brands or materials that are both reliable and affordable here in the US? I’m hoping to set something up without breaking the bank.
For budget-friendly yet reliable drip irrigation kits in the US, brands like Rain Bird, DIG, and Orbit are popular choices. These often offer starter kits at local hardware stores or online. You can also save by buying tubing and emitters separately and assembling your own system, especially for smaller gardens.
About the timers you mentioned—are there affordable options that are reliable for someone on a tight budget, and how complicated is the installation if I’ve never worked with irrigation equipment before?
Yes, there are affordable and reliable timers designed for beginners. Many basic battery-operated timers cost around $20–$30 at most garden centers. Installing them is straightforward: just screw the timer onto your outdoor faucet, then attach your hose or drip line. Most models have simple dial or button controls, so no technical experience is needed.
I’m really interested in trying drip irrigation for my vegetable garden, but I have a mix of raised beds and pots. Does your tutorial cover how to adapt the system for different types of garden setups like that?
Yes, the tutorial explains how to adapt a drip irrigation system for both raised beds and container gardens like pots. It covers how to run main lines and then branch off with smaller tubing or emitters to reach each area, so you can customize the setup to fit your garden’s layout.
You mentioned the importance of timers for automating the system. Are there specific types or features of timers you recommend for beginners, especially for gardens that don’t have a consistent daily schedule?
For beginners, digital hose timers are very user-friendly and often offer flexible programming. Look for timers with multiple start times and adjustable watering durations. Models with rain delay features are helpful if your garden doesn’t need daily watering or if the weather is unpredictable.
The article mentions using a timer for automation—do you have advice on choosing between mechanical and digital timers, especially if I want to set different watering schedules for separate zones in my garden?
If you want to set different watering schedules for separate zones, a digital timer is the better choice. Digital timers often let you program multiple zones with custom start times and durations, while mechanical timers usually control just one zone at a time and offer limited scheduling flexibility.
You mentioned that drip irrigation can reduce water usage by up to 60%. Have you noticed much difference in plant health or yield compared to using sprinklers, especially for vegetables and herbs?
Switching to drip irrigation, many gardeners notice not only water savings but also healthier plants and better yields, especially for vegetables and herbs. Drip systems deliver water directly to the roots, reducing leaf diseases and weed growth that can occur with sprinklers. Overall, plants tend to thrive with more consistent moisture.
Can you offer any tips on keeping the total cost of a starter drip irrigation system low, particularly for someone with a medium-sized vegetable patch?
To keep costs down, consider using basic poly tubing and manual emitters instead of pricier kits. Repurpose items like old milk jugs as gravity-fed water reservoirs. Buy supplies in bulk to reduce per-foot tubing costs, and only water essential areas. Start simple and expand your system gradually as needed.
If I want to add a timer for automatic watering, are there specific types you recommend that are beginner-friendly and reliable for home gardens?
For home gardens, battery-operated hose timers are a popular and beginner-friendly option. Brands like Orbit and Raindrip offer models with easy-to-use digital controls and straightforward installation. Look for timers with clear programming buttons and weather-resistant features to ensure reliability outdoors.
You mentioned using a timer for automation. Are there any affordable timers you recommend that work well with basic DIY drip irrigation kits, especially for someone who wants to keep costs down?
For budget-friendly drip irrigation setups, mechanical hose timers are a great choice—they’re affordable, easy to use, and don’t require batteries or electricity. Brands like Orbit and Raindrip offer simple manual dial timers for around $10–$20. These work with standard hose connections and are reliable for most DIY kits.
For someone who’s never installed any type of irrigation before, do you recommend starting with a full kit or buying the components individually as described in the tutorial? I’m a bit worried about compatibility and making sure I get everything needed.
If you’re new to irrigation setups, starting with a complete kit can make things much simpler. Kits ensure all the essential components are compatible and included, saving you the guesswork. Once you’re comfortable, you can customize or expand your system with individual parts as needed.
In the part about reducing weeds thanks to targeted watering, is there anything I should watch out for when installing the lines so that water doesn’t accidentally reach areas where I don’t want plants to grow?
When installing your drip lines, make sure the emitters are placed only near the base of your desired plants. Avoid positioning lines or emitters near bare soil or paths where you don’t want plants. Double-check for leaks or loose connections that could cause unintended watering in unwanted areas.
The excerpt says even beginners can handle the setup, but are there specific tips or common mistakes highlighted for first-time installers, especially when laying out the hoses around curved beds or irregular shapes?
Yes, the article points out a few helpful tips for beginners. When laying hoses around curves or irregular beds, it suggests using flexible tubing and securing it with stakes to maintain the shape. It also warns against pulling the hose too tight, which can cause kinks and uneven watering. Making gentle bends and testing water flow before finalizing placement are also recommended.
You mention that drip irrigation conserves water and reduces weeds, but what’s the best way to prevent clogging in the emitters over time, especially if my water is pretty hard?
To prevent emitter clogging, especially with hard water, it’s helpful to install a filter on the main water line and regularly flush the system. You might also use pressure regulators and periodically soak emitters in vinegar to dissolve mineral buildup. Checking and cleaning filters every few weeks keeps everything running smoothly.
I noticed you mentioned timers for automation—do you recommend a particular type for first-time DIYers, and are there important features I should look for if I want to water at different times on different days?
A digital hose-end timer is a solid choice for beginners since it’s easy to program and widely available. Look for a model that lets you set multiple schedules per week, allowing different watering times on specific days. Features like a clear display, manual override, and rain delay are also very helpful.
You mentioned using a timer for automation—are there affordable timer models you’d recommend for beginners, and do they require any special wiring or can they just attach to a regular outdoor spigot?
Many affordable hose timers are perfect for beginners and simply screw onto a standard outdoor spigot—no special wiring required. Basic models from brands like Orbit and Melnor are reliable and easy to program. Just attach the timer between your spigot and the drip system, set the schedule, and you’re set.
I’m curious, does creating a layout sketch for the irrigation system mean I have to measure all my garden beds? What advice do you have for someone with an irregular, non-rectangular garden shape?
You don’t have to measure every inch, but having basic measurements of each garden bed helps plan hose lengths and emitter placement, especially in an irregular garden. For non-rectangular shapes, sketch the overall outline and note distances between key points. This makes it easier to estimate materials and avoid under- or over-ordering supplies.
I’m in a drought-prone area and worried about water pressure drops—do you mention if most DIY drip kits work well on low-pressure lines, or should I look for specific emitters?
The article briefly notes that most DIY drip kits can work at lower pressures, but if you’re in a drought-prone area with especially low pressure, it’s a good idea to look for pressure-compensating emitters. These emitters ensure consistent water flow even when pressure drops, which can help your system work reliably.
Could you go into more detail on how often the drip irrigation system needs maintenance and what common issues I should look out for once it’s installed?
A drip irrigation system typically requires a quick check every couple of weeks during the growing season. Look out for clogged emitters, leaks in the tubing, or uneven water flow. Filters should be cleaned regularly, and flush the lines at least once a month to prevent buildup. Also, inspect connections and fittings to ensure everything stays tight and secure.
If my garden has a slight slope, are there extra steps I should follow during installation to ensure even water distribution, or will the basic setup described in the tutorial be sufficient?
Since your garden has a slight slope, you might notice water tends to flow downhill and collect at lower points, leading to uneven distribution. To address this, install pressure-compensating emitters, which provide a consistent flow even on slopes. Also, start laying the mainline tubing from the highest point and move downward, checking for leaks or pooling as you install. These adjustments will help ensure your plants receive even watering.
If the system is left to run automatically with a timer, how do I troubleshoot uneven watering, like if some plants seem too dry or too wet after a week or two of use?
To address uneven watering, first check for clogged or partially blocked emitters and clean them if needed. Make sure all emitters are distributing water at a consistent rate. Inspect hose connections for leaks, and verify your system’s water pressure matches the recommended range for your emitters. Adjust emitter placement or flow rate for plants that need more or less water.
I’m concerned about the initial cost of setting up a DIY drip irrigation system compared to just using a hose or soaker hoses. Can you give a rough estimate of what a basic setup would cost for a small backyard vegetable garden?
For a small backyard vegetable garden, a basic DIY drip irrigation kit usually costs between $25 and $60, depending on the brand and coverage area. This includes tubing, emitters, connectors, and a filter. While this upfront cost is higher than a soaker hose or basic hose, drip systems can save water and reduce labor over time, making them more cost-effective in the long run.
You mention drip systems helping to reduce weeds by only watering targeted spots. Does that mean I need to lay the hoses right up close to each plant, or can I run a line down a whole row and still see weed reduction?
You don’t have to lay the hose right up against each plant, but the closer the emitters are to your plants, the more targeted the watering will be—helping keep nearby soil drier and discouraging weeds. Running a line down a row with emitters placed near each plant will still provide weed reduction compared to overhead watering.
The article notes that drip irrigation can reduce water usage by about 60 percent compared to sprinklers. Are there specific tips for setting up the system to maximize water conservation, especially in a garden with a mix of vegetables and ornamentals?
To maximize water conservation, group plants with similar water needs together and adjust emitter flow rates accordingly. Use pressure-compensating emitters for even water distribution, and place emitters close to the plant roots. Consider using a timer to water early in the morning, reducing evaporation. Mulching around plants also helps retain moisture.
The article says timers make drip systems pretty low maintenance, but what kind of regular maintenance or troubleshooting should I expect once everything’s up and running? Are there common issues with DIY setups I should watch for?
Once your drip irrigation system is running, check the emitters regularly to make sure they’re not clogged with dirt or mineral deposits. Inspect hoses for leaks or cracks, especially around fittings. Flush the system a few times each season to clear out debris. Also, watch for uneven watering, which could signal blockages or pressure issues. These are some of the most common DIY drip system concerns.
For someone on a tight budget, are there any tips in your step-by-step process where you can cut costs without sacrificing efficiency? For example, are there certain components that can be DIY-ed or reused?
You can save money by using recycled plastic bottles for drip emitters or repurposing old garden hoses instead of buying new tubing. Also, basic connectors and stakes can be made from household items like skewers or wire. Just make sure the reused components are clean and free from chemicals to keep your system safe and effective.
When it comes to setting up a timer for the drip system, is there a certain brand or type that works best for beginners, or are all timers pretty much the same for small home gardens?
For beginners, simple mechanical or digital hose timers from well-known brands like Orbit or Rain Bird tend to work well and are very user-friendly for small home gardens. Most basic timers offer similar features such as set-and-forget schedules and easy installation. Just make sure the timer is compatible with your hose and water pressure, and you should be set.
I have a mix of vegetables and fruit trees in my backyard. Is it possible to set up one drip irrigation system for both, or should I plan separate lines since their watering needs are a bit different?
You can use a single drip irrigation system for both vegetables and fruit trees by setting up different zones or lines with separate emitters. This lets you adjust the water flow for each area. Fruit trees usually need deeper, less frequent watering, while vegetables benefit from more regular, lighter watering. Using separate valves or timers for each zone will help you tailor the watering schedule to suit both types of plants.
Are there any troubleshooting tips if I notice some plants are getting too much water while others in the same system seem too dry? I want to make sure the water is distributed evenly to all my vegetables.
Uneven watering usually means there are differences in water pressure or clogged emitters along the drip line. Check that all emitters are free of blockages, and make sure your system is level so water can flow consistently. You can install pressure-compensating emitters for more uniform output, and adjusting the placement or number of emitters for each plant can also help balance the distribution.
I’m trying to figure out what the typical upfront cost looks like for a basic setup as described here. Are there budget-friendly starter kits you recommend, or specific parts that aren’t worth skimping on for beginners?
A basic DIY drip irrigation setup for a small garden typically costs between $30 and $60 if you use a starter kit, which usually includes tubing, emitters, connectors, and sometimes a filter. Kits from hardware stores or garden centers are convenient for beginners and often good value. It’s important not to cut corners on the pressure regulator and filter, as these parts help the system last longer and work reliably.
I’m wondering how often I’ll need to clean or maintain the drip irrigation system after installation to keep it running smoothly. Can you share some tips or common issues to watch out for with clogs or leaks?
It’s best to check and clean your drip irrigation system every month, especially filters and emitters where clogs are common. Watch for reduced water flow or dry spots, which can signal blockages or leaks. Flushing the lines with water and inspecting connections regularly helps keep the system running smoothly.
Could you elaborate on what kind of timer you suggest for automating the system, and whether a battery-operated or solar-powered model works better for a typical home garden?
For most home gardens, a battery-operated timer is a reliable and straightforward choice. They’re easy to install, typically last a season or more on standard batteries, and don’t require any wiring. Solar-powered timers are eco-friendly but often need consistent sunlight to work well. If your garden is shaded or you want a plug-and-play option, a battery timer is usually the better fit.
Does your step-by-step guide explain how to choose the right type of tubing and emitters for different types of plants, like vegetables versus ornamentals? I want to make sure I don’t over- or underwater specific areas of my garden.
Yes, the guide covers how to select the appropriate tubing diameter and emitter flow rates based on the needs of different plants. It explains which emitters are best for vegetables, ornamentals, and other plant types, so you can tailor water delivery and avoid over- or under-watering specific areas.
I’m curious how you decide on the best spacing for the drip lines when dealing with raised beds that have a mix of vegetables and herbs. Do you recommend running separate lines for crops with higher water needs?
Spacing for drip lines in mixed raised beds usually depends on plant type and bed width. For most vegetables and herbs, lines are placed 12–18 inches apart. Crops with higher water needs, like tomatoes or basil, may benefit from an extra drip line or emitters closer together. Running separate lines for thirsty plants can help fine-tune watering, but you can also use adjustable emitters if using one system.
The article mentions using a timer to automate watering. Do you have recommendations on what kind of timer works best for a DIY setup and how frequently I should schedule watering for different types of crops?
For DIY drip irrigation, a battery-operated hose timer is easy to install and reliable. Digital timers let you adjust schedules easily. Watering frequency depends on your crops: leafy greens usually need daily watering, while tomatoes and peppers do well with 2-3 times per week. Always adjust for weather and soil moisture.
If my garden layout changes each year, like rotating vegetable beds, is it easy to adjust or move the drip tubing, or do I need to buy new parts every time?
You can definitely adjust or move the drip tubing each year as your garden layout changes. Most systems are designed to be flexible and reusable. Simply lift the tubing, redirect it, and reposition emitters or connectors as needed. You usually won’t need to buy new parts unless you expand your system or something wears out.
You mentioned using a timer for automatic watering—does the tutorial cover recommendations for affordable yet reliable timers, and is it easy to integrate one into the system for someone new to irrigation?
The tutorial does mention affordable and reliable timer options, with examples that are user-friendly for beginners. It also explains how to connect a timer to your drip irrigation system, making integration straightforward even if you are new to irrigation setups.
If I live in a region with occasional freezing temperatures, what steps should I take after installing the drip system to make sure it survives the winter?
To protect your drip irrigation system during freezing temperatures, drain all water from the lines after your last watering in fall. Remove and store any external timers or filters indoors. If possible, cap or cover exposed ends to keep debris out, and consider using insulation on above-ground sections.
What kind of budget should I expect for materials when setting up a drip irrigation system for a medium-sized backyard garden, and are there any hidden costs I should plan for during installation?
For a medium-sized backyard garden, you can expect to spend between $50 and $150 on materials like tubing, emitters, connectors, and a timer. Additional costs to consider include tools for cutting tubing, hose adapters, and possibly a pressure regulator. If your water source is far from your garden, you might need extra tubing, which can increase costs slightly.
If I want to automate the system using a timer, do you suggest battery-powered ones or those that connect to a smart home system? I’m curious about reliability and ease of setup for a typical backyard.
For most typical backyards, battery-powered timers are simple to set up and quite reliable, especially if you want a straightforward solution without wiring or WiFi setup. Smart home-connected timers offer more control and scheduling flexibility, but they can be a bit more complex to install and might depend on a stable WiFi connection. If you prefer ease of use and minimal maintenance, a battery-powered timer would be a solid choice.
You mention that drip systems can reduce water usage by up to 60%. Do you have any recommendations for timers or automation tools compatible with basic DIY setups so I can maximize both efficiency and time savings?
Absolutely! For basic DIY drip irrigation, battery-operated hose timers are a great choice. Brands like Orbit, Raindrip, and Melnor offer user-friendly models that attach directly to outdoor faucets. Look for timers with customizable scheduling and rain delay features. Some even support smartphone control if you prefer more automation.
The article mentions saving money with drip irrigation, but I’m wondering what the typical upfront costs are for a small backyard setup and if there are good budget-friendly options for beginners.
For a small backyard garden, upfront costs for a drip irrigation kit typically range from $25 to $60, depending on the size and features. There are many beginner-friendly starter kits available at hardware stores and online that include everything you need. These kits are usually more budget-friendly than buying individual parts.
When planning the layout for a drip system, how do you determine the best spacing for emitters if you have a mix of closely spaced vegetables and larger fruit trees in one garden?
Emitter spacing depends on the water needs and root zones of your plants. For closely spaced vegetables, place emitters about 12 inches apart along rows. For larger fruit trees, use 2 to 4 emitters evenly spaced around the drip line (the area under the outermost branches). Adjust based on your soil type and specific plant needs to ensure even coverage.
Do you have any recommendations for budget-friendly timers that work well with DIY drip irrigation setups? Automating watering sounds helpful, but I want to keep costs reasonable as a small business owner.
There are several affordable timers that work well with DIY drip irrigation systems. Battery-operated hose timers are popular and generally reliable—brands like Orbit, Raindrip, and Melnor offer models in the $20 to $40 range. Look for timers with easy programming and basic features like flexible schedules and manual override to suit most small business gardens.
If I want to minimize weed growth even more, should I combine the drip system with mulch, and are there any specific troubleshooting tips if the emitters seem to get clogged over the summer?
Combining mulch with your drip irrigation system is an excellent way to further reduce weed growth and keep soil moisture steady. For clogged emitters, regularly flush the system, check filters, and occasionally soak emitters in vinegar to dissolve mineral buildup. Preventative maintenance throughout the summer helps keep everything running smoothly.
If my garden layout includes both raised beds and containers, do I need separate drip lines for each, or is there an efficient way to connect everything to one system as described in the setup steps?
You can connect both raised beds and containers to a single drip irrigation system by using a main supply line with branching ¼-inch tubing to each area. Just make sure to adjust emitters and tubing lengths to fit each bed and container. This way, water delivery stays efficient and everything runs off the same system.
You mention drip systems can reduce water usage by up to 60%. For a small vegetable garden, how do I estimate exactly how much water I’ll save versus just hand-watering with a hose?
To estimate your water savings, measure how much water you typically use when hand-watering—try timing yourself and checking your hose’s flow rate (usually printed on the nozzle or packaging). Then, check your drip system’s flow rate per emitter and multiply it by the number of emitters and watering duration. Compare both totals over a week or month to see your actual savings.
You mentioned timers can automate watering, but I’m worried about overwatering if it rains. Are there certain types of timers or sensors you recommend for first-timers to prevent this?
To avoid overwatering when it rains, consider using a timer that connects with a rain sensor or a soil moisture sensor. Basic rain sensors will pause watering if they detect rainfall, while soil moisture sensors can stop the system when the ground is wet enough. Many starter kits include simple rain sensors that are easy to set up and use.
When planning the drip irrigation system, how do I determine how many emitters I need per plant, especially if I have a mix of vegetables and fruit trees in the same garden?
To figure out how many emitters each plant needs, consider the plant size and water requirements. Most vegetables do well with one emitter (1–2 gallons per hour), placed near the base. For fruit trees, use two to four emitters spaced evenly around the root zone. Adjust as needed for larger or thirstier plants.
The article mentions that drip systems help prevent weeds by only watering specific spots. If I use mulch in my garden beds, will that interfere with how well the drip irrigation works?
Using mulch with a drip irrigation system actually works very well. Mulch helps retain soil moisture and keeps water from evaporating too quickly. Just make sure your drip lines or emitters are placed under the mulch but on top of the soil, so water reaches plant roots efficiently.
Do you have any suggestions for troubleshooting if some emitters are barely dripping while others have a strong flow? I want to make sure each plant gets enough water.
If some emitters are dripping slowly and others have a strong flow, it’s usually due to uneven water pressure or clogged emitters. Check for blockages by removing and flushing out affected emitters. Make sure your tubing has no kinks and that the system is level, as elevation changes can affect pressure. If needed, install a pressure regulator to ensure even distribution.
When planning out the drip irrigation based on a garden layout, are there special considerations for sloped yards to make sure all plants get even watering?
Yes, for sloped yards, water can flow downhill and create uneven watering. To address this, use pressure-compensating emitters, which help ensure each plant gets the same amount of water regardless of elevation. Also, consider dividing your system into zones based on slope, so you can adjust watering times if needed.
I’m wondering if you have any tips for connecting a drip system to an outdoor spigot that doesn’t have a pressure reducer installed. Will skipping a pressure regulator damage the tubing or affect performance?
Connecting your drip system directly to an outdoor spigot without a pressure regulator can cause problems. Most drip tubing and emitters are designed for low pressure, typically around 20-30 PSI. If you skip the pressure regulator, high water pressure from your spigot may cause the tubing or fittings to leak, burst, or deliver uneven water flow. For best results and system longevity, it’s highly recommended to install a pressure regulator between the spigot and your drip system.
I’m a bit concerned about installation costs. For a small backyard garden, about 10×20 feet, what’s a rough budget range for all the essential supplies for a drip irrigation setup?
For a 10×20 foot backyard garden, you can usually expect to spend between $40 and $80 for all the essential drip irrigation supplies. This includes tubing, emitters, connectors, and a basic filter or pressure regulator. Prices can vary a bit depending on the brand and local hardware store rates.
Is there a recommended way to combine the drip system with a rain barrel for water conservation, or would I need a pump to get enough pressure for the drip lines?
You can absolutely use a rain barrel to supply your drip irrigation system for better water conservation. However, most rain barrels don’t provide enough water pressure by gravity alone, unless they’re raised several feet above the garden. For best results, consider installing a small submersible pump inside the barrel to ensure steady pressure for your drip lines.
When planning the system out, do you have tips for connecting drip irrigation to a rain barrel or using non-traditional water sources? Wondering if there are good methods to adjust for inconsistent water pressure.
To connect a drip system to a rain barrel, make sure your barrel has a tightly fitted spigot near the bottom. Use a filter to keep debris out and consider a gravity-fed drip kit designed for low pressure. If water pressure is inconsistent, installing a pressure regulator or a drip system with adjustable emitters helps maintain even flow throughout your garden.
I’m on a pretty tight budget and curious about the total estimated cost for all the materials needed for a small backyard vegetable garden. Are there any common beginner mistakes that can end up costing extra money?
For a small backyard vegetable garden, you can expect to spend around $30 to $70 on basic drip irrigation materials like hoses, emitters, connectors, and a timer. Prices vary depending on your garden size and the quality of components. Common beginner mistakes that can drive up costs include buying more tubing than needed, choosing an overly complex system, or not planning the layout before purchasing. Measuring your garden and making a simple sketch helps avoid unnecessary purchases.
You mentioned using a timer to automate watering—are there any budget-friendly timer options you recommend for someone just starting out with drip irrigation?
Yes, there are several affordable timer options perfect for beginners. Basic manual or digital hose timers from brands like Orbit, Raindrip, and Melnor are usually priced under $30 and work great for simple drip irrigation setups. Look for a timer that attaches directly to your outdoor faucet, is weather-resistant, and has straightforward scheduling controls.
Does your step-by-step guide include recommendations for affordable starter kits for small gardens, or should we purchase drip irrigation components individually based on the garden layout?
The guide highlights both options. It suggests a few cost-effective starter kits suitable for small gardens, but also explains how to choose individual components if your layout needs something more customized. This way, you can pick what best fits your budget and garden size.
I have a mix of vegetables and decorative plants in my backyard. Does your step-by-step guide address how to group different types of plants with varying water needs when laying out the drip lines?
Yes, the guide includes tips on grouping plants based on their water needs. It suggests planning separate drip lines or zones for vegetables and decorative plants to ensure each group receives the right amount of water. This helps avoid over- or under-watering different plant types.
Does your step-by-step guide cover how to integrate a timer with the DIY system for automatic watering, or would you recommend certain types of timers for beginners setting this up for the first time?
The guide briefly mentions adding a timer, but it doesn’t go into detailed steps for timer integration. For beginners, I recommend starting with a simple mechanical or battery-operated hose timer, which is easy to install—just attach it between your water source and the drip system. This will automate the watering process without much setup.
What are some common mistakes people make when first installing a drip irrigation system? As someone new to this, I’d like to avoid any beginner errors that could cause leaks or uneven watering.
Some common mistakes include not flushing the system before use, which can lead to clogged emitters, and placing emitters too far from plant roots. Beginners also sometimes use the wrong tubing size or fittings, leading to leaks. Ensure all connections are secure and check for even water flow at each emitter during your initial test.
If I want to keep the initial investment low, are there any budget-friendly options for timers or tubing that still work well? Wondering how much I realistically need to spend for a small backyard setup.
For a small backyard, you can find basic drip irrigation kits with tubing and simple mechanical timers for around $30–$60. Mechanical or battery-operated timers are usually more affordable than digital ones, and standard 1/4-inch tubing works well for most gardens. Local hardware stores often sell starter kits that include everything you need to get going without a big investment.
I noticed you mentioned timers for automating the drip system. Do you have any recommendations for affordable timers that are easy to set up for beginners and work well with DIY garden irrigation setups?
For beginners, battery-operated hose timers are a great choice since they’re simple to attach and program. Brands like Orbit and Raindrip offer affordable models with easy-to-use dials or digital displays. Look for those labeled ‘single outlet’ or ‘basic,’ as they cover most DIY garden needs and usually require no special tools for setup.
Can you clarify what common pitfalls I should look out for during the assembly process? I’ve never worked with irrigation equipment before, and I’m a bit worried about making mistakes that might cause leaks or blockages.
Absolutely, here are a few common pitfalls to watch for: not pushing tubing and connectors together tightly enough (which can cause leaks), forgetting to flush the lines before use (debris can cause blockages), and placing emitters too close to the main line (risking uneven water flow). Take your time with each connection and check for leaks after turning the system on.
Does the tutorial cover how to connect a drip irrigation system to a typical outdoor faucet, or do I need special adapters for that setup in a home garden?
The tutorial does explain how to connect your drip irrigation system to a standard outdoor faucet. It also mentions that you may need a simple adapter, like a hose-to-drip connector, and possibly a pressure regulator, but these are commonly available at garden centers and are easy to install.
The article mentions reducing water usage by up to 60%. Could you clarify if this estimate assumes watering every plant in the garden, or does it refer to more targeted watering schedules for only the thirstiest plants?
The 60% reduction in water usage refers to the savings compared to traditional overhead watering when you use drip irrigation to water all your plants, not just the thirstiest ones. The system delivers water directly to plant roots, minimizing waste. If you use targeted schedules or only water certain plants, you may save even more.
For gardeners in areas with frequent hose bib freeze in winter, are there specific drip irrigation components or setup tips you recommend to make winterizing the system easier and prevent damage?
For areas where hose bibs freeze in winter, consider installing a quick-connect fitting or a hose bib vacuum breaker for easy disconnection. Use flexible tubing that can be drained and coiled up, and add a mainline shut-off valve before the system. Always disconnect and drain all above-ground parts before freezing temperatures arrive to prevent damage.
What are some common mistakes new users make when assembling their first drip system, especially if they’ve never worked with irrigation equipment before? I want to avoid any issues that might waste water or harm my plants.
Some common mistakes include not securing connections tightly enough, which can lead to leaks, and placing emitters too far from plant roots. Many beginners also forget to flush the system before use, leaving debris that can clog emitters. Double-check your water pressure and spacing to ensure efficient watering without waste.
Could you share more about the typical up-front costs involved in assembling a DIY drip irrigation system for a small backyard, especially for someone trying to stay within a tight budget?
For a small backyard, you can expect to spend around $30 to $60 for the basic components like tubing, emitters, connectors, and a simple timer. Prices can be lower if you reuse existing hoses or skip the timer at first. Shopping at hardware stores or buying kits online can help keep costs down.
I’m interested in minimizing costs—do you have suggestions for affordable yet durable materials when purchasing parts for a beginner DIY drip irrigation system?
To keep costs low while ensuring durability, consider using polyethylene tubing, which is both affordable and long-lasting. Look for barbed plastic fittings instead of brass, as they are cheaper but still sturdy. Basic emitters and stakes can be found in bulk packs for savings. Reusing plastic bottles as drip emitters for small setups is another budget-friendly option.
Could you give a rough estimate of how much the basic materials for a DIY drip system would cost for a typical 400-square-foot garden? I’m trying to budget before getting started.
For a 400-square-foot garden, you can expect basic drip irrigation materials—such as tubing, drip emitters, connectors, and a simple filter or pressure regulator—to cost between $60 and $120. Prices vary depending on the brand and quality, but this range should cover essential supplies for most home gardens.
I noticed you mentioned using a timer for convenience. Are there specific timer types or features you recommend for someone who wants to set up scheduled irrigation cycles and avoid overwatering?
For scheduled irrigation and avoiding overwatering, digital timers with programmable cycles work well. Look for models that let you customize watering duration and frequency by day of the week. Features like rain delay and moisture sensors are also helpful to prevent watering when it’s not needed.
Does the tutorial include any advice on winterizing the drip irrigation system, especially in regions with freezing temperatures? I’m concerned about potential damage to hoses and emitters after the growing season.
The tutorial briefly mentions the importance of preparing your drip irrigation system for winter but does not provide detailed steps. For regions with freezing temperatures, it’s a good idea to drain all water from the hoses and emitters, disconnect components, and store them indoors if possible to prevent cracking or damage.
Does your tutorial cover how to handle mixed planting beds that include both vegetables and ornamentals? I’m wondering how to set up the drip lines so that each type of plant gets the right amount of water.
The tutorial includes guidance on customizing drip irrigation layouts for mixed planting beds. It suggests grouping plants with similar water needs together and using adjustable emitters or separate lines for vegetables and ornamentals. This way, you can fine-tune the water delivered to each type, ensuring all your plants get what they need.
Could you explain how to set up a timer with the drip irrigation system you describe? I’d like to know if there are budget-friendly options that work well with DIY setups for automatic watering.
To add a timer to your DIY drip irrigation system, look for hose-end timers at garden centers or hardware stores—they’re usually affordable and easy to install. Attach the timer to your outdoor faucet, then connect your drip system’s main supply line to the timer. Most budget timers are battery-powered, let you set watering schedules, and work reliably with DIY setups. Just remember to check the battery and adjust settings as needed through the growing season.
Could you clarify if drip irrigation works equally well for container gardens or raised beds, or are there special considerations needed compared to traditional in-ground beds?
Drip irrigation works well for both container gardens and raised beds, but there are a few things to keep in mind. For containers, use smaller tubing or adjustable emitters to avoid overwatering. Raised beds often need more emitters spaced evenly to cover the area. Both setups may need shorter watering cycles compared to in-ground beds due to better drainage.
You mentioned drip systems can reduce water use by up to 60 percent. Is it possible to estimate upfront how much water (or money) I might save if I switch from hand-watering a small backyard garden?
Yes, you can estimate your savings. Start by tracking how much water you currently use when hand-watering—measure the number of watering sessions per week and how much water you use each time. Drip systems typically deliver water more efficiently, reducing usage by up to 60 percent. Multiply your current water use by 0.4 to estimate future use, then compare the difference for expected water and cost savings.
For someone on a tight budget, what parts of the drip irrigation setup are worth investing more in, and where can you safely use cheaper options without sacrificing efficiency or durability?
It’s best to invest a bit more in a quality mainline tubing and a reliable pressure regulator, as these are critical for system longevity and consistent water flow. You can save money by using basic emitters and inexpensive stakes or connectors, since these are easier to replace if they wear out.
The article mentions planning based on your garden layout. What adjustments would I need to make if my beds are not in straight rows, but more of a scattered or irregular shape?
For scattered or irregularly shaped beds, you’ll want to use flexible tubing that can easily curve around different shapes. Lay out the main supply line to reach each bed, then branch off with smaller tubing to individual plants or groups. Use connectors and adjustable emitters to ensure even watering, adapting the layout as needed to fit your garden’s design.
I noticed you mentioned timers for automation—do basic hose timers work for a small backyard setup, or is it worth investing in a more advanced system for reliability?
Basic hose timers work well for most small backyard drip irrigation setups and are easy to use. If your needs are straightforward, a basic timer should be reliable. Consider a more advanced system only if you want extra features like moisture sensors, app control, or multiple zones.
The water savings sound impressive, but how often do you need to check or clean the emitters to prevent clogging, especially if your water has a lot of minerals in it?
If your water contains a lot of minerals, it’s a good idea to check and clean the emitters every two to four weeks. Mineral buildup can cause clogging, so regular inspection and occasional flushing of the lines help keep the system running smoothly. You might also consider adding a fine filter at the water source to reduce clogging risk.
If my backyard has a mix of ornamentals and fruit trees with different watering needs, will the step-by-step guide show how to adjust the drip system for each plant type, or is it just a one-size-fits-all setup?
The tutorial covers how to customize your drip irrigation system based on different plant needs. It explains using various emitters and adjusting flow rates, so you can set up specific watering zones for ornamentals and fruit trees. This way, each plant type gets the appropriate amount of water.
Is there any advice in your guide regarding the initial cost range for a basic home drip irrigation system, and do you mention any budget-friendly tips for larger backyard gardens?
The guide gives an estimated initial cost range for a basic home drip irrigation system, helping you budget accordingly. It also suggests budget-friendly tips for larger gardens, like buying supplies in bulk and using simple DIY emitters to keep costs down while covering more area.
The article mentions using a timer for automation. Are there any affordable timer brands or models you’d recommend for a basic backyard drip setup, especially ones that stand up well to rain and sun exposure?
Some reliable and budget-friendly hose timers for backyard drip systems include the Orbit 62061Z Single-Outlet and the Raindrip R675CT. Both are popular, weather-resistant options that handle outdoor conditions well. They’re easy to program and can be found at most home improvement stores or online.
I run a small roadside nursery, and I’m wondering how adaptable this DIY drip irrigation system would be if I need to frequently move pots and planters around. Are there flexible options for changing layouts?
This DIY drip irrigation system is quite adaptable for nurseries where pots and planters are moved often. Using flexible tubing and quick-connect fittings makes it easy to reposition drippers or extend lines as your layout changes. You can simply unplug and reroute lines without needing to re-do the whole setup.
I like the idea of setting up the system for automatic watering. Are there any affordable timer options you recommend that integrate well with a basic DIY drip irrigation setup for a medium-sized home garden?
Absolutely, there are several affordable water timers that work great with basic DIY drip irrigation systems. Mechanical dial timers are budget-friendly and simple to use, while battery-powered digital timers offer more control over watering schedules. Brands like Orbit and Raindrip have models that are easy to install on standard outdoor faucets and are well-suited for medium-sized home gardens.
I noticed the article mentions timers for automation. Are there specific timers you recommend that are easy for beginners to set up and won’t break the bank for a small garden?
For small gardens, mechanical dial timers or basic digital hose timers work well and are beginner-friendly. Brands like Orbit and Melnor offer simple, affordable options that connect directly to your outdoor faucet. Look for models with clear instructions and basic on/off scheduling to keep things straightforward.
I’m interested in minimizing weed growth as you mentioned. Are there particular emitter types or installation techniques you suggest for closely spaced vegetable beds to maximize that benefit?
For closely spaced vegetable beds, use drip lines or soaker hoses with emitters spaced 6 to 12 inches apart. Place them close to plant rows so water goes directly to roots, keeping surrounding soil drier and limiting weed growth. Also, install the tubing under mulch to further suppress weeds and reduce evaporation.
I’m a bit worried about water pressure since my outdoor faucet is pretty far from my backyard beds. Does the tutorial cover how to deal with pressure issues or do I need to buy a specific pump or regulator?
The tutorial does touch on water pressure by recommending a pressure regulator to ensure consistent flow throughout the system. For longer distances, it suggests using tubing with a larger diameter to maintain pressure. Most setups won’t need a pump unless your pressure is unusually low, but a regulator is usually a good idea.
Can this setup work for gardens with raised beds and containers, or is it mainly intended for in-ground planting? I’d love to avoid hand-watering my pots too.
You can absolutely use this drip irrigation setup for raised beds and containers, not just in-ground gardens. Just run the main line to your beds or pots, and use smaller drip tubing or emitters for each container. It’s a great way to automate watering and save time.
For gardeners on a tight budget, are there specific components or brands you consider essential versus optional when purchasing supplies for a basic but functional home drip irrigation system?
For a basic and cost-effective drip irrigation system, essential components include tubing, emitters (drippers), connectors, and a filter. You can skip timers or pressure regulators if your garden is small and you can manually control watering. Generic or store-brand parts often work just as well as name brands for basic setups.
The article mentions using a timer to automate watering. Could you recommend what kind of timer works best for a basic DIY setup, and is there a big price difference between manual and smart timers for small gardens?
For a basic DIY drip irrigation setup, a simple battery-operated hose timer is reliable and easy to use. Manual timers are generally less expensive and work well for small gardens if you don’t need remote control or advanced scheduling. Smart timers offer app-based scheduling and can adjust for weather, but they do cost more. For most small home gardens, a manual timer is usually sufficient unless you want extra convenience and features.
You mentioned using a timer for automation. Are there specific types or brands you recommend for beginners, or any pitfalls to avoid when selecting a timer?
For beginners, look for simple digital or mechanical hose timers that are easy to program, such as those from Orbit or Rain Bird. Make sure the timer is weather-resistant and has clear instructions. Watch out for overly complex models—basic features like set-and-forget schedules are perfect for starting out.
I see you mention that drip irrigation can save up to 60 percent of water compared to sprinklers. How do I figure out how long to run the system each day to make sure my plants get enough water without overdoing it?
To determine how long to run your drip system, check the water needs of your specific plants and the output rate of your emitters (usually measured in gallons per hour). For example, if your plants need 1 inch of water per week and your emitters release 1 gallon per hour, you can calculate how many hours are needed each week, then divide that time over several days. Monitor soil moisture to adjust as needed—soil should be damp but not soggy after watering.
I noticed you mention using timers for automatic watering. Do you have any recommendations on what type of timer is easiest to install and works well with standard DIY drip systems?
A battery-operated hose-end timer is a popular and easy option for most DIY drip systems. These timers simply attach to your outdoor faucet and let you set watering schedules with a dial or digital display. Look for timers labeled as ‘drip irrigation compatible’ to ensure smooth operation.
I’m trying to figure out how much time it actually takes to set up a DIY drip irrigation system for a medium-sized vegetable garden. Can you give me a ballpark estimate for the installation process from planning through assembly?
For a medium-sized vegetable garden, you can expect the entire DIY drip irrigation setup—planning, layout, assembling the system, and testing—to take about 4 to 6 hours. This may vary depending on your garden’s complexity and any adjustments you need to make along the way.
You mention timers for automatic watering—do you have recommendations for reliable, beginner-friendly timers that work well with basic DIY drip systems?
For beginners setting up a DIY drip irrigation system, I recommend looking for battery-operated hose timers with simple dial controls. Models from brands like Orbit and Raindrip are user-friendly and reliable. These timers connect directly to a standard outdoor faucet, making installation easy without complicated programming.
Does your tutorial cover any tips for dealing with water pressure issues if I’m connecting my drip system to an outdoor spigot? Sometimes I hear pressure regulators are needed—do you recommend them, and if so, what type do you suggest for a small backyard garden?
The tutorial does mention water pressure concerns and suggests using a pressure regulator, especially when connecting to an outdoor spigot. For a small backyard garden, a regulator that reduces pressure to about 20-30 PSI is usually ideal. Look for one labeled specifically for drip irrigation—these are often easy to install and fit standard garden hoses.
If I accidentally overwater with the drip system, what are the most common causes and what steps can I take to troubleshoot and fix this issue in my garden?
Overwatering with a drip system usually happens if the emitters release too much water, the timer runs too long, or the soil drains poorly. Check that your emitters match your plants’ needs, adjust the watering schedule, and observe how quickly the soil dries. If needed, swap to lower-flow emitters or shorten watering sessions to prevent soggy roots.
Could you mention any budget-friendly options for timers or automation? I want to save time, but I’m not sure if smart timers are necessary for a small garden.
For a small garden, you don’t need an expensive smart timer. Simple mechanical hose timers are budget-friendly and can be found at most hardware stores. They let you set watering times manually. Basic digital timers are also affordable and offer more scheduling options without the complexity of smart features.
If my backyard has a mix of raised beds and in-ground rows, do I need different types of drip emitters for each, or can one setup handle both efficiently?
You can use the same drip irrigation setup for both raised beds and in-ground rows, but you might want to adjust emitter types or placement for best results. Raised beds often do well with drip lines or tubing with evenly spaced emitters, while in-ground rows may benefit from drip tape or individual emitters tailored to plant spacing. Mixing and matching within the same system is easy, just ensure water pressure and flow remain balanced.
If I have a mix of raised beds and containers in my backyard, will the same drip irrigation system work for both, or do I need to set them up differently?
You can use the same drip irrigation system for both raised beds and containers, but you may need to adjust the layout. Use main tubing to connect everything, then tailor the emitter types and spacing—raised beds usually need lines or drip tape, while containers work well with individual emitters or small tubing run directly into each pot.
You mention saving water compared to sprinklers, but I’m curious—does installing a timer add a lot to the project cost, and is it really necessary for beginners?
A basic timer for drip irrigation systems is usually quite affordable and can be found for under $30. While not strictly necessary, a timer helps ensure consistent watering and prevents overwatering, making it a helpful addition for beginners who want low-maintenance care for their garden.
For someone on a tight budget, are there certain components of a drip irrigation system that you think are worth splurging on, versus parts where a basic option will do just fine for a home vegetable garden?
For a home vegetable garden on a budget, it’s smart to invest a bit more in a good quality filter and pressure regulator since they protect the whole system and help it last longer. For tubing and simple emitters, basic options usually work well and can save you money.
If my backyard has a mix of raised beds and containers, is it possible to use the same drip irrigation setup for both, or would that require separate lines or different emitters?
You can use the same drip irrigation system for both raised beds and containers, but you may need to add separate lines or adjust emitter types and flow rates for each area. Containers often require emitters with a lower flow rate, so customizing the layout to fit each zone is a good idea.
I noticed you mentioned timers for automatic watering. Are there specific timer types or scheduling tips you would suggest for gardeners who travel frequently and want to ensure consistent irrigation?
For frequent travelers, digital hose timers with programmable schedules are a reliable choice. Look for models that let you set multiple watering times and durations per week. Some smart timers even connect to Wi-Fi, allowing remote adjustments via an app, which is handy if travel plans change. Always use fresh batteries before you leave to avoid interruptions.
Do you have any recommendations for which types of tubing materials work best for vegetable gardens versus flower beds, especially in areas with extreme summer temperatures?
For areas with extreme summer temperatures, polyethylene tubing is a solid choice for both vegetable gardens and flower beds because it’s UV-resistant and durable. If you need extra flexibility or have tight spaces in flower beds, consider using vinyl tubing, but keep in mind it can degrade faster under intense sun. For maximum longevity in hot climates, stick with heavy-duty, UV-stabilized polyethylene tubing.
I’m a bit worried about the initial setup time—realistically, how long should I expect to spend assembling and installing a drip system for an average-sized backyard garden?
For an average-sized backyard garden, you can expect to spend around 2 to 4 hours on the initial assembly and installation of a DIY drip irrigation system. This includes laying out tubing, connecting emitters, and testing for leaks. If your garden has a complex layout or you’re new to DIY projects, it might take a bit longer. Taking time to plan your layout beforehand can make the process smoother and quicker.
If part of my garden is sloped, will the drip system still deliver water evenly to all plants, or are there adjustments I need to make to avoid overwatering at the bottom and underwatering at the top?
A sloped garden can cause uneven water distribution, with more water collecting at the lower end. To address this, use pressure-compensating emitters, which release water at a constant rate regardless of elevation. You may also want to divide your system into zones or adjust emitter placement and flow rates for better balance.
You mentioned using a timer for automating the drip irrigation system. Are there specific types of timers you would recommend for beginners, and do they need to be weatherproof if the garden is completely outdoors?
For beginners, battery-operated digital hose timers are easy to set up and use. If your timer will be outdoors, weatherproof models are best to withstand rain and sun. Look for timers labeled as waterproof or designed for outdoor use to ensure durability.
I noticed it says drip irrigation can be automated with a timer. Is it worth investing in a smart irrigation controller, or will a basic mechanical timer work just as well for most home gardens?
A basic mechanical timer is usually sufficient for most home gardens, especially if your watering needs are simple and consistent. However, a smart irrigation controller offers more flexibility, like adjusting schedules based on weather or remote control via your phone. If you want convenience and better water efficiency, a smart controller is a good investment, but it’s not essential for everyone.
Could you elaborate on common pitfalls you mentioned when planning the layout? I’m worried about accidentally overcomplicating the setup or missing parts that are specific to my garden’s shape.
When planning your drip irrigation layout, a common pitfall is making the system too complex with unnecessary splits or loops. Stick to simple, logical lines following your garden beds. Carefully measure each area so you buy the correct number of connectors and emitters. Also, consider your garden’s unique shape—plan for curves or odd corners by using flexible tubing or elbow connectors where needed. Double-check your supply list before buying to avoid last-minute trips for missing parts.
About the timers you mentioned for automation, are there affordable options that you recommend for a small backyard garden? I’m hoping to keep the total cost down but still want the convenience of an automatic schedule.
Absolutely, there are several budget-friendly hose timers available that work well for small backyard gardens. Look for basic mechanical or battery-operated digital timers at hardware stores or online. They usually start around $15-$30 and offer simple scheduling options without extra features you might not need.
You mentioned timers for setting up automatic watering. Are there any budget-friendly timer options you recommend that will work with standard outdoor faucets, especially for small backyard gardens?
Yes, there are several affordable water timers that fit standard outdoor faucets and are great for small backyard gardens. Mechanical timers, which you twist to set for up to a couple of hours, are usually inexpensive and easy to use. For a bit more flexibility, basic digital timers let you schedule watering times and often cost under $30. Both types are widely available at garden centers and big-box stores.
If my garden has a mix of vegetables and fruit trees in different areas, should I set up separate drip zones, or can a single system handle everything efficiently?
For a garden with both vegetables and fruit trees in different areas, setting up separate drip zones is usually best. Vegetables and fruit trees often need different amounts and frequencies of watering. Separate zones let you tailor the irrigation to each plant type, helping both thrive and avoiding over- or under-watering.
When planning my garden layout for drip irrigation, should I use separate lines for vegetables versus ornamentals, or can I run everything off one main tubing? I’d like to avoid overwatering some plants while underwatering others.
It’s a good idea to use separate lines or zones for vegetables and ornamentals if their water needs are different. This way, you can tailor the watering schedule and amount for each group of plants, reducing the risk of overwatering or underwatering. If both types require similar irrigation, you could use one main line, but most gardeners find separate lines give better control.
You mention reducing water usage by up to 60% with drip irrigation. Do you have any tips for adjusting the system if some plants need more water than others, especially during heat waves or if the soil types vary across the garden?
You can use adjustable emitters or drippers to control the flow rate for each plant, allowing you to give more water to those that need it. Grouping plants with similar water needs and installing separate drip lines or zones also helps. During heat waves, increase watering frequency or duration temporarily, and for different soil types, test and adjust emitter placement or quantity to ensure even coverage.
When planning the drip lines for a vegetable garden with uneven beds, should I lay the tubing along each row or is it better to run it between the rows? Not sure which will help with the weed issue you talked about.
Laying the drip tubing directly along each vegetable row is usually best. This ensures water goes right to your plants’ roots rather than between rows, which can help reduce weed growth in the spaces between beds. It also gives you more precise watering where it’s needed most.
If my backyard has a pretty irregular shape with some trees and raised beds, will a basic drip system work or would I need extra connectors or special parts to reach everything efficiently?
A basic drip system can still work in an irregularly shaped backyard, but you’ll likely need extra connectors, tubing, and maybe some emitters to reach all your trees and raised beds. Adjustable fittings, T-connectors, and elbow joints can help you customize the layout to fit your garden’s unique shape.
For a first-time setup, can you give some ballpark idea of how much time it actually takes to assemble and lay out all the tubing for a small backyard garden? I’m worried it could turn into a weekend-long project.
For a small backyard garden, most people can set up a basic drip irrigation system—including assembling and laying out the tubing—in about 2 to 4 hours. If your garden has a simple layout and you have your materials ready, it probably won’t take up your whole weekend. Allow a little extra time for planning and any small adjustments.
If I want to set this up with a timer like mentioned, do I need a special type of timer for drip irrigation systems, or will any basic garden hose timer work?
You can use most basic garden hose timers with a drip irrigation system, as long as they can handle low flow rates. Just attach the timer between your outdoor faucet and the drip system. For more precise scheduling or multiple zones, you might want to look for timers specifically designed for drip irrigation.
Does this tutorial address how to adjust the drip system for gardens with both raised beds and in-ground plants? I’m wondering if there are important differences in setup for those two situations.
The tutorial does discuss setting up drip irrigation for different garden layouts, including both raised beds and in-ground plants. It highlights that while the basic process is similar, you may need to adjust hose lengths and emitter placement for each type. Raised beds often need shorter tubing and more precise emitter spacing, while in-ground systems might require longer runs and flexibility for plant placement.
Does the guide recommend any specific types or brands of drip irrigation kits that work best for raised beds with a variety of plant heights, or is it better to assemble the system from individual parts?
The guide mentions that both pre-made drip irrigation kits and assembling your own system from individual parts are viable options. For raised beds with plants of different heights, it suggests using adjustable emitters or drippers, which you can find in many kits or purchase separately. There’s no specific brand recommended, but flexibility and adjustability are key features to look for.
If my garden has some areas in full sun and others in shade, should I use different drip emitters or flow rates for those zones? How do I plan for that when sketching the layout?
Yes, it’s smart to use different emitters or flow rates for sunny and shady zones, since sunny spots need more water. When sketching your layout, group plants with similar light and water needs into zones. Note each zone’s sun exposure on your plan, and select emitters that provide more water for sunnier areas and less for shaded ones. This ensures each part of your garden gets just the right amount of moisture.
I’m interested in setting up drip irrigation in my veggie garden, but my backyard layout is kind of oddly shaped. Do you have any advice for planning the tubing routes in gardens that aren’t just straight rows?
For irregularly shaped gardens, start by sketching your layout and marking where each plant is located. Use flexible tubing and connectors like elbows or tees to follow your garden’s contours. You can branch off main lines to reach different sections, ensuring every plant gets water. Adjustable emitters are handy for uneven plant spacing. Take your time laying out the tubing before cutting, so you can make adjustments as needed.
Could you elaborate on how to adjust the system if I notice certain plants are getting too much or too little water? Are there easy troubleshooting steps for balancing water distribution across different areas of the garden?
If you notice uneven watering, start by checking if emitters are clogged or leaking and clean or replace them as needed. You can swap emitter types for higher or lower flow rates depending on each plant’s needs. Adjust the placement of emitters closer or farther from plant bases, or add drip lines to target dry spots. Regularly running the system and monitoring soil moisture helps you fine-tune distribution.
Does the system need to be adjusted if I plant new vegetables in a different spot each year, or can the tubing be easily moved around to fit crop rotation?
You can definitely adjust the tubing to fit crop rotation each year. Most DIY drip irrigation systems are designed to be flexible, so you can move or reconfigure the lines as you change your planting layout. Just make sure to secure any new connections and check for leaks after moving the tubing.
I’m new to irrigation setups and wondering about the initial costs. Based on the steps you outlined, what’s a reasonable budget range for a small backyard vegetable patch using drip irrigation?
For a small backyard vegetable patch, you can expect to spend between $30 and $75 on a basic DIY drip irrigation system. This budget should cover tubing, emitters, connectors, and a simple timer. Prices may vary depending on the size of your garden and any extra features you choose.
When planning out the initial purchase, about how much should I budget for a typical backyard vegetable garden? Are there major cost differences between basic starter kits and assembling everything piece by piece?
For a typical backyard vegetable garden, budgeting $50 to $150 is common for a basic starter drip irrigation kit, depending on garden size. Starter kits usually include all essentials and are more cost-effective and convenient for beginners. Assembling your own system piece by piece may allow more customization but can become more expensive and time-consuming, especially if you need specialized connectors or tools.
If I want to include both raised beds and some fruit trees in the same drip irrigation layout, should I connect them to one main line or is it better to keep them separate for better water control?
It’s usually best to keep raised beds and fruit trees on separate drip lines. This way, you can adjust watering frequency and duration according to each area’s needs—raised beds often require more frequent, lighter watering, while fruit trees benefit from deeper, less frequent watering. Separate lines give you much better control.
I’ve got a mix of raised beds and in-ground rows in my backyard. Does your setup tutorial include tips for connecting drip lines to both types of layouts, or would I need separate systems?
The tutorial covers connecting drip lines to both raised beds and in-ground rows using the same main supply line. You don’t need separate systems—just branch off with tubing and connectors to reach each area. The instructions include tips for adjusting emitters and spacing to suit each layout.
For gardens with both veggies and ornamentals, do you recommend using different emitters or tubing for each type, or can the same setup handle different plant water needs without issues?
For gardens with both veggies and ornamentals, it’s best to use different emitters for each group since their water needs often vary. You can use the same main tubing, but choose lower-flow emitters for ornamentals and higher-flow for thirstier vegetables. This way, each plant gets the right amount of water without over- or under-watering.
When planning the system, how do you make sure you’re not overwatering or underwatering plants with different needs in the same drip line? Do you need separate zones, or is there a simpler approach?
To handle plants with different watering needs on the same drip line, you can use emitters with various flow rates for each plant. This way, thirstier plants get more water, and drought-tolerant ones get less. Separate zones are helpful for very different needs, but adjusting emitters is a simpler and effective approach for most home gardens.
You mentioned using a timer to automate watering, but I’m not sure what kind to buy or how to set it up for a basic backyard setup. Could you explain what to look for in a timer for beginners?
For a basic backyard drip system, look for a simple hose timer that connects directly to your outdoor faucet. Choose one with easy-to-read dials or digital settings to set watering times and frequency. Battery-operated models are reliable and easy to install. Just attach it to your faucet, connect your drip system, set the desired schedule, and you’re all set!
I’m trying to stick to a budget—are there certain parts of the drip irrigation system where it’s okay to go with cheaper options, or are there components you definitely shouldn’t skimp on for long-term reliability?
You can save money by choosing basic tubing and inexpensive emitters, as long as they’re compatible with your system. However, don’t cut corners on the main filter and pressure regulator—these are essential for preventing clogs and ensuring the system works reliably over time.
If I want to automate the drip system with a timer as suggested, do I need to invest in any special connectors for it to work with typical outdoor spigots in US homes, or is basic hardware usually enough?
Most outdoor spigots in US homes use standard thread sizes, so most basic hose timers will screw right on without special connectors. However, if your spigot is older or has unusual threading, you might need a simple adapter. For most setups, basic hardware and the timer itself will be enough.
If my outdoor faucet isn’t near my raised beds, what’s the best way to connect the drip irrigation system without losing a lot of water pressure? Do I need a special kind of tubing for a longer distance?
If your faucet is far from the raised beds, use a mainline tubing (typically 1/2 inch or larger) to run the long distance—this helps maintain water pressure. Only switch to smaller drip tubing once you’re near the beds. Make sure to keep the mainline tubing as straight and unobstructed as possible.
Does switching to a drip irrigation system typically lower a home’s overall water bill enough to offset the initial installation costs, or does it depend on the size of the garden?
Switching to a drip irrigation system usually leads to noticeable water savings because it delivers water directly to plant roots with less waste. For larger gardens, the savings can often offset the initial setup costs within a year or two. For very small gardens, the payback period may be longer, but you’ll still benefit from more efficient watering and healthier plants.
If my backyard has a mix of raised vegetable beds and ornamental flower borders, will a standard DIY drip kit work for both, or do I need to buy any special adapters or extra tubing to customize the setup?
A standard DIY drip kit can work for both raised vegetable beds and ornamental borders, but you may need extra tubing or connectors to reach all areas and customize the layout. Check if your kit includes enough emitters and adapters, or purchase additional parts to fit your specific garden arrangement.
How often do you recommend running the timer once the drip system is set up, especially for drought-prone areas like mine? Does it depend on the vegetables I’m growing?
The frequency depends on your local climate and the needs of your vegetables. In drought-prone areas, most gardens benefit from running the drip system 2-3 times per week, delivering deep watering each time. Leafy greens may need more frequent, lighter watering than root vegetables. Always check the soil moisture and adjust based on how quickly it dries out.
You mention timers for automation. Are there certain timers or controls you’d recommend for someone on a budget, and how reliable are these in outdoor conditions over time?
Budget-friendly mechanical timers are a reliable choice for basic automation, as they’re simple to use and usually waterproof for outdoor use. Digital hose timers are another affordable option, offering more scheduling flexibility. Both types generally hold up well outside if you check the batteries and protect them from direct sun or heavy rain.
Could you clarify how to estimate how many drip lines or emitters I’ll need if my garden has both raised beds and rows of ornamentals?
To estimate what you need, first measure the length of each raised bed and ornamental row. For raised beds, usually one drip line per row of plants is enough, with emitters spaced about 12 inches apart. For ornamental rows, run drip lines parallel to the plants, also spacing emitters 12 to 18 inches apart depending on plant size. Add up all the lengths to determine total drip line needed, then count how many emitters based on your plant spacing.
In the planning stage, how do you figure out how many emitters you need per plant or row, and what’s the best way to position them for unevenly spaced crops in a backyard garden?
To determine the number of emitters, check each plant’s water needs and emitter flow rate—most vegetables do well with one emitter per plant, while larger or thirstier plants might need two. For unevenly spaced crops, position emitters close to each plant’s root zone, adjusting the tubing layout so every plant gets covered, even if that means using extra tubing or adjustable emitters.
The article mentions reduced weed growth since only the root zones are watered. Have you noticed any potential issues with underwatering plants that have larger root systems, or do you have tips for adjusting placement for different plant types?
Underwatering can happen with larger-rooted plants if emitters aren’t well placed. For those plants, use multiple emitters or drip lines around the base to cover their full root zones. Adjust the emitter spacing and flow rate based on each plant’s size and water needs. Regularly check soil moisture to make sure all your plants are getting enough water.
If my backyard has both raised beds and containers, can I run a single drip irrigation setup for all of them, or do I need to separate the connections somehow to avoid uneven watering?
You can set up a single drip irrigation system for both raised beds and containers, but it’s important to use separate lines or adjustable emitters for each area. This way, you can control the water flow to match the different needs and avoid over- or under-watering any part of your garden.
I live in a drought-prone area, so the water conservation aspect really caught my eye. Are there specific timers or moisture sensors you recommend to make sure the system only waters when truly needed?
For drought-prone areas, pairing your drip irrigation system with a soil moisture sensor and an automatic timer is a smart choice. Look for timers that let you connect moisture sensors directly, so watering only happens when soil is dry. Many gardeners find brands like Orbit and Rain Bird reliable, as they offer timers with moisture sensor compatibility.
The article mentions using a timer for automation. Are there any specific timer features or brands you’d recommend for a small backyard DIY drip system, especially for someone new to irrigation?
For a small backyard DIY drip system, look for a timer that is easy to program, has flexible scheduling options, and is weather-resistant. Brands like Orbit and Rain Bird are popular and user-friendly for beginners. Models that attach directly to your outdoor faucet and have digital displays make setup straightforward.
If my backyard has areas with different water needs, what’s the best way to adjust the drip irrigation system so some zones get more water than others without making it too complicated?
You can use adjustable drip emitters or install separate drip lines with different flow rates for each area. If possible, group plants with similar water needs together. For an easy setup, install in-line valves or flow control devices on the tubing to manually adjust water to each zone without needing an advanced controller.
If my garden has several different types of plants with varying water needs, how do I plan the drip irrigation layout to accommodate that? Should I use separate lines or valves for each section?
To accommodate plants with different water needs, it’s best to group similar plants together in zones. Use separate drip lines or add individual control valves for each zone, so you can adjust watering times and amounts specifically for each group. This makes it easy to tailor the irrigation to each plant type.
If I want to set this up in a garden that already has mature fruit trees and flower beds, are there modifications I should make to the basic installation steps, especially around larger roots?
When installing drip irrigation around mature fruit trees and flower beds, you may need to gently route tubing around large roots instead of burying it. Use flexible tubing and place emitters at the tree’s drip line, not right against the trunk. For flower beds, snake the tubing between plants to avoid disturbing existing roots. This way, you can protect root systems while ensuring even watering.
When setting up a drip system as described, how do you handle gardens with different types of plants that need varying amounts of water? Should I use separate lines or are adjustable emitters enough?
If your garden has plants with different water needs, adjustable emitters usually work well—they let you control how much water each plant receives. For areas with very different watering requirements, you might find it easier to set up separate lines or zones, so you can schedule watering times more precisely.
If my garden is in a drought-prone area with occasional water restrictions, are there any special considerations or modifications I should make during installation to maximize efficiency even further?
For drought-prone areas, consider adding a timer with moisture sensors to your drip system, so watering only occurs when needed. Use pressure regulators and quality emitters to minimize leaks and evaporation. Mulching around your plants will also help retain soil moisture, making each drop count.
I’m hoping to keep my initial costs low. Can you suggest which components are okay to buy as budget versions and which ones are worth investing in for a backyard drip system that will last more than a few seasons?
For a long-lasting backyard drip system, it’s wise to invest in a good-quality mainline tubing and a reliable pressure regulator, as these are critical and prone to wear. You can save on basic emitters and connectors, since they’re easier and cheaper to replace if needed. Avoid very cheap filters, though—get a decent one to prevent clogging issues down the line.
For someone new to irrigation systems, are there specific tools or materials you recommend purchasing upfront to avoid making repeat trips to the hardware store during installation?
For a smooth installation, it’s smart to gather everything you’ll need ahead of time. Basic tools include a sturdy pair of scissors or garden shears, a punch tool for emitter holes, and a hose connector. Materials typically needed are mainline tubing, emitter tubing, drip emitters, connectors, stakes, a filter, and a pressure regulator. Double-check your garden’s layout so you buy the right lengths and quantities.
You mentioned that drip irrigation helps reduce weed growth by targeting water delivery. Have you noticed any issues with certain weeds adapting or growing along the lines over time, and if so, how do you deal with that?
Some weeds can still take advantage of moisture near the drip lines, especially if the lines are exposed or there’s mulch gaps. To manage this, regularly check for weed growth along the tubing and use mulch to cover the lines and block light. Hand-pulling or spot-applying organic weed barriers around emitters can help keep weeds in check over time.
If my garden’s layout changes a bit each season, how easy is it to modify or expand the drip irrigation system after it’s installed? Are there any quick-connect parts or methods for easy adjustments?
Modifying or expanding your drip irrigation system is quite straightforward, especially if you use flexible tubing and quick-connect fittings. Many systems offer push-fit or barbed connectors that let you easily add or move lines as your garden changes. Just cut the tubing where needed, attach a new connector, and reposition emitters or lines as required.
I’m interested in setting up a drip system for both veggies and fruit trees. Do you recommend running the same line for both, or should I separate them for different watering needs?
It’s best to separate the drip lines for your veggies and fruit trees. Vegetables usually need more frequent, lighter watering, while fruit trees benefit from deeper, less frequent irrigation. Having separate zones allows you to tailor the watering schedule to each plant type’s specific needs.
In the planning section, you mention sketching out the garden layout. Do you have any tips on how detailed this sketch needs to be, especially if I have a mix of raised beds and containers?
Your sketch doesn’t need to be artistic, but should clearly show the shape and location of each raised bed and container. Include the dimensions and label each area, noting which plants are where if possible. This helps you estimate tubing lengths and decide where emitters are needed, making installation smoother and more efficient.
When setting up the drip system, do I need to worry about water pressure if my backyard faucet is pretty far from the main garden? Any tips for dealing with low pressure or long distances?
Yes, water pressure can drop if your faucet is far from the garden, which might affect how well the drip system works. To help, use a larger diameter main supply tubing to reduce pressure loss, avoid sharp bends, and keep tubing runs as short as possible. Using a pressure regulator and checking for leaks will also make the system more efficient.
How does installing a drip irrigation system compare cost-wise to just using soaker hoses, especially if I have a medium-sized backyard garden? I’m trying to figure out what the investment looks like up front.
For a medium-sized backyard garden, soaker hoses are usually cheaper upfront, often costing less than a drip irrigation kit. Drip systems require more parts like tubing, emitters, and connectors, so setup costs are higher. However, drip irrigation is more efficient and can save water in the long run, which may lower your ongoing costs. If budget is your main concern right now, soaker hoses are more affordable to start with.
If my backyard has a mix of raised beds and containers along with in-ground plants, can this one drip system cover all of them or would I need separate lines for different areas?
You can use one drip irrigation system to cover raised beds, containers, and in-ground plants, but you’ll likely need separate tubing branches or lines running from the main supply to each area. This lets you adjust emitters, flow rates, and spacing for the different plant setups, making sure each gets the right amount of water.
I’m curious about the typical cost to set up a basic drip irrigation system for a medium-sized backyard garden. Do you recommend any budget-friendly tips for purchasing or assembling the parts?
A basic drip irrigation system for a medium-sized backyard garden usually costs between $50 and $120, depending on the size and quality of materials. To save money, consider using a starter kit, shopping at hardware stores during seasonal sales, or buying components in bulk. Reusing old hoses and connectors from previous projects can also help reduce costs.
I’m concerned about maintenance—how often do you need to clean or replace parts in a drip system to keep it running efficiently, especially if you’re using well water with possible sediment?
With well water that may have sediment, it’s best to check and clean the drip system filter every 2–4 weeks. Emitters and lines should be flushed monthly to prevent clogs. Replace filters or emitters if you notice decreased flow or persistent blockages, usually once or twice a season.
I noticed you mentioned drip irrigation is especially useful in drought-prone areas. Do you have any tips for maintaining a system during winter or if I need to temporarily shut it down for a season?
To maintain your drip irrigation system during winter or when shutting it down, drain all water from the lines to prevent freezing and cracking. Remove and store emitters and filters indoors if possible, and cap any open ends to keep out debris and pests. This will help ensure the system works smoothly when you start it up again.
I see you mentioned that drip irrigation can cut water use by up to 60%. For a small backyard vegetable garden, about 100 square feet, roughly how often should the system be run each week, and for how long?
For a 100-square-foot vegetable garden, running your drip irrigation system 2 to 3 times per week is usually sufficient. Each session should last about 30 to 45 minutes, depending on your soil type and weather. Adjust the frequency and duration if you notice the soil is staying too wet or drying out between waterings.
I see you highlighted the water savings with drip irrigation compared to sprinklers. Are there particular types of timers or automation features you suggest for beginners to maximize efficiency without making the system too complicated?
For beginners, battery-operated hose timers are a great choice since they’re easy to install and program. Look for models with customizable schedules and rain delay features to prevent overwatering. Some timers even offer multiple zone controls if you expand your system, but starting with a simple single-zone timer keeps things straightforward.
I’m wondering how to handle gardens with both raised beds and in-ground plots—does your step-by-step tutorial cover how to connect a drip system across those different setups, or do I need separate kits for each?
The tutorial explains how to connect a drip irrigation system that can serve both raised beds and in-ground plots as part of a single setup. You don’t necessarily need separate kits—just plan your mainline tubing to reach both areas and use appropriate fittings and emitters as described in the guide.
When you mention reducing water usage by up to 60%, does that factor in the initial cost of setting up the system? I’m trying to figure out how long it would take for the water savings to offset what we’d spend on materials.
The 60% water savings statistic refers specifically to ongoing water usage, not the upfront cost of installing the drip irrigation system. To find out how long it would take for your water savings to cover the setup costs, compare your average water bill before and after installation, subtract the savings each month, and divide your total setup cost by that monthly savings.
The tutorial mentions using a timer for automatic watering. Do you have any recommendations for timers that are reliable but still affordable for a small business garden?
For a small business garden, consider digital hose timers from brands like Orbit or Raindrip—they’re known for reliability and are budget-friendly. Look for timers with multiple program settings and rain delay features to save water and make scheduling easier. These options usually start at a reasonable price and are widely available at garden centers.
If my garden is a mix of raised beds and containers, can I use the same drip irrigation system for both, or do I need to buy separate kits to ensure each plant gets the right amount of water?
You can use the same drip irrigation system for both raised beds and containers. Just make sure to customize the layout by using adjustable emitters or different flow-rate drippers for each plant, so every area receives the right amount of water. No need for separate kits—just adapt your tubing and connectors as needed.
I see you talk about reducing water waste by up to 60% with drip irrigation. How noticeable is this on your monthly water bill if you switch over a medium-size vegetable garden, and does it work during water restrictions?
Switching a medium-size vegetable garden to drip irrigation can noticeably lower your monthly water bill, often reducing outdoor water use by about half compared to sprinklers or hand watering. The savings will depend on your rates and climate, but many gardeners see a meaningful drop. Drip systems are usually allowed during water restrictions since they’re efficient and target plant roots directly, but always check your local guidelines to be sure.
Does the tutorial recommend any particular type of timer for automating the drip irrigation system, or will any basic programmable timer work for most home gardens?
The tutorial suggests that most basic programmable timers will work well for home gardens. It does not recommend a specific brand or model, so you have flexibility to choose one that fits your needs and budget. Just make sure the timer is compatible with your hose or faucet connection.
Could you clarify if this tutorial covers setting up a timer for automatic watering and what type of timer you recommend for a beginner?
The tutorial does include instructions for installing a timer to automate watering. For beginners, a simple battery-operated hose timer is recommended because it’s easy to set up and program. These timers usually attach directly to your outdoor faucet and can be adjusted for different watering schedules.
Can you explain what maintenance is involved with drip irrigation over time? For example, how often do I need to check for clogs or replace parts to keep the system working efficiently?
With a drip irrigation system, it’s important to check for clogs in emitters or tubing every few weeks, especially during peak growing season. Flush the lines and filters regularly—usually once a month. Replace any damaged tubing, emitters, or connectors as you notice leaks or blockages. A yearly inspection before the gardening season starts helps ensure everything runs smoothly.
When planning the layout, do you have any tips for dealing with uneven garden terrain or slopes to make sure all plants get consistent watering from the drip system?
For uneven terrain or slopes, run the main drip line along the highest point and use pressure-compensating emitters to ensure even water flow. Place emitters close to each plant and check for runoff at the lower end. You might also use shorter tubing for steeper areas to avoid pressure loss.
You mention using timers for automatic watering with a drip system. What type of timer would you recommend for someone just starting out, and are there any that work well with rain sensors to avoid overwatering?
For beginners, a simple digital hose timer is a great starting point—they’re easy to program and attach directly to your outdoor faucet. If you want to avoid overwatering, look for a model that supports rain sensors. Many brands offer timers with a port for a rain sensor, allowing the system to skip watering cycles when it’s raining.
You mention that drip systems can reduce water use by up to 60%. Are there specific brands or kits for beginners on a tight budget that still offer that kind of efficiency?
Yes, there are several affordable drip irrigation kits suitable for beginners that maintain high water efficiency. Brands like Raindrip and Orbit offer budget-friendly starter kits with adjustable emitters to help control water use. These kits typically include everything you need and can help you achieve substantial savings if installed and operated correctly.
If I want to add a timer for automatic watering, are there particular brands or types that work best with a basic DIY drip setup? Also, how reliable are solar-powered timers compared to those that plug in?
Most basic DIY drip systems are compatible with standard hose-end timers, and popular brands like Orbit, Raindrip, and Melnor are widely used for their reliability and ease of installation. Solar-powered timers can be effective if placed in a sunny spot, but they generally require more maintenance and may struggle in consistently cloudy conditions. Plug-in timers offer more consistent operation but need access to an outdoor outlet. Choose based on your garden’s setup and sun exposure.
If I wanted to install a basic drip system on a tight budget, what components could I safely skip or substitute from your step-by-step plan without sacrificing too much efficiency?
To keep costs low, you can skip automatic timers and stick with manual watering. You can also use recycled plastic bottles or inexpensive tubing for emitters and main lines. Instead of commercial filter units, try a simple mesh screen at the water source. Just make sure your system delivers water evenly to your plants and check periodically for clogs.
You mention setting up an automatic timer—do you recommend a particular kind, or are simple mechanical timers good enough for a small backyard veggie garden?
For a small backyard veggie garden, a simple mechanical timer is often sufficient and reliable. They’re easy to use and can handle basic watering schedules. However, if you want more flexibility—like multiple daily cycles or seasonal adjustments—an inexpensive digital timer offers more features without much added complexity.
You mentioned timers can automate the watering process—do you have recommendations for affordable timer options that are reliable for beginners, or is this something I should skip at first?
A timer is a great investment for beginners because it takes the guesswork out of watering. Affordable options like simple mechanical hose timers or basic digital timers work well and are easy to set up. Brands such as Orbit and Raindrip are popular and reliable for home gardens. Starting with a timer helps ensure your plants get consistent care, so it’s worth including from the start.
In the planning stage, do you have any tips for designing a drip system that works efficiently in oddly shaped or tiered garden beds? I’m not sure how to best lay out the lines for maximum coverage in a non-rectangular space.
For oddly shaped or tiered beds, start by sketching your garden and marking plant positions. Use flexible tubing that can bend to match the contours. For tiers, install a separate line for each level and use connectors to join them. Consider adjustable emitters for uneven plant spacing, and use T and elbow fittings to navigate corners efficiently. This ensures every area gets watered without waste.
Can you give examples of common mistakes people make during the assembly stage that might lead to leaks or uneven watering?
During assembly, people often make mistakes like not pushing connectors fully into tubing, which can cause leaks. Others use mismatched or low-quality parts, leading to weak seals. Forgetting to flush out the lines before use can also leave debris that blocks emitters and causes uneven watering. Careful assembly and double-checking each connection help prevent these issues.
If my garden has several distinct zones with different watering needs, is it possible to run multiple drip lines off a single outdoor spigot without losing pressure? How would you lay out the system in that case?
Yes, you can run multiple drip lines from one spigot using a hose splitter or manifold, which lets you control each zone separately. Make sure your water pressure is adequate, and consider using pressure regulators and filters for each line. Lay out main tubing from the spigot, then branch off to each zone, adjusting emitters or valves to fit each area’s needs.
When assembling a DIY drip irrigation system as described, do I need to worry about my water pressure being too high or too low for the system to work properly? If so, how can I check or adjust it for a typical backyard setup?
Yes, water pressure is important for a drip irrigation system. Too much pressure can cause leaks, while too little may not deliver enough water. For most systems, ideal pressure is around 20-30 psi. You can check your pressure with a simple hose bib pressure gauge. If it’s too high, install a pressure regulator; if it’s too low, check for clogs or consider adjusting your water source.
When setting up a drip irrigation system for a backyard that mixes raised beds and containers, do you recommend using separate lines for each plant type, or can the same line serve both? I’d like to avoid overcomplicating the system.
You can use the same main drip line for both raised beds and containers, but it’s important to branch off with smaller tubing or emitters to adjust for each plant’s water needs. This keeps the system simple but still allows some customization for different plant types.