
Introduction: The Power of Preparation in DIY Home Painting
Home painting projects are among the most satisfying and cost-effective ways to refresh spaces, express personality, and increase property value. However, the difference between a professional-looking finish and a patchy, frustrating experience often comes down to the tools and equipment you choose. Whether you’re tackling a single accent wall or painting your whole house, assembling the right toolkit is absolutely essential. Understanding each tool’s purpose, how to choose quality over quantity, and when to invest in specialty items can save you time, money, and plenty of headaches. This comprehensive guide walks you through every essential item you’ll need, from prep to cleanup, ensuring you’re equipped for flawless results every time. Let’s dive into the must-haves, smart add-ons, and pro tips that will raise your DIY painting game for good.
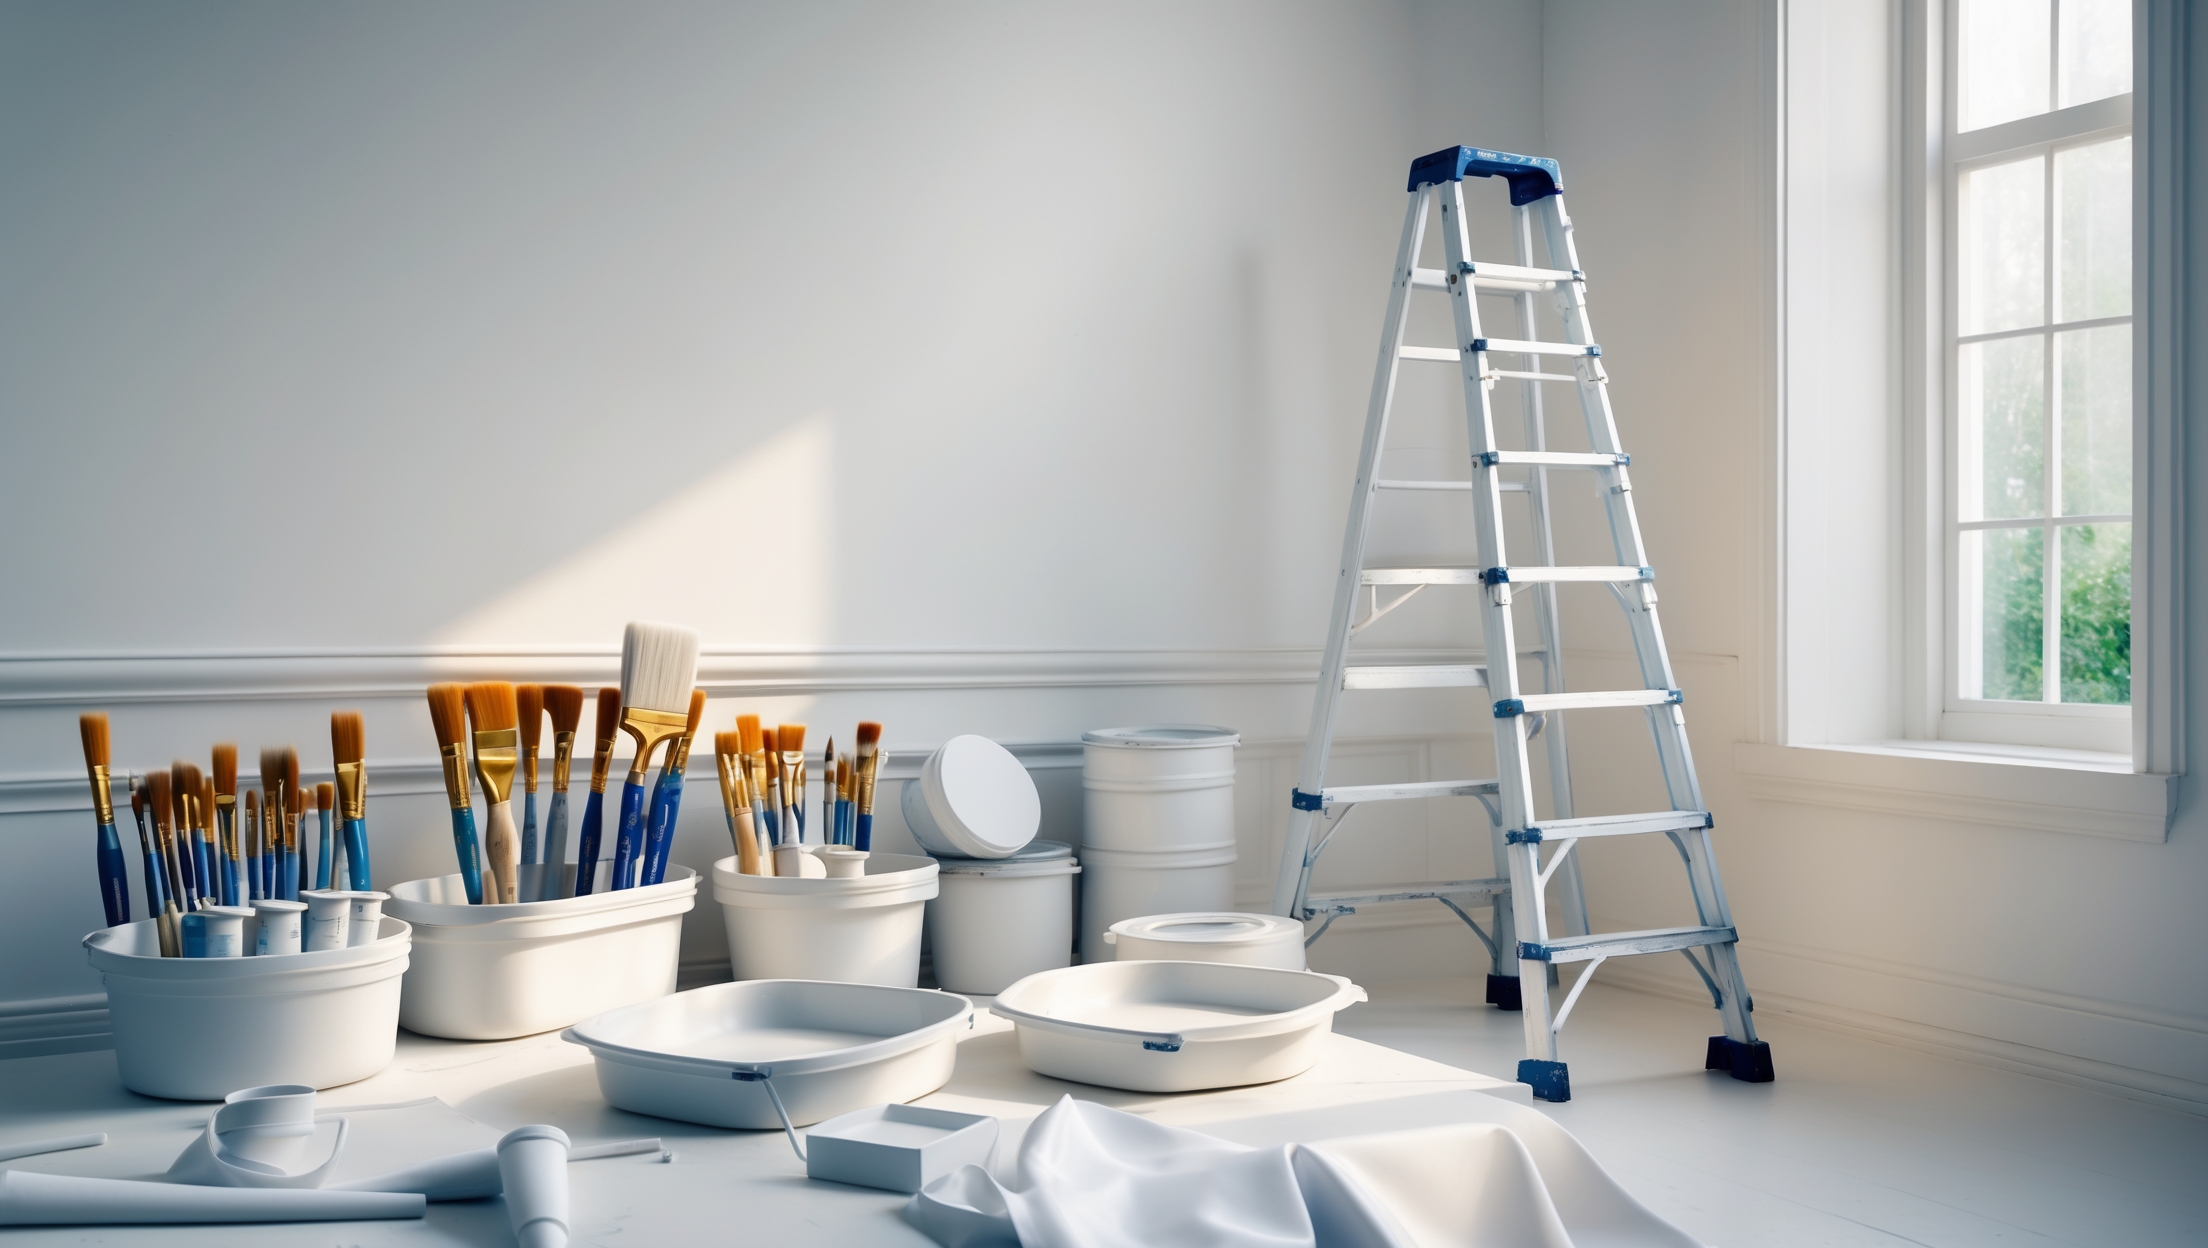
Brushes: Types, Sizes, and Quality Matters
Understanding Brush Types
Paint brushes come in a dizzying variety of shapes, sizes, and bristle materials. Each is designed for specific applications:
- Flat Brushes: For broad, flat surfaces and straight edges.
- Angled (Sash) Brushes: Essential for cutting in corners, painting trim, and detailed work.
- Round Brushes: Best for touch-ups and intricate areas.
Bristle Materials
- Synthetic Bristles: (nylon/polyester) Ideal for water-based (latex) paints, easy to clean, and durable.
- Natural Bristles: Best for oil-based paints, providing a smoother finish.
Choosing the Right Size
- 2-inch angled brush: Versatile for cutting in and trim.
- 4-inch flat brush: Great for larger panels and doors.
Invest in mid-to-high quality brushes; cheap ones tend to shed bristles and deliver uneven results.
Rollers: Coverage, Texture, and Efficiency
Roller Types and Nap Length
- Short Nap (1/4″–3/8″): For smooth walls, ceilings, and woodwork.
- Medium Nap (1/2″): Best for lightly textured surfaces.
- Long Nap (3/4″+): For rough or highly textured surfaces like stucco or concrete block.
Roller Frames and Extension Poles
Choose sturdy roller frames with comfortable handles. Extension poles are invaluable for ceilings and tall walls—make sure they fit your roller frame securely.
Specialty Rollers
- Mini rollers: For cabinets, doors, and tight spaces.
- Textured rollers: To create decorative effects (optional for most DIY jobs).
Prep Tools: Creating the Perfect Canvas
Surface Preparation Essentials
- Putty Knife: For filling nail holes and minor wall damage.
- Spackle or Wall Filler: Patches imperfections before painting.
- Sandpaper/Sanding Block: Smooths patched areas and dulls glossy surfaces for better paint adhesion. Grits from 120–220 work for most walls.
- Painter’s Tape: Ensures crisp lines along trim, ceilings, and fixtures. Opt for quality brands to prevent paint bleed.
- Drop Cloths: Protect floors and furniture. Canvas is reusable and stays in place; plastic is more affordable but can be slippery.
- Cleaning Supplies: Mild detergent, sponges, and buckets for washing walls before painting.
Repair and Cleaning Tools
- Utility knife: For trimming tape and opening paint cans.
- Vacuum or broom: Removes dust after sanding.
Paint and Related Supplies
Quality Paint: Why It Matters
Investing in premium paint pays off with better coverage, richer color, easier application, and increased durability. Consider finish (matte, eggshell, satin, semi-gloss, gloss) based on the room’s use and cleaning needs.
Primers
- Standard primer: For new drywall or major color changes.
- Stain-blocking primer: Essential for covering water marks or smoke damage.
Other Accessories
- Paint trays and liners: Liners make cleanup easier and extend tray life.
- Paint pouring spout: Prevents messy drips from paint cans.
- Paint stir sticks: Even distribution of pigment and consistency.
- Paint can opener: Safer and more effective than a screwdriver.
Safety Equipment: Protecting Yourself and Your Space
- Respirator or Dust Mask: Especially important when sanding or using oil-based paints and primers.
- Safety Glasses: Shields eyes from splatters, dust, and debris.
- Gloves: Nitrile or latex for clean hands; heavier work gloves for moving furniture.
- Coveralls or Old Clothing: Dedicated workwear prevents ruining your wardrobe.
- Step Ladder: A sturdy, non-slip ladder is crucial for reaching ceilings and high walls. Inspect before use.
Cleanup and Storage Tools
Efficient Cleanup
- Bucket and Soap: For washing brushes and rollers (use water for latex, mineral spirits for oil-based paints).
- Brush Comb: Maintains bristle shape and removes trapped paint.
- Rags and Paper Towels: For spills and wiping surfaces.
- Plastic Wrap or Bags: Wrap brushes and rollers for short breaks—prevents drying out.
Organizing Supplies
- Toolbox or caddy: Keeps small tools and accessories organized.
- Shelf or storage bin: For storing leftover paint, rollers, and brushes between projects.
Optional but Useful Add-Ons
- Paint Edgers: Handy for perfectly straight lines along ceilings and trim.
- Paint Sprayer: For large-scale jobs or achieving ultra-smooth finishes. Requires practice and thorough masking of the area.
- Work Light: Illuminates shadows and ensures even coverage, especially in poorly lit rooms.
- Moisture Meter: Checks if walls are dry enough to paint, crucial for basements or after repairs.
- Paint Grid: For use with 5-gallon buckets, helps remove excess paint from rollers.
Budgeting for Your Painting Toolkit
Where to Invest
Prioritize quality for brushes, rollers, and drop cloths—these are the workhorses of any painting job. Bargain items often result in frustration and wasted paint. Many other tools, such as sanding blocks, trays, and painter’s tape, can be chosen based on frequency of use and personal budget.
Starter Toolkit Checklist
- 2 high-quality brushes (angled and flat)
- 1 roller frame with 2–3 roller covers (different naps)
- Extension pole
- Paint tray and liners
- Drop cloths (canvas preferred)
- Painter’s tape
- Putty knife, spackle, sandpaper
- Step ladder
- Safety gear (mask, glasses, gloves)
- Cleanup supplies (bucket, soap, rags)
This starter kit will cover nearly all interior DIY painting projects. Add specialty items only as needed for unique surfaces or decorative techniques.
Maintenance and Care of Painting Tools
Cleaning Brushes and Rollers
Never let paint dry on your tools. For latex paints, rinse brushes and rollers thoroughly in warm, soapy water until the water runs clear. For oil-based paints, clean with the recommended solvent. Use a brush comb to untangle bristles and maintain their shape. Hang brushes to dry or store flat—never store upright on their bristles.
Proper Storage
Store brushes and rollers in a dry, cool place away from direct sunlight. Use original packaging or brush covers to prevent dust and maintain shape. Store leftover paint tightly sealed, upside down to minimize air exposure (for latex paints).
Pro Tips for Flawless DIY Painting
- Always prep more than you think you need—clean, repair, and tape thoroughly.
- Use a wet edge technique to avoid lap marks when rolling large surfaces.
- Remove painter’s tape while paint is still slightly damp for the cleanest lines.
- Label and date leftover paint for future touch-ups.
- Test paint samples on your wall and observe in natural and artificial light before committing.
Conclusion: Equip Yourself for Painting Success
DIY home painting is not merely about picking a color and grabbing a brush—it’s a process that rewards careful preparation and the right set of tools. Armed with the knowledge from this guide, you can confidently approach any painting project, knowing you have the essentials for every stage: preparation, application, safety, and cleanup. Investing in quality brushes and rollers yields smoother finishes and saves money in the long run. Prioritizing safety equipment means you can focus on your work without risk. And, by maintaining your tools properly, you’ll be ready for the next project with minimal fuss and expense.
Whether you’re painting your first room or refreshing your entire home, a well-chosen toolkit is the foundation of success. Take the time to assemble and care for your gear, and you’ll achieve professional results that last. Happy painting!
For someone on a tight budget just getting started, are there any essential tools from this list you recommend splurging on, and where can I get away with more affordable options without sacrificing too much quality?
If you’re just starting out, it’s worth investing a bit more in a good quality paintbrush and roller, as these make a big difference in the final finish and last longer. For items like paint trays, drop cloths, and painter’s tape, budget-friendly options usually work just fine. Hardware stores often have mid-range brands that balance cost and quality well.
I noticed you mentioned both synthetic and natural bristle brushes and their uses with different types of paint. If I’m planning to paint a room with both latex and oil-based paints (like latex on the walls but oil-based on trim), do I really need to buy both types of brushes, or is there one that could work well enough for both?
Great question! While synthetic brushes (like nylon or polyester) are designed for latex paints, they can technically be used with oil-based paints too—though you might not get the absolute smoothest finish on oil-based work. Natural bristle brushes are definitely best for oil-based paints because they hold and spread that thicker paint more evenly, but they don’t do well with water-based paints like latex, as the bristles absorb water and get limp. If you want the best results for each surface, having both types will give you the best finish. However, if you’re only doing a small amount of oil-based trim work, a high-quality synthetic brush can usually do a decent job in a pinch—just make sure to clean it thoroughly between uses!
When selecting roller nap length, how do I tell if my walls are considered ‘lightly textured’? I want to pick the right roller the first time and not end up with a weird finish.
To determine if your walls are ‘lightly textured’, run your hand over the surface. If you feel slight bumps or a faint pattern but it’s not rough or deeply patterned like popcorn or stucco, that’s lightly textured. For these, a 3/8-inch roller nap usually provides even coverage without leaving excess texture.
This article mentions using synthetic bristle brushes for water-based paints and natural bristles for oil-based ones. I’m planning to paint both my kitchen walls (latex paint) and some old cabinets (oil-based). Is it really necessary to buy separate brushes for each type of paint, or can one brush work for both if I clean it well?
Great question! While it might seem convenient to use one brush for everything, using the right brush type actually does make a difference. Synthetic bristle brushes are designed to hold up better with water-based (latex) paints and clean up easily afterwards. Natural bristle brushes, on the other hand, perform best with oil-based paints and can get damaged or lose their shape when used with water-based products. Even with thorough cleaning, brushes can retain traces of previous paints or cleaners, which can affect your finish. So for the best results and longer-lasting brushes, it’s smart to have one set of synthetic brushes for latex and a separate set of natural bristle brushes for oil-based paints. Hope that helps you get great results in both your kitchen and on your cabinets!
I noticed the article mentions investing in mid-to-high quality brushes to avoid shedding and uneven results. Are there specific brands or price ranges you recommend for someone who wants quality but is also on a pretty tight budget?
If you’re on a tight budget, brands like Wooster and Purdy often offer reliable quality at reasonable prices—look for their entry-level lines. Generally, spending $8 to $15 per brush can get you a decent tool that should last for several projects if cleaned properly.
The article talks about using different nap lengths for rollers depending on the wall texture. How do I figure out what nap length is best if my walls are kind of in-between smooth and lightly textured?
For walls that are in-between smooth and lightly textured, a roller with a 3/8-inch or 1/2-inch nap usually works best. The 3/8-inch nap is ideal for most lightly textured surfaces, while 1/2-inch can handle a bit more texture without leaving excess paint. If you’re unsure, try testing both on a small section to see which gives you smoother, even coverage.
How much time should I set aside just for the prep steps before I even start painting, and what tools from the list would help speed up things like taping and cleaning the walls?
You should plan on spending at least a few hours, or even a full day for larger rooms, just on prep work before painting. Tools that speed up prep include painter’s tape dispensers for quick and straight taping, extension poles for dusting or cleaning high areas, and microfiber cloths or sponges for wiping down walls efficiently. Using a scraper or putty knife can also make quick work of smoothing surfaces.
When you talk about investing in mid-to-high quality brushes, could you suggest any brands or ways to tell if a brush is actually good quality when I’m buying it at a home improvement store?
Look for brands like Purdy, Wooster, and Corona, which are known for their durable, high-quality brushes. When checking in-store, feel for bristles that are densely packed and flexible, with split ends (flagged tips) for smoother application. The ferrule (metal band) should be firmly attached with no loose parts, and the handle should feel balanced and comfortable in your hand.
I’m new to DIY painting and noticed you mentioned both synthetic and natural bristle brushes. If I’m working on a project that involves both water-based and oil-based paints in different rooms, do I really need to buy both types of brushes, or is there an all-purpose brush that works well for both kinds of paint?
Great question! While it might seem easier to find one brush for both paint types, it’s best to use synthetic bristle brushes for water-based paints and natural bristle brushes for oil-based paints. Synthetic bristles are designed not to absorb water, so they keep their shape and durability with latex paints. Natural bristles, usually made from animal hair, give a smoother finish with oil-based paints but can get limp and soggy with water-based products. If you only want to buy one type, synthetic brushes are the most versatile—they can technically be used with oil-based paints in a pinch, but for the best results and longevity of your tools, having both types is ideal. It’s a small investment that can make a noticeable difference in your finished project!
The guide talks about different roller nap lengths, but how do you figure out what texture your wall actually has before you pick a roller? Any advice for beginners on this step?
To determine your wall’s texture, run your hand over the surface and look closely. If it feels very smooth with almost no bumps, it’s a smooth wall. If it feels slightly rough or you see a light orange peel pattern, it’s lightly textured. Heavy bumps or ridges mean a rougher finish like popcorn or knockdown. For beginners, start with a small test area using a shorter nap roller on smooth areas and a thicker nap on textured spots to see what works best.
I’m on a pretty tight budget for my first painting project. Are there any specific tools from your must-have list where it’s okay to go cheaper, or should I always spend more for quality?
For your first painting project on a tight budget, you can go cheaper on items like plastic drop cloths, paint trays, and painter’s tape. However, it’s worth spending a bit more on good quality brushes and rollers, as they make a noticeable difference in the final finish and are easier to use.
For someone painting several rooms with different types of surfaces, like both smooth walls and some textured ceilings, would you recommend having multiple roller nap lengths, or can one size work for everything?
For best results, it’s a good idea to have more than one roller nap length. Use a shorter nap (about 3/8 inch) for smooth walls to get an even finish, and a longer nap (3/4 inch or more) for textured ceilings to reach into grooves and crevices. This way, you’ll get optimal coverage and a professional look on every surface.
After finishing a big project, what’s the best way to thoroughly clean and store both synthetic and natural bristle brushes so they last? I seem to ruin at least one brush after every job.
To keep brushes in good shape, wash synthetic brushes with warm soapy water and natural bristle brushes with the proper solvent (like mineral spirits for oil-based paints). Rinse until the water or solvent runs clear, reshape the bristles, and let them dry flat or hanging. Once dry, store them in their original packaging or wrap them in paper to maintain their shape and keep dust away.
Could you expand on when it makes sense to invest in specialty tools versus sticking with just the essentials for someone tackling their first whole-house painting job on a budget?
For a first-time, whole-house painting project on a budget, it’s usually best to start with just the essential tools like quality brushes, rollers, trays, and painter’s tape. Specialty tools, such as paint sprayers or edging tools, are worth considering only if you have tricky surfaces or large areas that would be difficult or slow with basics. Borrowing or renting specialty tools is a good way to try them without a big investment.
I noticed you mentioned investing in mid-to-high quality brushes to avoid shedding and uneven results. How can I tell if a brush is actually good quality when I’m shopping in-store or online?
When shopping for quality brushes, look for densely packed bristles that hold their shape and don’t shed when you run your fingers through them. The bristles should feel springy, not floppy. A solid, smooth ferrule (the metal part holding the bristles) and a comfortable, sturdy handle are also signs of good craftsmanship. If shopping online, check for positive reviews about durability and minimal bristle loss.
Can you clarify how to tell the difference between mid-quality and high-quality brushes when shopping in-store? Are there specific things I should look for to avoid brushes that shed or leave streaks?
To distinguish between mid-quality and high-quality brushes, check the bristles—they should be densely packed, securely anchored, and tapered to a fine tip. High-quality brushes often feel balanced in your hand and have flagged (split-ended) bristles for smoother paint application. Gently pull on the bristles; if any come out easily, the brush may shed. Also, look for solid, stainless steel ferrules and comfortable, solid wood handles.
For someone on a tight budget, which specialty items from your essentials list could be skipped or improvised without sacrificing too much in terms of results or ease of use?
If you’re on a tight budget, you can usually skip specialty tools like paint edgers, extension poles, or dedicated paint pour spouts. Instead, use painter’s tape carefully for edges and trim, and a sturdy step stool for higher spots. A flat-head screwdriver can open paint cans, and you can pour paint slowly to avoid drips. Prioritize good brushes and rollers, as these have the most impact on your results.
The article mentions different nap lengths on rollers for various surfaces. If my walls are a mix of smooth and lightly textured, should I use separate rollers, or is there a compromise roller nap length that would work for both?
For walls that are both smooth and lightly textured, a 3/8-inch roller nap is a versatile choice. It provides good coverage on smooth surfaces and can handle light texture without leaving too much stippling. This way, you won’t need separate rollers for each surface type.
When it comes to rollers, how do you decide between using a short nap versus a medium nap if your walls have a mix of smooth and lightly textured areas? Is there a compromise that works for both?
For walls with a mix of smooth and lightly textured areas, a medium nap roller—around 3/8 inch—is a good compromise. It holds enough paint to cover light textures evenly while still giving a smooth finish on flat surfaces. This way, you don’t need to switch rollers as you move around the room.
You talk about how important brush quality is, but I’m on a pretty tight budget. Are there any specific signs to look for in cheaper brushes that might still do a decent job without shedding bristles everywhere?
When choosing budget brushes, gently pull on the bristles—if many come loose, skip that brush. Look for brushes with firmly attached ferrules (the metal part), densely packed bristles, and smooth, even tips. Avoid brushes with visible glue or uneven bristle lengths, as these are more likely to shed and leave streaks.
Is there a rule of thumb for when you should use a specialty brush or roller versus sticking with the basics, particularly if you’re painting surfaces with unique textures or corners?
For textured surfaces or tricky areas like corners and trim, specialty brushes and rollers are definitely recommended. Use angled brushes for corners and edges, and specialty rollers with thicker naps for rough or textured surfaces. Stick with basic brushes and smooth rollers for flat, even walls. This helps achieve a cleaner, more professional finish.
You mention that investing in mid-to-high quality brushes is important for preventing bristle shedding. Could you recommend any specific brands or features to look for, especially if I’m on a tight budget but still want decent results?
For a tight budget, look for brands like Purdy, Wooster, or even the premium lines from hardware store brands. Choose brushes with flagged or tapered bristles, as these hold paint better and shed less. Synthetic bristles (like nylon/polyester blends) work well for latex paints and are easier to clean, making them a practical choice for most DIY projects.
The guide touches on different nap lengths for rollers, but how do I figure out what nap to use if my walls have some spots that are smooth and others with a light texture?
For walls with both smooth and lightly textured spots, a 3/8-inch nap roller is a versatile choice. It holds enough paint to cover mild textures without leaving too much texture on smoother areas. This option gives an even finish across mixed surfaces.
The article mentions different nap lengths for rollers depending on surface texture. If my walls have a mix of smooth and lightly textured areas, is it better to use separate rollers or is there a versatile option that works for both?
A 3/8-inch nap roller is a versatile choice that typically works well on both smooth and lightly textured walls. You can use the same roller for both areas, which saves time and effort, unless the textures are very different. Just make sure to roll evenly for consistent coverage.
Can you give some advice on which must-have tools are worth spending a bit more on versus where it’s okay to buy budget items, especially for someone painting multiple rooms on a tight budget?
For painting multiple rooms, invest more in quality brushes and rollers, as they give smoother finishes and last longer. Good painter’s tape is also worth it to avoid messy edges. For items like paint trays, drop cloths, or extension poles, budget options usually work fine since they don’t impact the final result as much.
For smaller painting projects like touch-ups around my store, would you recommend investing in both angled and flat brushes, or is one type versatile enough to handle detail and flat surfaces effectively?
For most small touch-up jobs, an angled brush is usually versatile enough to handle both detail work and flat surfaces. Its slanted edge makes it easy to cut in around edges and corners, while still covering small flat areas. Unless you have larger flat surfaces to paint, you likely don’t need a separate flat brush.
If my walls have some rough patches and old paint texture, should I use a medium or long nap roller, and do I need to do any prep work apart from cleaning before painting?
For walls with rough patches and old paint texture, a medium nap roller (about 3/8 to 1/2 inch) typically works well, as it can handle uneven surfaces without leaving too much texture. Besides cleaning, it’s important to sand down rough spots and patch any holes or cracks with filler, then prime those repaired areas before painting for a smoother final result.
If I’m painting over slightly textured walls and also have smooth trim in the same room, which roller nap length and brush types should I be buying to avoid having to switch tools constantly?
For slightly textured walls, a 3/8-inch nap roller is a great all-purpose choice—it handles mild texture well without leaving too much stipple. For smooth trim, use a high-quality angled sash brush, ideally 2 to 2.5 inches wide. You’ll need both tools for best results, but the 3/8-inch roller can serve for walls and may also work for wider, flatter trim if needed, minimizing the number of tool changes.
I noticed you mentioned synthetic versus natural bristles for different paints. If I’m using a mix of water-based and oil-based paints in my project, is it OK to use the same brushes after washing them out, or should I keep separate brushes?
It’s best to keep separate brushes for water-based and oil-based paints, even if you clean them thoroughly. Synthetic bristles work better with water-based paints, while natural bristles are ideal for oil-based paints. Mixing use can affect the brush’s performance and the quality of your finish.
You mention different nap lengths for rollers depending on the wall texture. How can I tell what nap size is right if my walls have a light orange peel texture that’s pretty common in newer homes?
For walls with a light orange peel texture, a roller nap size between 3/8 inch and 1/2 inch works well. This thickness will hold enough paint to cover the slight bumps without leaving too much texture or excess paint behind. If you’re unsure, 3/8 inch is a safe and versatile choice for most lightly textured walls.
I noticed the article talks about investing in mid-to-high quality brushes, but are there any affordable brands that still hold up well for someone painting a whole house on a budget?
Absolutely, there are a few affordable brush brands that offer good performance for budget-conscious painters. Brands like Wooster and Purdy have entry-level lines that hold up well for big projects. Also, angled sash brushes from brands like Linzer can work nicely without breaking the bank. Just be sure to clean them thoroughly after each use to get the most out of them.
Is there a big difference in cleanup time or ease between synthetic and natural brushes? I mainly use water-based paint, but I want to make sure I’m picking the right brush for hassle-free cleanup after painting.
For water-based paints, synthetic brushes are generally easier and quicker to clean than natural bristle brushes. Synthetic bristles don’t absorb as much paint or water, so paint washes out more easily with soap and water. Natural bristles are better for oil-based paints but can be harder to clean thoroughly after water-based projects.
I noticed rollers come in different nap lengths depending on the wall texture. How do I figure out what nap length I need if my walls have some old minor imperfections but aren’t super textured?
For walls with minor imperfections but not heavy texture, a medium nap roller—usually 3/8 inch to 1/2 inch—is a good choice. This length helps cover small flaws without leaving too much texture from the roller itself.
Once the painting is finished, do you have any tips for the best way to clean and store synthetic versus natural bristle brushes so they last for future projects?
For synthetic brushes, wash them thoroughly with warm soapy water and rinse well. For natural bristle brushes, use mineral spirits or paint thinner if you used oil-based paints, then wash with soap and water. After cleaning, reshape the bristles and hang or lay flat to dry before storing in their original covers or wrapping in paper.
I see the guide explains which nap lengths to use for different surfaces with rollers. Is there a way to tell if you picked the wrong nap before you start painting, or will problems only show up after using it?
You can usually tell if you’ve picked the wrong nap before painting by looking at how the roller feels against the surface and how much paint it holds. If the roller feels too rough or leaves lint, it may be too thick. If it doesn’t pick up enough paint or glides too smoothly on a textured wall, it may be too thin. Testing a small area first can help you catch issues before painting the whole surface.
You mentioned that investing in mid-to-high quality brushes is better than going cheap. Can you recommend specific brands or what features I should look for to ensure I am buying a brush that will last through multiple painting jobs?
Look for brushes with solid, durable handles and tapered, densely packed bristles. Brands like Purdy, Wooster, and Benjamin Moore are widely trusted for quality. Synthetic bristles are great for latex paints, while natural bristles suit oil-based paints. A good brush should feel firm, not floppy, and keep its shape after cleaning.
After a painting project, what’s the most efficient way to clean and store brushes and rollers so they last for multiple jobs? Is there a point when it’s more cost-effective to replace them instead of cleaning?
To keep brushes and rollers in good shape, clean them right after use—use water for latex paints and mineral spirits for oil-based ones. Rinse thoroughly, reshape bristles, and hang or lay them flat to dry. Rollers can be wrapped in plastic if reusing soon. If the bristles are frayed or rollers don’t regain their shape after several uses, it’s more practical to replace them.
Can you clarify how to choose the right nap length for a roller if my walls have some light orange peel texture? I’m not sure if that counts as smooth or lightly textured.
For light orange peel texture, your walls are considered lightly textured rather than smooth. A roller with a 3/8-inch nap is ideal—it has enough thickness to cover the slight texture without applying too much paint. This will give you a smooth, even finish.
You mention that mid-to-high quality brushes are important to avoid shedding and uneven finishes, but what should I specifically look for when shopping for a good quality brush? Are there certain brands or features that really make a difference?
When choosing a quality paintbrush, look for brushes with densely packed, tapered bristles that feel firm yet flexible. Synthetic bristles are best for latex paints, while natural bristles work well with oil-based paints. A solid, comfortable handle and stainless steel ferrule help with control and durability. Some reputable brands to consider are Purdy, Wooster, and Benjamin Moore, but checking for smooth, even bristle tips and sturdy construction is most important.
Could you elaborate on how to choose between different roller nap lengths if my walls are somewhere between smooth and lightly textured? I have both drywall and some older plaster in my house and want to avoid buying the wrong rollers.
For walls that are between smooth and lightly textured, like a mix of drywall and older plaster, a 3/8-inch nap roller is usually ideal. It holds enough paint for subtle textures without leaving too much stippling. If you find areas are rougher, you could use a 1/2-inch nap for those spots, but 3/8-inch is a versatile choice for most surfaces in your situation.
You mention using different roller naps for various surfaces. How do I know if my wall is considered ‘lightly textured’ or ‘rough,’ and is it okay to use the same roller for ceilings and walls?
A ‘lightly textured’ wall usually has a slight, subtle pattern (like orange peel), while a ‘rough’ surface is bumpier or more pronounced (like popcorn or stucco). For best results, match roller nap thickness to the surface: thinner naps for smooth surfaces, thicker naps for rough. You can use the same roller for ceilings and walls if the texture is similar, but always start with a clean roller to avoid debris and ensure an even finish.
Could you go into more detail about choosing roller nap lengths for older textured walls? The house I’m working on has some inconsistent surfaces and I’m not sure whether to use medium or long nap rollers.
For older, textured, and uneven walls, a longer nap roller—typically 3/4 inch—is best because it holds more paint and reaches into crevices and rough spots. Medium nap rollers (3/8 to 1/2 inch) are better for light texture, but for heavy or inconsistent surfaces, stick with the longer nap to get better, more even coverage.
Can you explain how to choose between a medium nap and long nap roller if I have a mix of smooth and lightly textured walls at home?
For a mix of smooth and lightly textured walls, a medium nap roller (around 3/8 to 1/2 inch) is usually the best compromise. It holds enough paint for light textures, but still gives a smooth finish on flatter areas. Long nap rollers are more suited for heavily textured surfaces like stucco.
If I only have a weekend to get most of the painting done, which tools from your must-have list would you say are absolutely essential for keeping things efficient without sacrificing quality?
To stay efficient and maintain quality over a weekend, focus on high-quality brushes for detailed work, a roller and tray for larger surfaces, painter’s tape for clean edges, drop cloths to protect floors, and a sturdy step ladder. These essentials will help you cover a lot of ground quickly without cutting corners on results.
You mention that investing in mid-to-high quality brushes can make a big difference. How can I tell if a brush is actually good quality when I’m shopping at a local hardware store?
When checking brushes in-store, look for densely packed, flexible bristles that return to shape when bent. Tug gently to make sure bristles don’t come loose. The brush should feel sturdy, with a smooth, comfortable handle. Also, higher quality brushes often have flagged (split) bristle tips, which help deliver smoother paint coverage.